How to enable Dentally integration with 3Shape Unite
01/07/2024Prerequisites for the integration:
- 3Shape Unite 21.1.x or newer.
- Dentally Software Bridge and Dentally Image Bridge Chrome extension ver. 1.3.2 or newer.
- Dentally Software Bridge, Image Bridge Chrome extension and 3Shape Unite must be installed on the same computer.
- Both standalone and client-server setups are supported, see Known Limitations.
3Shape Unite and Dentally Software Bridge together with Bridge Chrome extension (PMS) provides automation of Patient Management in 3Shape Unite from (Create, merge, and update patient) and allows you to open TRIOS directly from the patient chart in for faster and easier scanning. Read more about Dentally Software Bridge here.
How to enable the integration in Unite
Please follow the steps described in the related article: How to install "PMS integration" App from Unite Store
How to enable the integration in Dentally Image Bridge
To setup integration from Dentally towards 3Shape Unite, Dentally Image Bridge Chrome extension and Software installer are required for the integration.
The following steps are provided as an aid to set up and use the integration for Dentally Software Bridge and Chrome extension.
For more information on accessing and Bridge Software setup please contact Dentally PMS provider via official website.
Dentally Software Bridge installer can be downloaded from the instructions here.
Chrome Bridge extension of the latest version can be downloaded from the Chrome Webstore link.
In order to setup integartion following steps should be performed :
1.Install the Dentally Imaging Bridge Chrome Extension.
2. Install the Dentally Software Bridge.
2.1 Run the installer and optionally indicate your Site ID.
2.2 Finish installation.
3. Configure the Google Chrome imaging bridge Chrome extension.
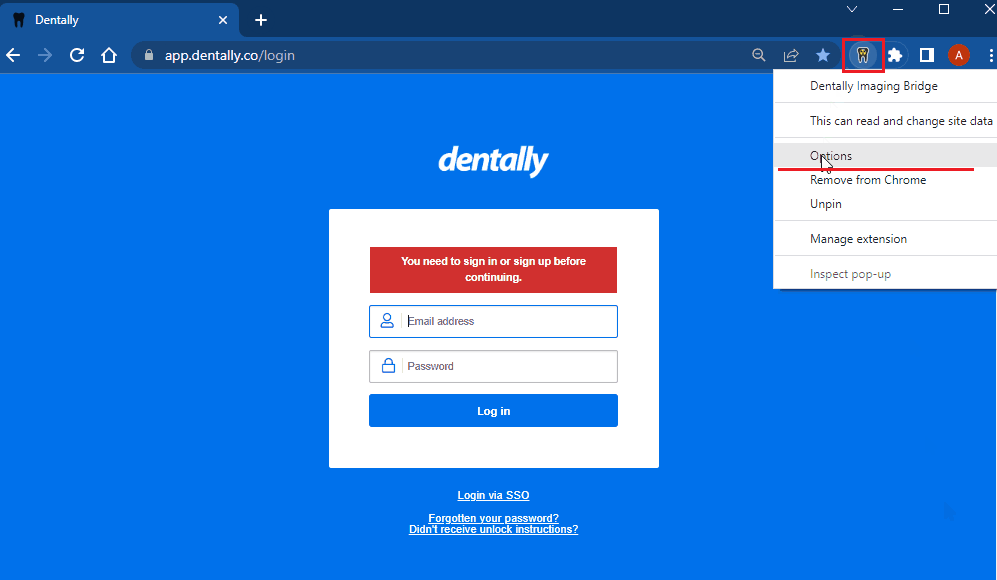
3.1. Right-click on the 'Dentally Imaging Bridge' extension icon on Chrome right after it was installed.
3.2. Click on ‘Options’ :

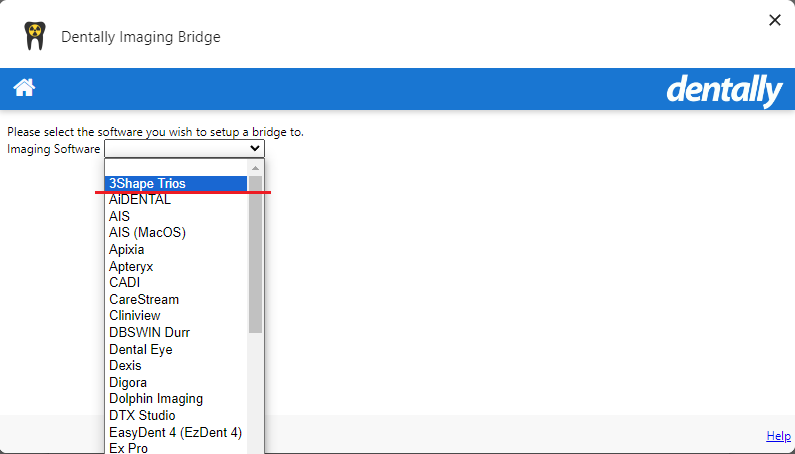
3.3. Choose '3Shape Trios' software from the drop-down list :

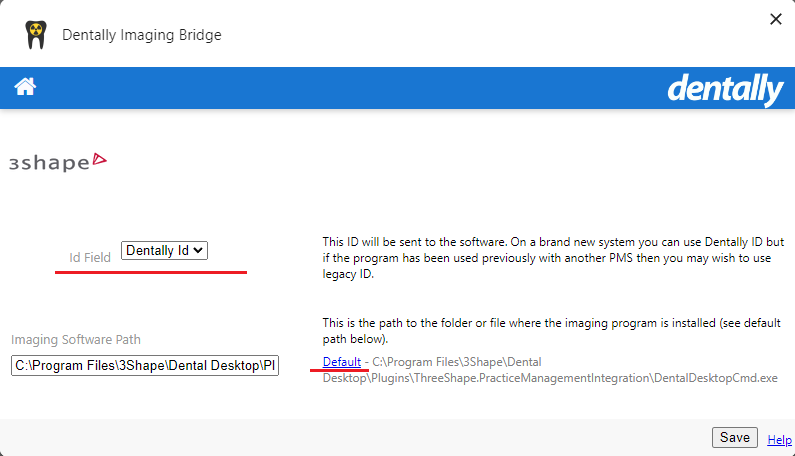
3.4. Set your ID field and Software path by clicking on ‘Default’ to insert execution link into ‘Imaging Software Path’ filed and Click ‘Save’ .

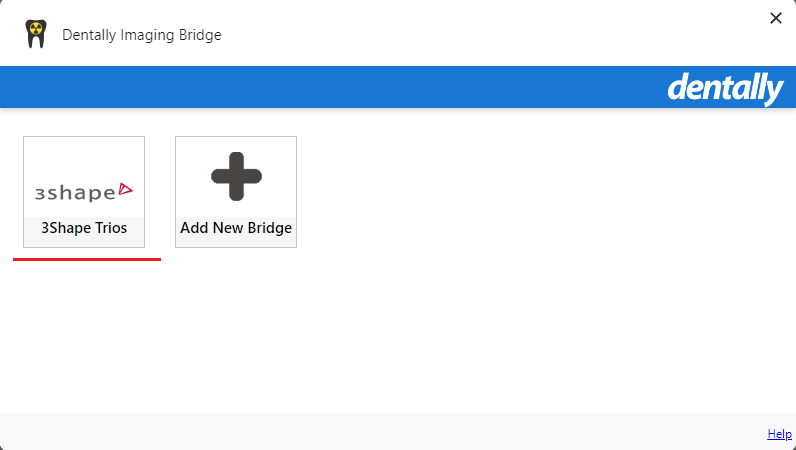
4. ‘3Shape Trios’ icon will appear as bridge configuring is finished to proceed on integartion usage:

As soon as you set the integration up, standard PMS integration workflows will be available:
Create Patient:
Update Patient:
Merge Patient:
Known limitations:
- Regarding different PMS & Unite setup options and integration on Trios Move, check this article: Practice management system & Imaging system setup overview
- Patient updates are only propagated from Dentally Software Bridge to 3Shape Unite. Not the other way around.
Contact 3Shape Support if you have further questions.
For full information on correct usage please consult the official Safety and Setup Guide and the most current Manual.