If you have a TRIOS 4 scanner, please see this article instead. If you are not sure what type of scanner you have, see here.
Calibration of the scanner guarantees that the scanner will have high accuracy and ensures that your scanned image will display correctly and with correct coloring on screen and in print. You need to calibrate the scanner regularly, especially after heavy usage, to avoid decreased scan quality. You can also find a guide on how to calibrate the scanner in this video.
Initiating Calibration: Reminder Message or Manual Start
- From a reminder message in the software. If color and 3D calibration are not done for 7 days, TRIOS software will remind you about it automatically. Press the Calibrate button in the reminder message.

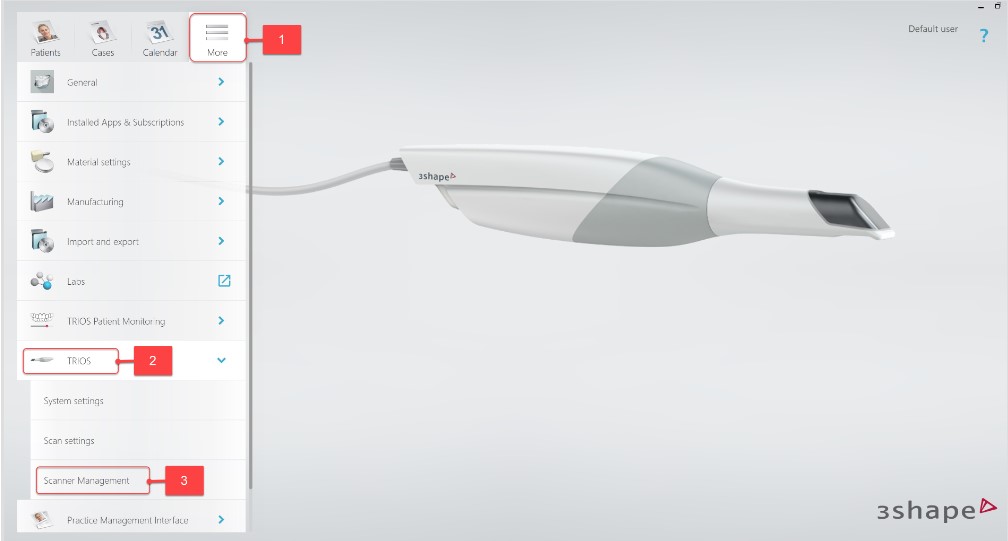
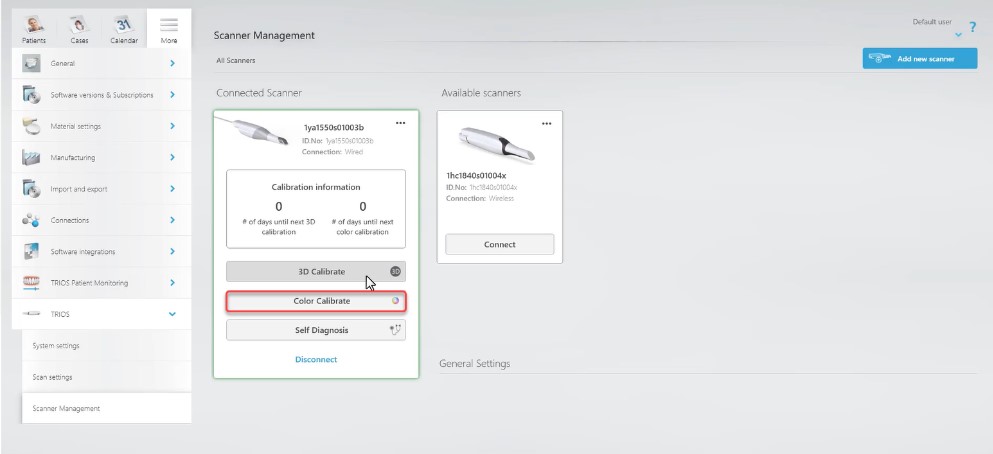
- Manually from the Scanner Management page in Unite Settings.
- Open Unite and go to More > Settings > TRIOS > Scanner Management.
Regardless of the starting point, you will see a pop-up window with instructions for calibration once it has been initiated.
TRIOS 3 Scanner Calibration Process: 3D and Color Calibration
TRIOS 3 scanner calibration consists of 2 parts:
- 3D calibration of the scanner guarantees the scanner's high accuracy and ensures that your scanned image will display correctly on screen and in print.
- Color calibration of the scanner guarantees the scans will reflect an accurate representation of the colors that will be printed on the model.
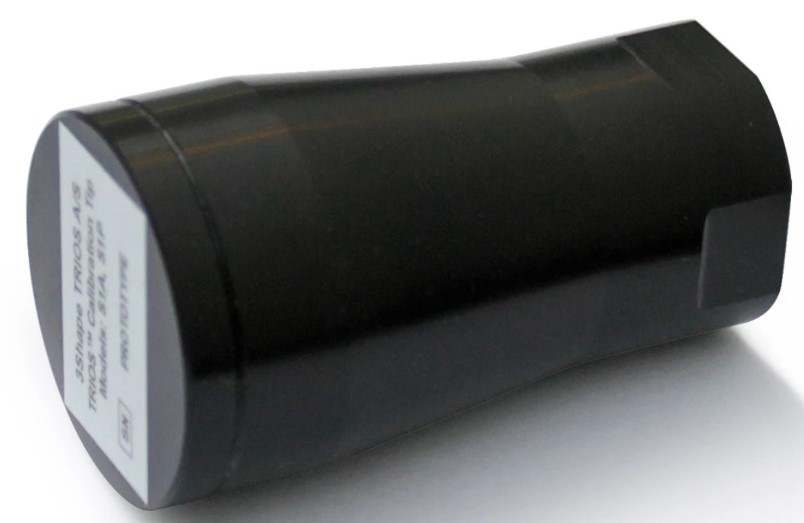
3D Calibration: Step-by-Step Guide with Calibration Object
3D calibration should be done as the first step. For 3D calibration you will need a 3D Calibration object:
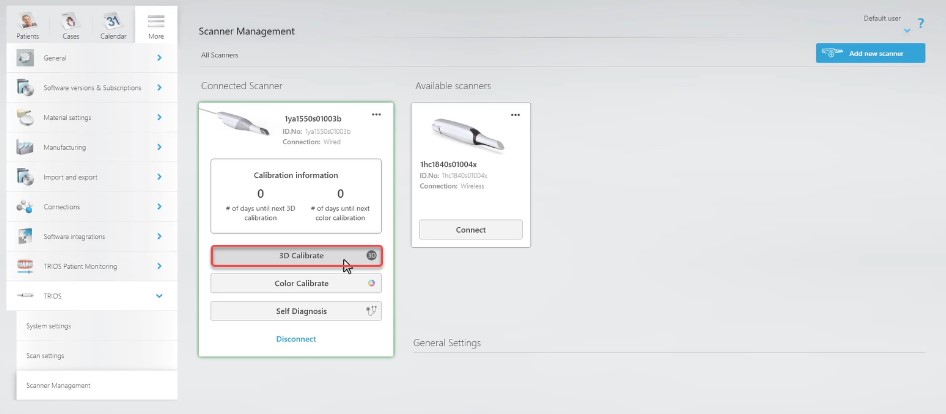
- On the Scanner Management page, press the button 3D Calibrate under the "Connected Scanner" menu:
- Remove the scanning tip and mount the 3D calibration object onto the front tube. Make sure that the front glass of the scanner is clean and has no scratches.
- The whole process will take up to 1 minute. Once the 3D calibration is finished, remove the 3D calibration object from the scanner.
Color Calibration: Using the Color Calibration Kit for Accurate Scans
For Color calibration, you will need a Color Calibration Kit (Color Calibration Adapter and Calibration Target that is inserted into the Adapter). Before the calibration, make sure that the Target is clean and free of scratches on both sides, and that the color squares on the color side are not missing or faded.
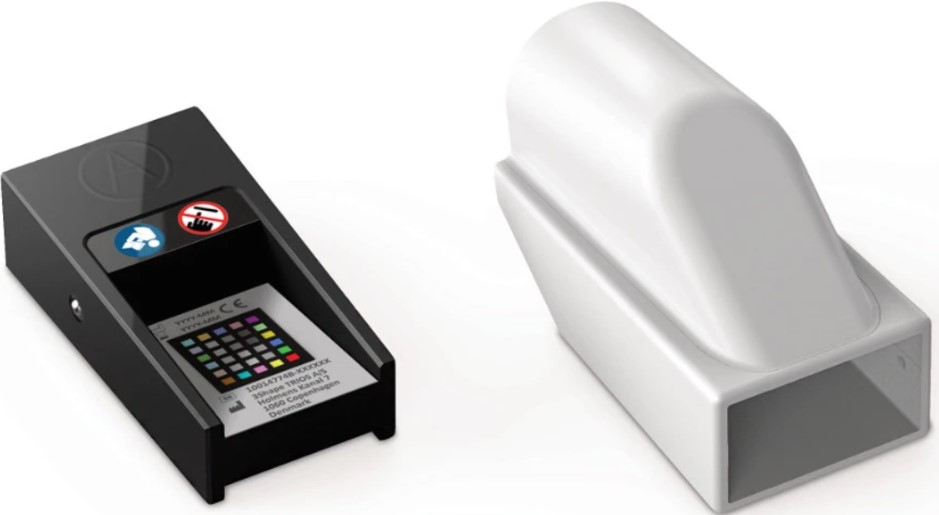
Color calibration kit: Calibration Target (left) and Color Calibration Adapter (right)
Color calibration process
- Color calibration can be done from the same Scanner Management section by pressing the button Color Calibrate:
- Alternatively, Color calibration can be done when you have started scanning a case by clicking Tools on the scanning page and then Color calibration.

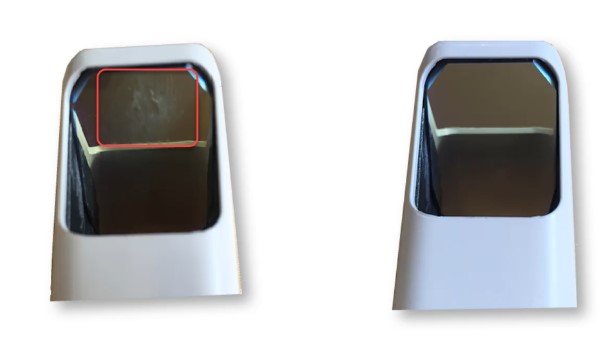
- Make sure that the mirror of the scanning tip is clean. It must be clean and sterilized, without water stains or scratches:
- Attach the scanning tip to the scanner facing downwards and mount the Color Calibration Adapter onto the scanner tip.
- Remove the protective plastic sleeve from the Color Calibration Target. Then, insert it into the Adapter with the color side (side A) facing up and press Calibrate.

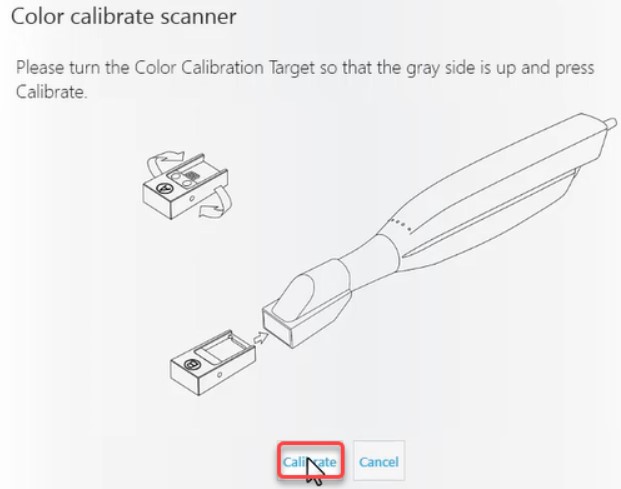
- After calibration on side A has finished (approximately 10-15 seconds), remove the Color Calibration Target and turn it over so that the grey side (side B) faces up.
- Insert the Target into the Color Calibration Adapter and press Calibrate.
- Once the calibration is completed (after approximately 10-15 seconds), remove the Color Calibration Target and Adapter from the scanner and put the Target back into the protective sleeve.

______________________________________________________________________________________________________________________________________________________________________________________________
Contact 3Shape Support if you have further questions.
For full information on correct usage, please consult the official Safety and Setup Guide and the most current Manual.