How to enable customized Open Dental integration with 3Shape Unite
22/12/2023Customized 3Shape Bridge in Open Dental.
NOTE: With this custom setup, SSN number will not be transferred in Unite when you create Patient from Open Dental.
For standard installation setup guide, please refer to this article : How to enable Open Dental integration with 3Shape Unite
How to enable the integration in Unite
How to enable and configure custom Bridge for 3Shape Unite in Open Dental.
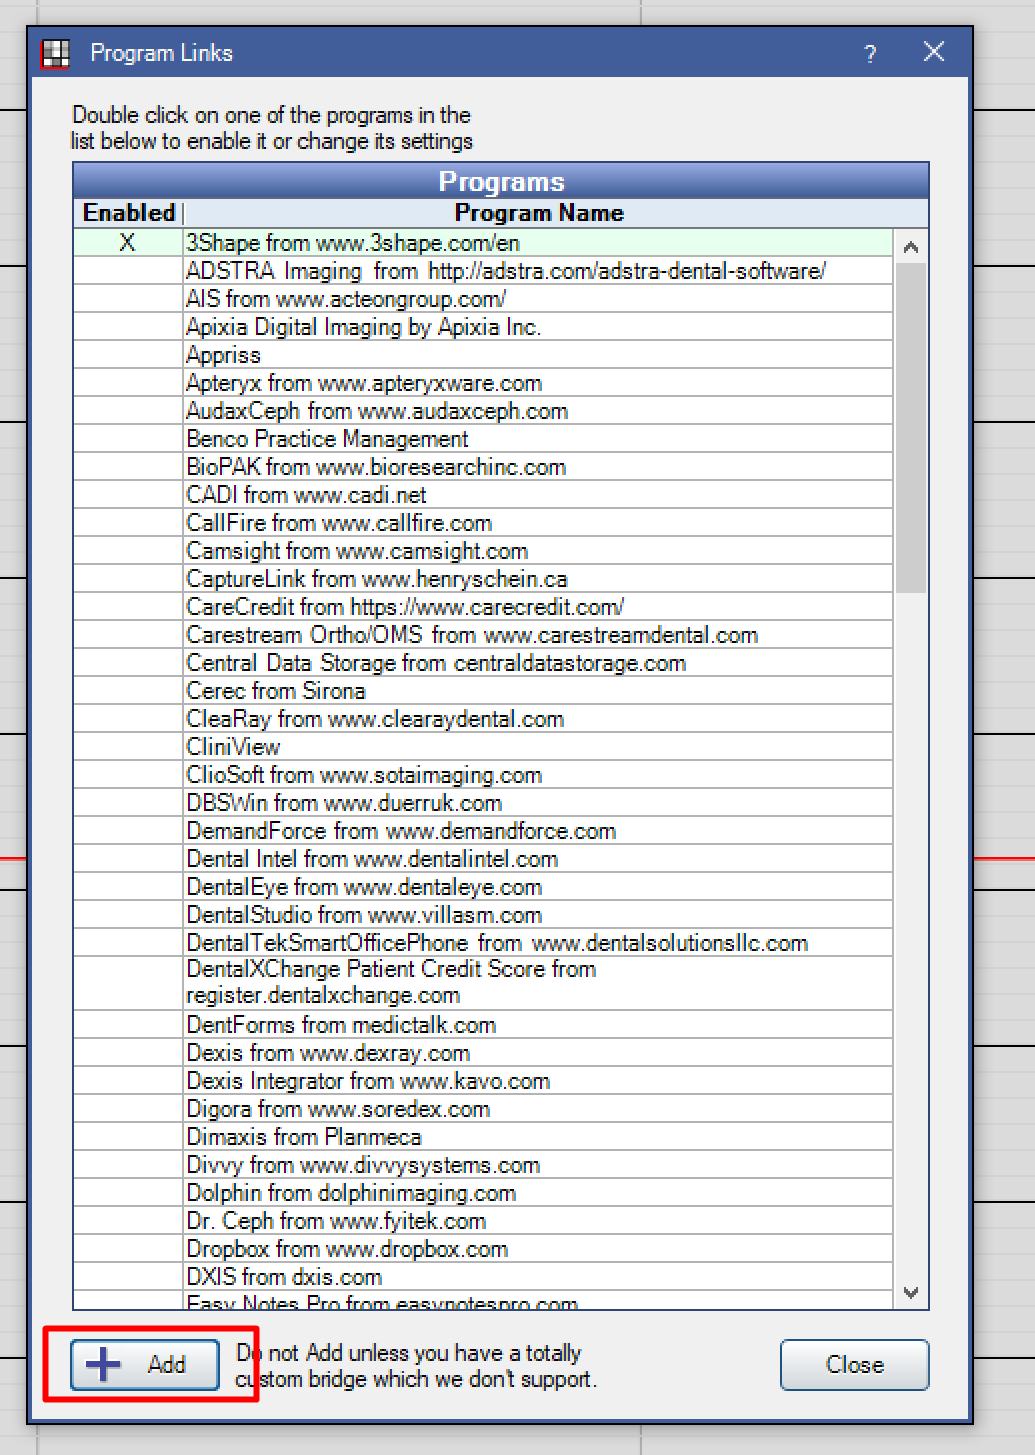
In the Main Menu, click Setup, Program Links click on Add button

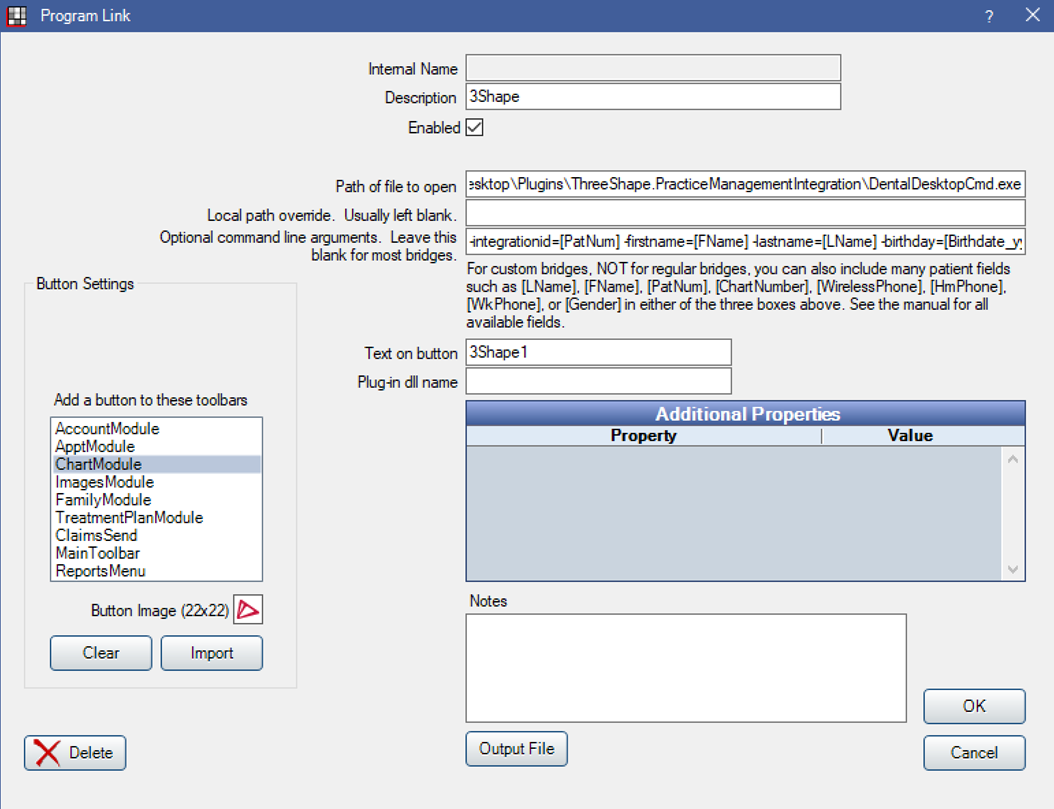
To enable the bridge
1.Check the Enabled box.
2.Enter the Path of file to open. If you have standard installation, the path will be:
C:\Program Files\3Shape\Dental Desktop\Plugins\ThreeShape.PracticeManagementIntegration\DentalDesktopCmd.exe
3. Enter the following path to Optional command line argument.
-integrationid=[PatNum] -firstname=[FName] -lastname=[LName] -birthday=[Birthdate_yyyyMMdd] -merge
4. Set up a clickable bridge button.
a) Under Add a button to these toolbars, highlight where to display the button.
b) Enter the Text on button. 3Shape/TRIOS
c) (Optional) Import an image to show on the button (22 x 22 pixels). Icon can be found by the following path for standard installation
C:\ProgramFiles\3Shape\DentalDesktop\Plugins\ThreeShape.PracticeManagementIntegration\Icons
5. If using clinics, click Hide Button for Clinics. Select which clinics the button should display on.
6. Click OK.

Once you finish setup, you may use the integration as usual. When you Create Patient from Open Dental, SSN number will not be transferred to Unite.
Contact 3Shape Support if you have further questions.
For full information on correct usage please consult the official Safety and Setup Guide and the most current Manual