How to perform Dental System Server-Client installation
07/11/2023Overview of Dental System Server-Client installation
How to perform Dental System Server-Client installation
This article contains a detailed description of the 3Shape Dental System Server-Client installation. This type of installation gives you the powerful and productive option of running multiple PCs in a network and smoothly sharing orders and files. The multiple PC installation enables one or more operators to create orders or scan and design in parallel.
Prerequisites:
- Server PC: all software and the order database are stored locally and all folders should be shared in the network so they can be seen and accessed by the client PCs.
- Client PC: links to the software, dongle, and order database on the Server PC.
Benefits of multi-PC installation in a dental practice
Advantages of multiple PC installation:
- Highly productive option for one or more operators to create orders, scan and design in parallel.
- Simplicity of maintenance and upgrades.
- Easy sharing of folders and files across multiple PCs.
- Client PC can be installed and operated from any PC within the network - you are not limited to work on a specific PC. Subscriptions are floating and directly shared between all PCs in the network, i.e. a single CAD subscription can be used on any client PC, but only one at a time. For simultaneous scanning or designing you can purchase additional Client Points.
Setup scheme:

Detailed steps for Dental System Server and Client installation process
Dental System Server installation process:
Place the dongle in the Server PC and always start with the Server installation. In case you have multiple dongles it is strongly recommended to consolidate all your subscriptions in a single dongle. Please contact your 3Shape reseller to consolidate the subscriptions.
- Launch 3Shape Dental System Installer as administrator
- Insert the dongle into the Server PC
- Select Server Install from the drop-down menu in the Custom Settings window and specify the necessary settings for the chosen option

- Complete the installation.
Dental System Client installation process:
- Start Dental System installation on Client PC. When installing Client PCs make sure you launch the installer file of the same version as installed on the Server PC. From Dental System 2021, a specific Client Installer file is created after installing the Server.
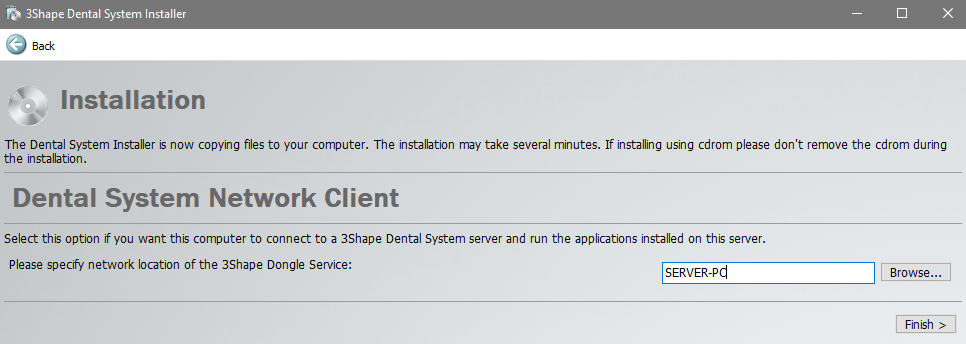
- Select Network Client under the Installation type drop-down list during Custom Installation
- Provide the hostname or IP address of the Server PC name and press Finish

- Repeat steps 1-3 on the rest of the Client PCs.