How to enable OnyxCeph integration with 3Shape Unite
07/11/2023Prerequisites for the integration:
| OnyxCeph 3™ Image Integration: | OnyxCeph 3™ Integration: |
|
|
3Shape Unite and OnyxCeph integration provides automation of Patient Management in 3Shape Unite from OnyxCeph (Create, merge and update patient) for faster and easier managing of patient data. Read more about OnyxCeph here.
By activating the OnyxCeph 3™ Image Integration feature within Unite, you will be able to seamlessly transfer both 2D images and 3Shape scans in STL format directly to OnyxCeph.
Supported workflows:
| OnyxCeph 3™ Image Integration: | OnyxCeph 3™ Integration: |
|
|
How to enable the integration in Unite
Please follow the steps described in the related article: How to install "PMS integration" App from Unite Store
How to enable the integration in OnyxCeph
OnyxCeph 3™ Image Integration
Please consult OnyxCeph documentation. The following steps are provided as an aid to set up and use the integration in OnyxCeph software.
1.To begin, activate the integration in the OnyxCeph
- Navigate to the Options > System Options > Interfaces > Model -i/o -Scanner
- Select 3Shape and check the box “3Shape Unite” to enable the integration
- Enter additional settings such as Host and Port.
Host address can be found in Unite settings page for OnyxCeph 3™ Image Integration.
Host- IP of the computer with Unite (leave empty for local use)
Port - IP Communication port, 5492

2. Send Patient information from OnyxCeph to Unite
Once the integration is enabled, you can send patient data directly from the OnyxCeph to 3Shape Unite.
Please make sure that a valid phone number is entered in the patient's card within OnyxCeph. If you encounter an error during the integration process, we recommend manually reviewing and correcting the patient's phone number before proceeding.
- Select Patient profile
- Open the Image Acquisition
- Click 3Shape button > Hand over Master data to transfer patient details to 3Shape Unite

3. Once you press 3Shape button for the first time, a pop-up with sign-in request will appear. Please authorize, using 3Shape Account. It is preferable to authorize with the admin of 3Shape Company which is used in 3Shape Unite.
- Log in using your credentials to proceed with the integration.

4. Once authenticated, return to Unite to create new Patient profile or merge/synchronize with the existing patient data.
- For existing Patient card in Unite, use the Merge patient dialog and confirm the choice.

5. Click Retreive Images, to download 3D images (scans) associated with the patient.

2D images from 3Shape Unite are also accessible in OnyxCeph:

OnyxCeph 3™ Integration
Please consult OnyxCeph documentation. The following steps are provided as an aid to set up and use the integration in OnyxCeph software.
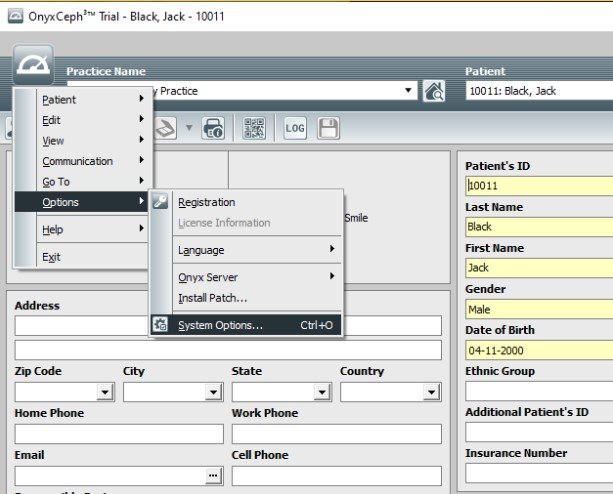
- Open OnyxCeph > go to Options > System Options or use (Ctrl+O) hotkey:
- Go to Interfaces:
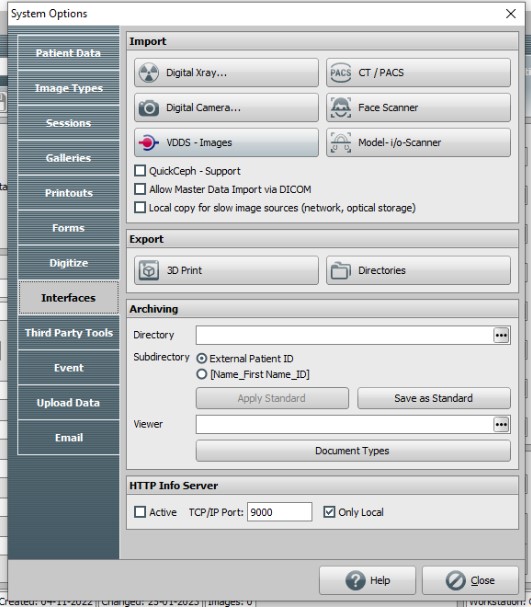
- Select VDDS - Images tab:

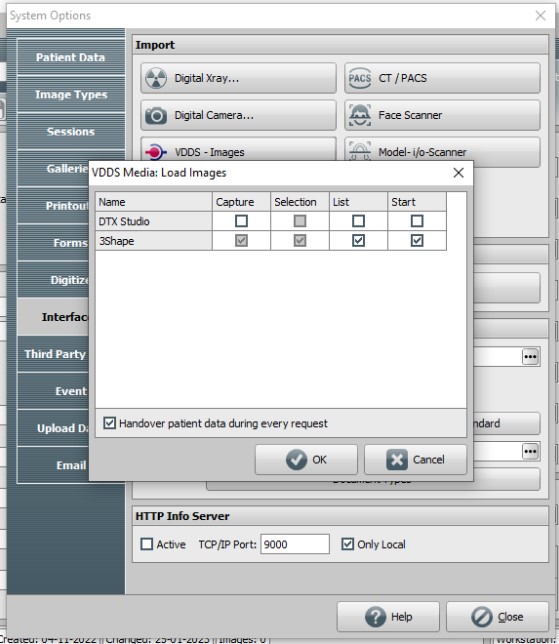
- Please ensure that all checkboxes are selected in the 3Shape section and click OK:
You have now set up the integration:
Known limitations
- Regarding different PMS & Unite setup options and integration on Trios Move, check this article: Practice management system & Imaging system setup overview
- If your 3Shape Account doesn't have a license for Practice Management System, the integration will not function. To review licenses compatibility, check this article: FAQ: Integration of PMS with 3Shape Unite
Contact 3Shape Support if you have further questions.
For full information on correct usage please consult the official Safety and Setup Guide and the most current Manual.