
How to install "VDDS interface" App from Unite Store
07/11/2023This setup is intended for development use only.
This article describes how to install a generic VDDS interface for integration purposes.
If you are looking to integrate a specific Practice Management system, ensure you install the appropriate integration directly from the Practice Management section in the Unite Store.
Prerequisites for the installation
- 3Shape Unite 21.1.x or newer
Installation Instructions
Step 1: Open Unite.
Step 2: Go to More.
Step 3: Select Store.
Step 4: Select the 3Shape tab.
Step 5: Search for the "VDDS Interface" App.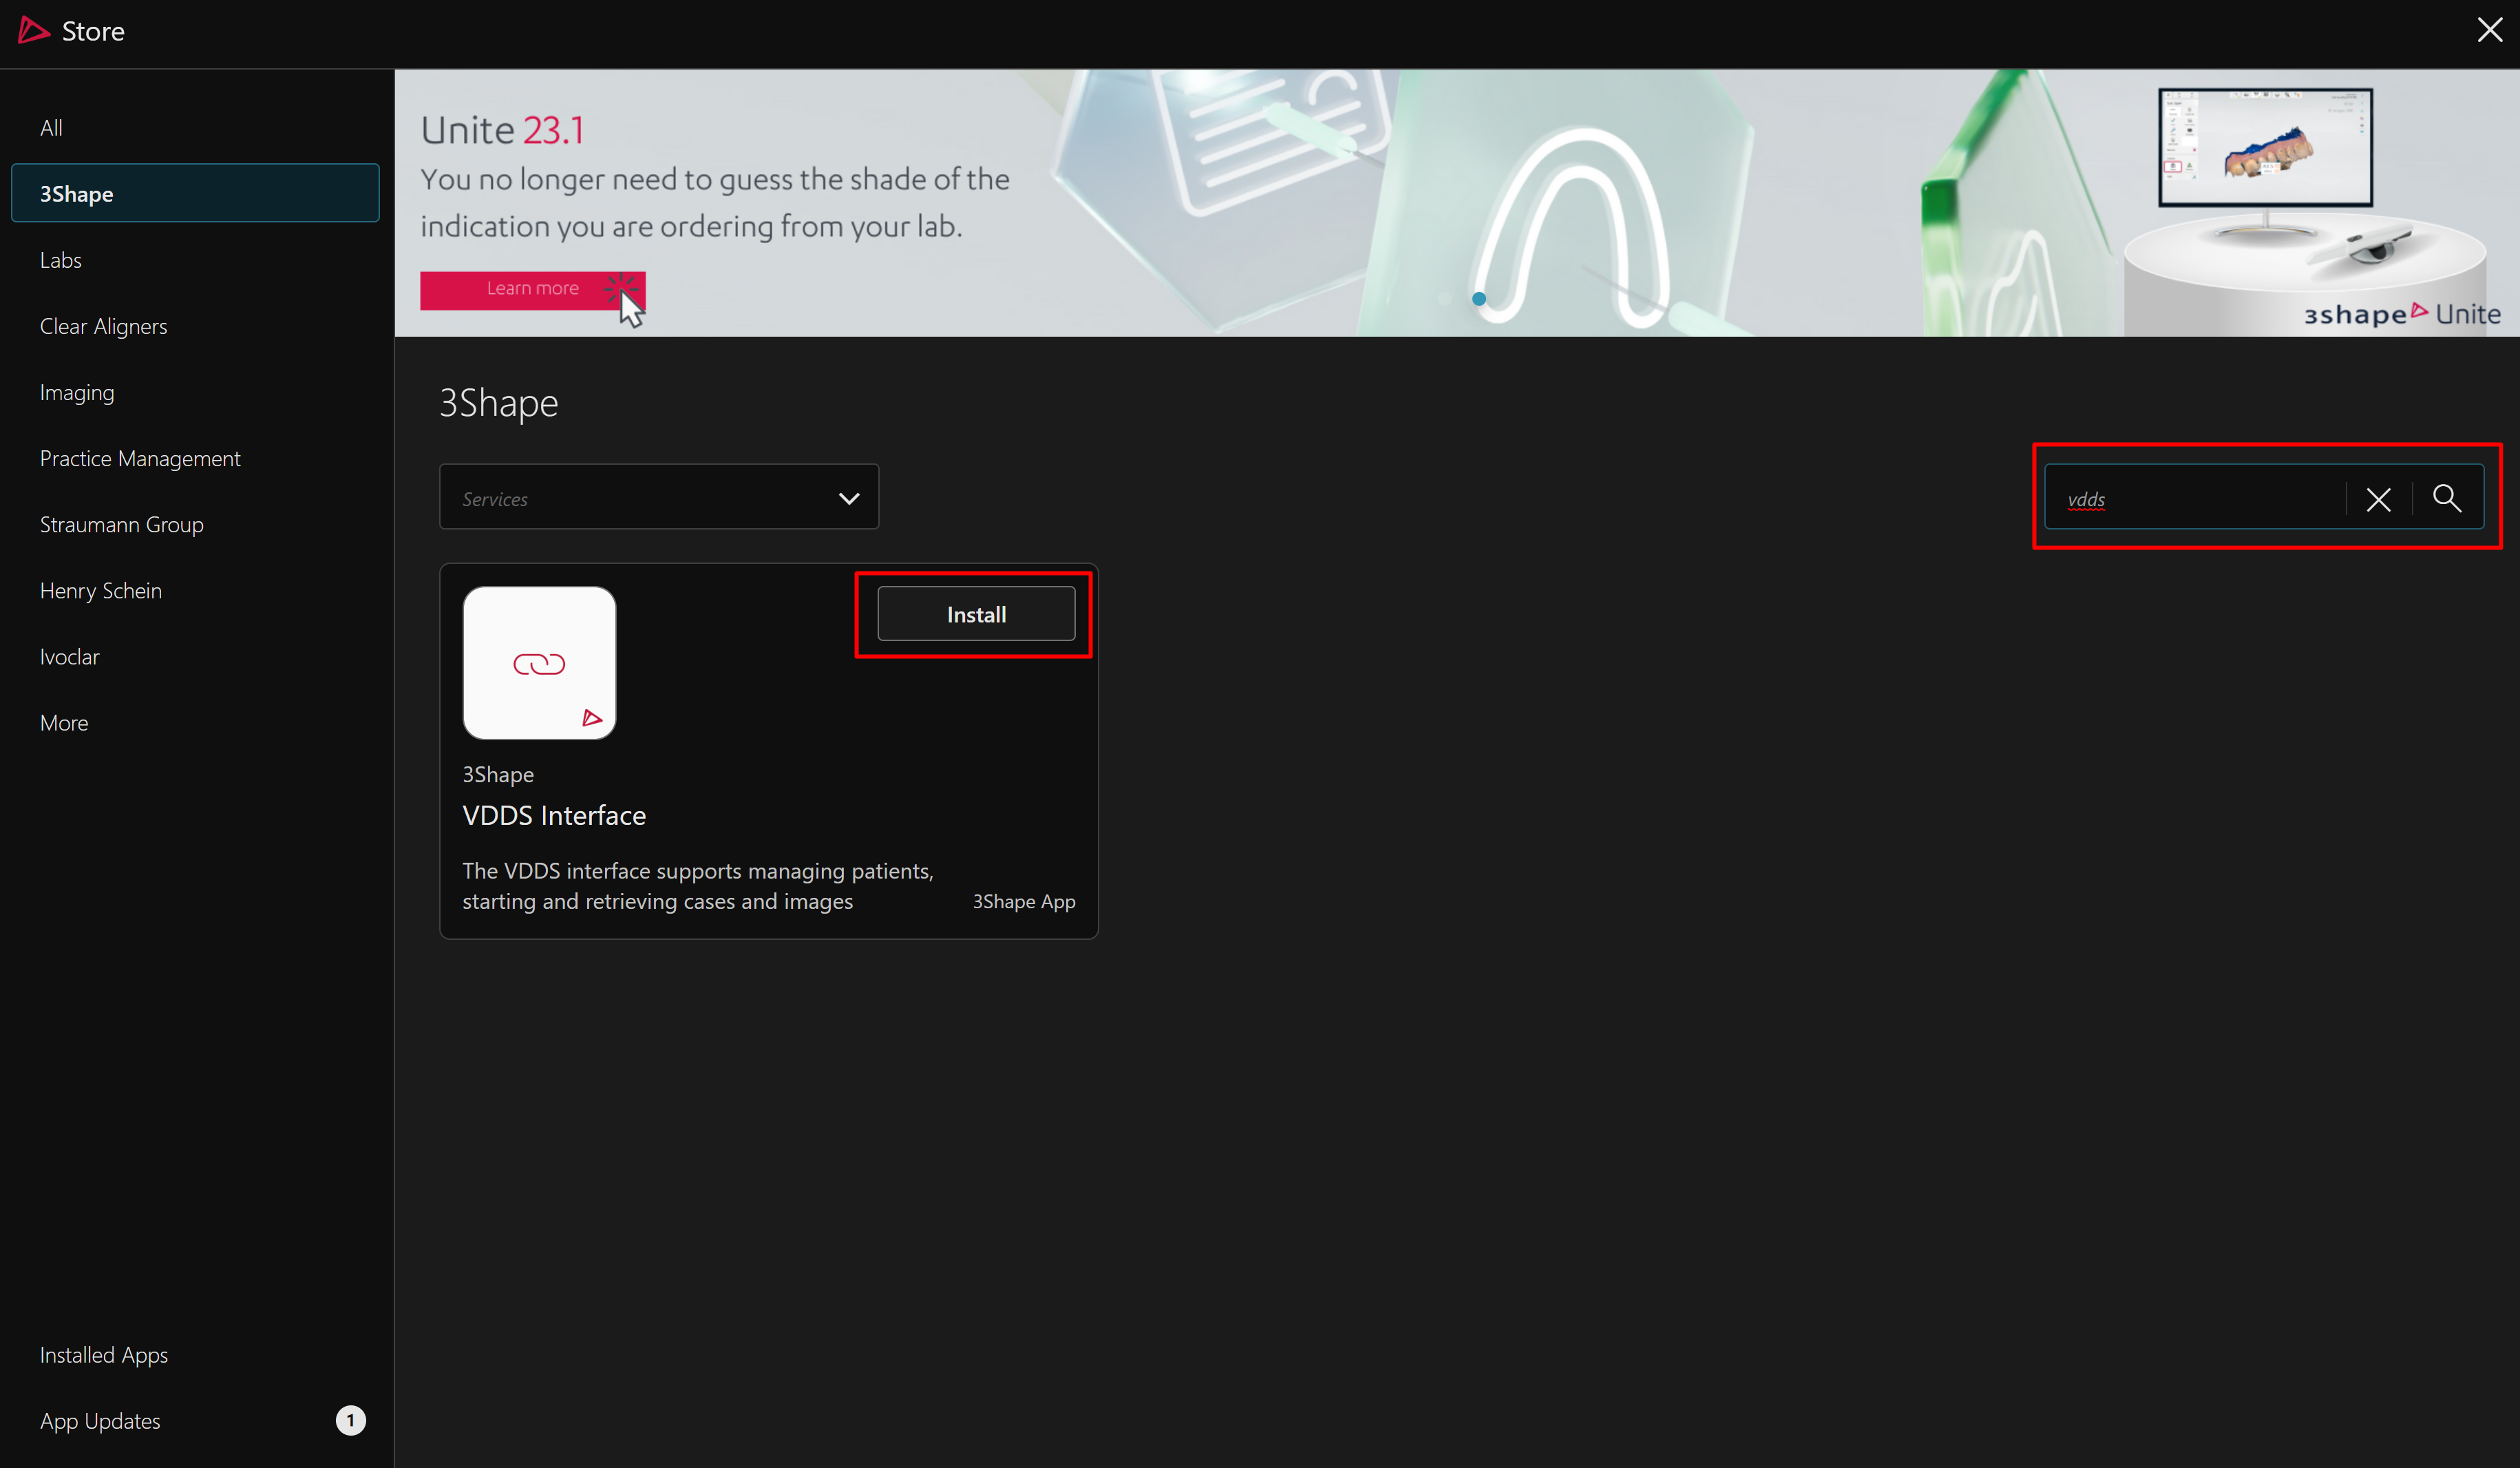
Step 6: Click Install and then OK.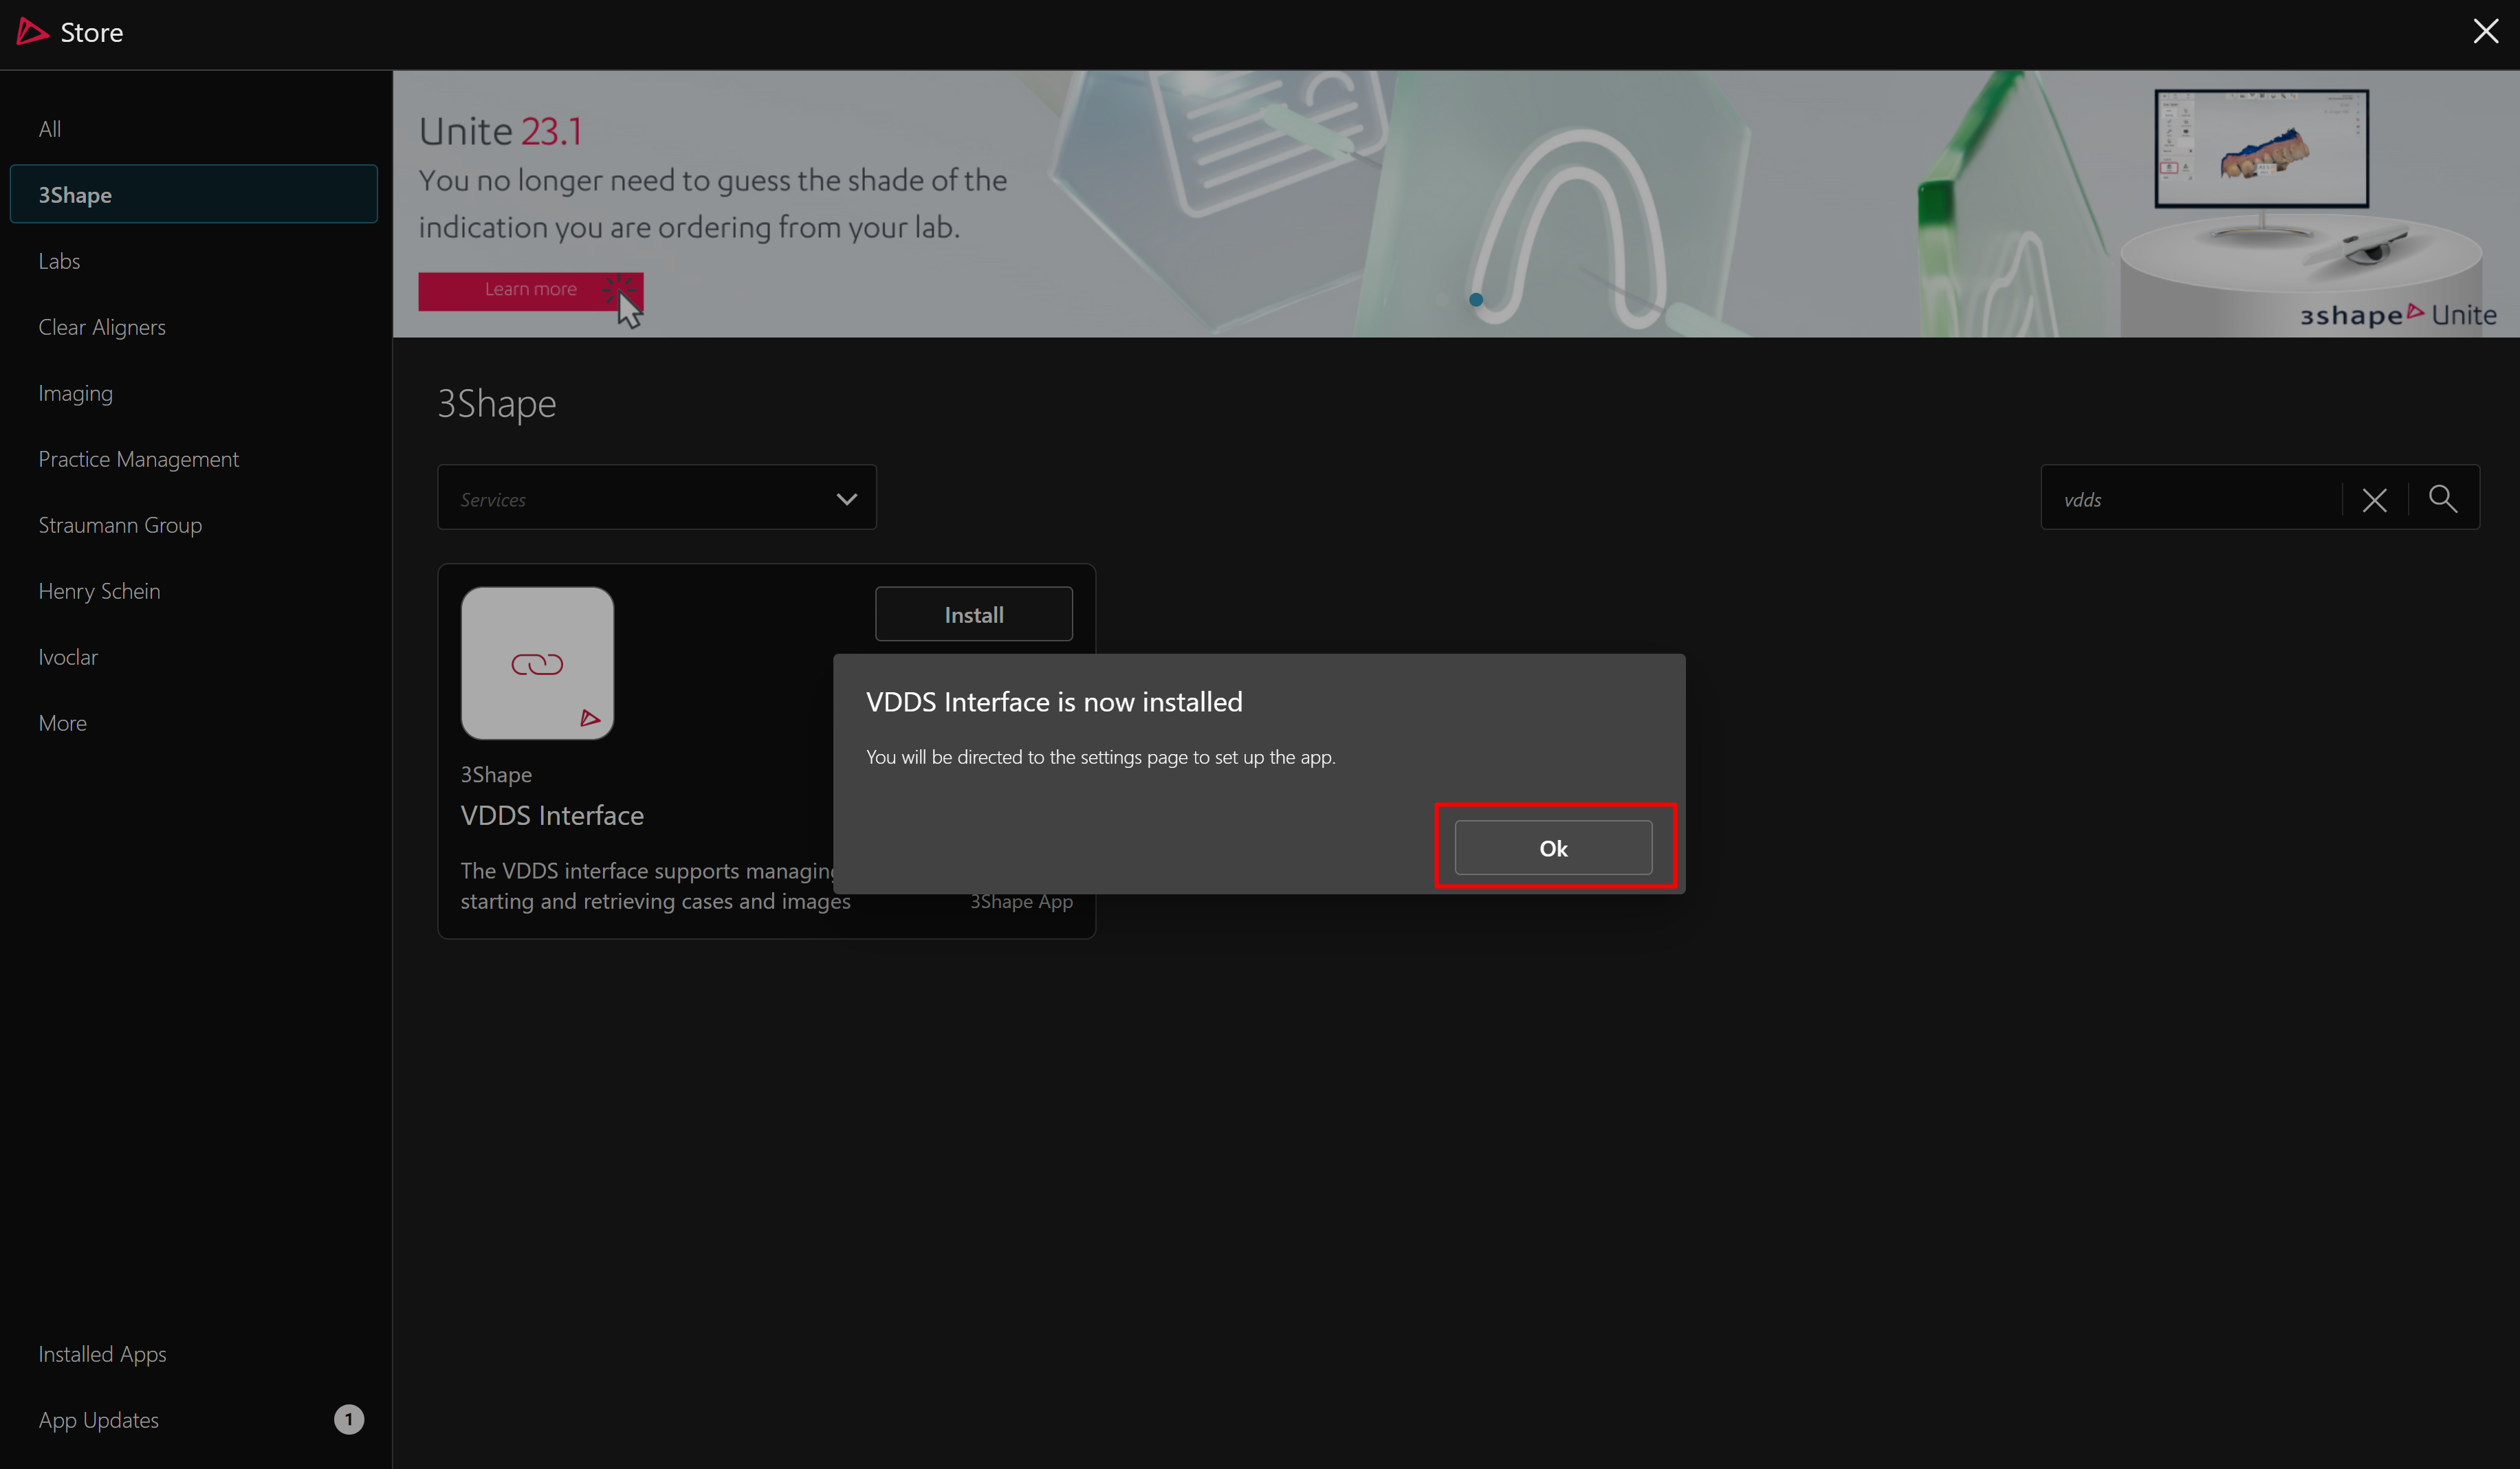
Step 7: Depending on your version of Unite you may need to configure additional settings. See relevant section below.
Unite 25.1 since PMS Web Service 3.10.0
New parameters were added to the Settings page:
- Show patient notifications on all devices – makes patient pop-ups available on all Unite workstations, allowing them to be handled from any PC. After the installation/update, the toggle is turned on by default.
- Handle request immediately on this client – automatically processes requests on the selected workstation without displaying a confirmation dialog.
Important: These options are mutually exclusive and cannot be enabled at the same time. The setting is stored locally and must be configured by each user on every PC where Unite is used.

Unite 25.1 since PMS Web Service 3.9.0
New parameter was added to the Settings page:
- Integration status – shows the current setup and synchronization status of the integration and indicates when it is ready for use.

Unite 24.1 since PMS Web Service 3.1.0
Note: Since PMS Web Service 3.1.0, host device selection is impossible and is no longer required in Unite.

Unite 24.1 before PMS Web Service 3.1.0
Host setup: you are required to select a host device from the drop-down menu. In the list, you will see all connected devices in your network. It is recommended to select a device that is always on, using a wired network connection, and without a TRIOS scanner connected.
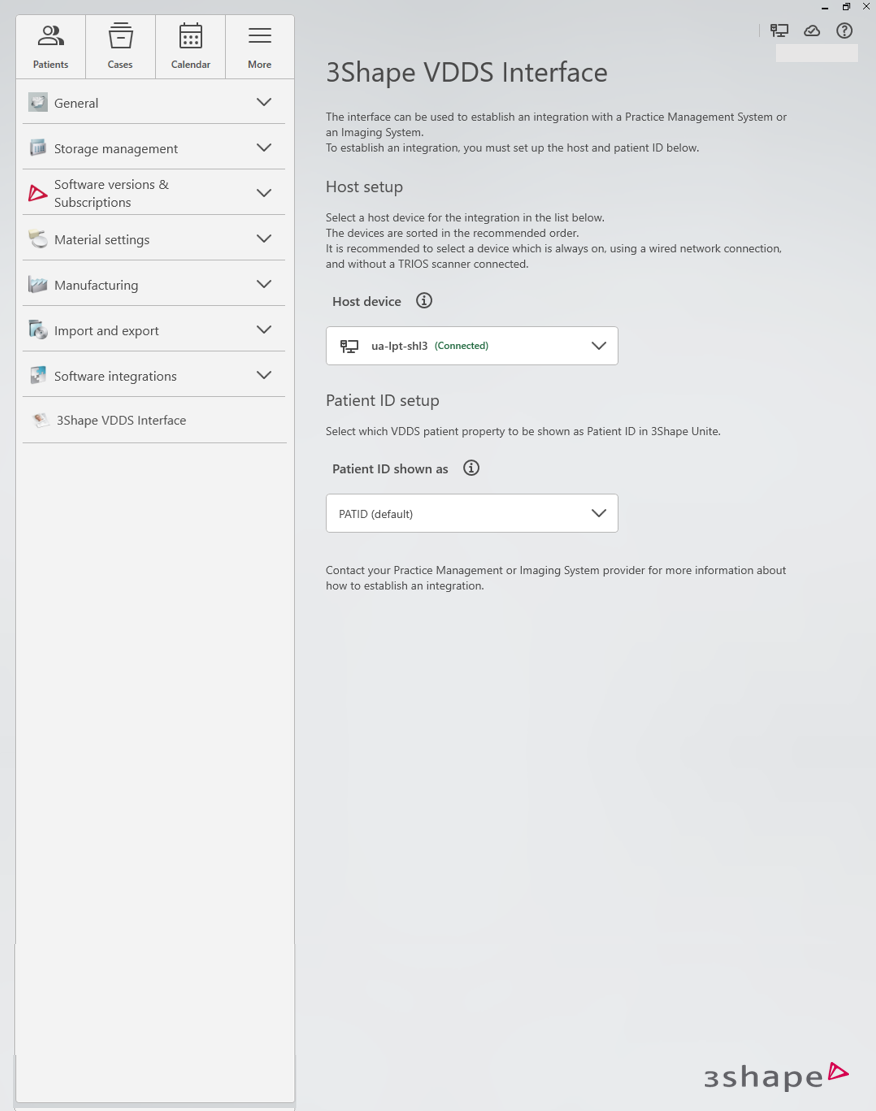
Unite 23.1

Step 8: You may now configure Patient ID parameters and finish setup in your PMS or Imaging software. Changes in Unite are saved automatically, when you leave the settings page.
Contact 3Shape Support if you have any further questions.
For full information on correct usage consult the official Safety and Setup Guide and the most current Manual.