How to create a 3Shape Account
07/11/2023To be able to use 3Shape products and services, you must have a 3Shape Account. These following steps help you to create a 3Shape Account for you and your company.
How to Create a 3Shape Account
- Open your preferred browser and access the following link: https://portal.3shapecommunicate.com.
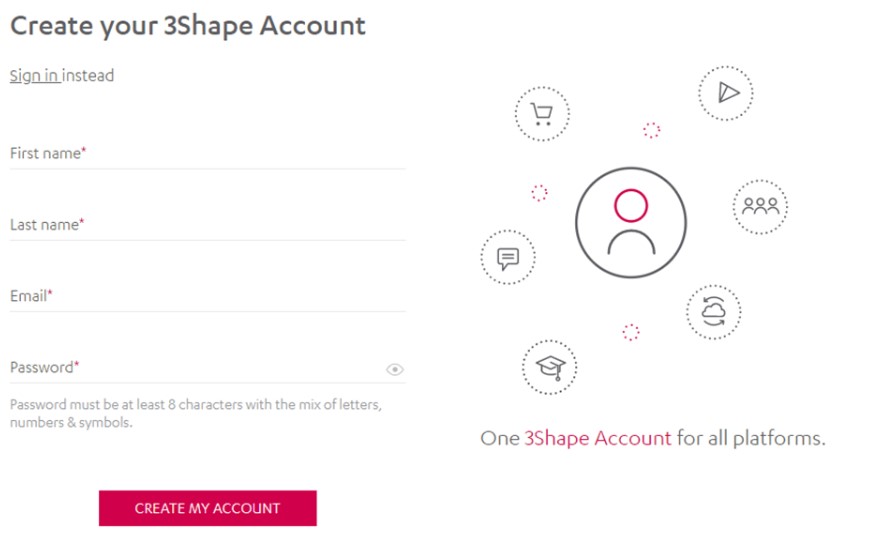
- Select the option that says Create 3Shape Account.
- Fill in the details and then press the CREATE MY ACCOUNT button.
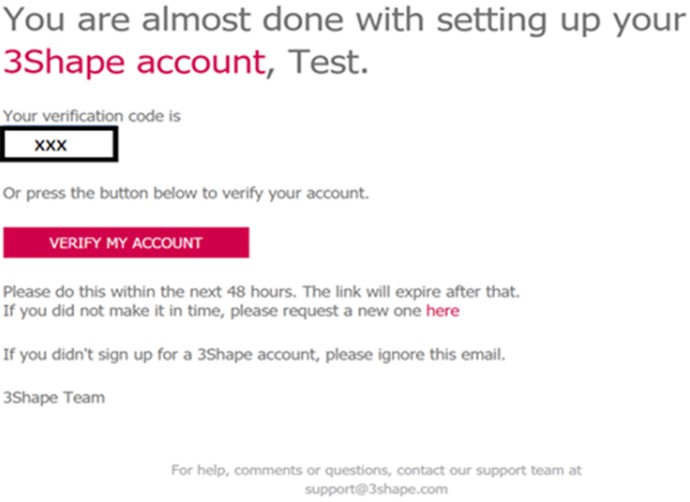
- You will be asked to verify your account with a code you received in by email.
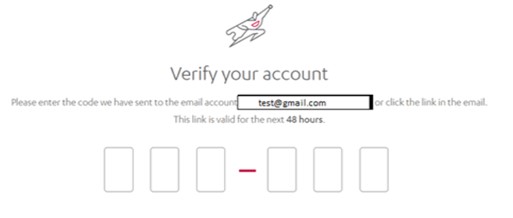
5. Verification link and code will arrive to your mailbox. Please either copy and paste the verification code, or simply click the red button VERIFY MY ACCOUNT in the email.
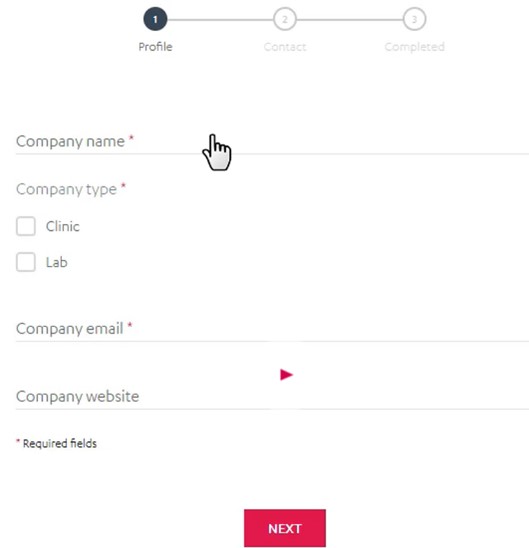
6. Now your account is active and you will be redirected to set-up a company profile. Remember that it is mandatory to create a company profile.
You may watch a video here of how to create a 3Shape account. Be aware, this link will take you outside of the Help Center to the 3Shape Training Videos YouTube page.
How to create a Company Profile in 3Shape's Communicate Portal.
NOTE: You may use the same email address as for your 3Shape account or a different one. All main account settings are managed on a company level and are synchronized with company email. That means all notifications will be sent to the company email and can be controlled from there (order confirmations, incoming connection requests, integrations, etc.).
1. Create a Company account
2. You will be redirected to a Company creation page.
3. Fill in the details of the Profile tab - press NEXT.
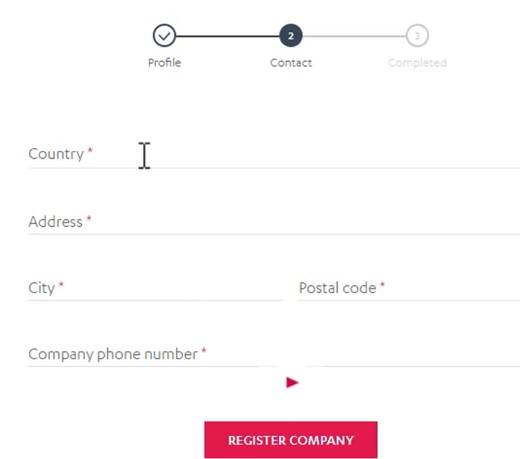
4. Fill in the details of the Contact tab. Fill in contact information for your company, the country, postal address, and phone number - press the Register Company button.
NOTE: Please make sure to select the correct country, as it will determine which 3Shape Server your cases will be stored in.
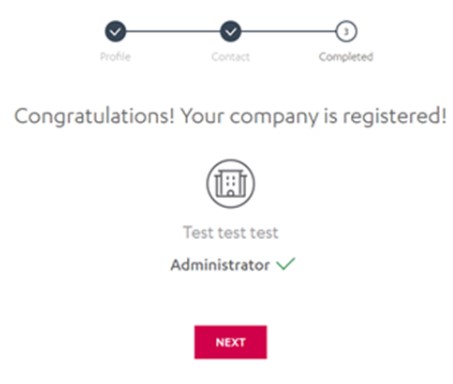
11. You will see a confirmation of the registration of your company. As soon as company creation is finished, you will be able to use your 3Shape account.
NOTE: When you register a company you will, by default, become the assigned “administrator” and “owner” for it.
You can also watch a video of how to create a Company Profile in 3Shape's Communicate Portal. This link will take you outside of the Help Center to the 3Shape Training Videos YouTube page.
Adding clinic staff to your company profile
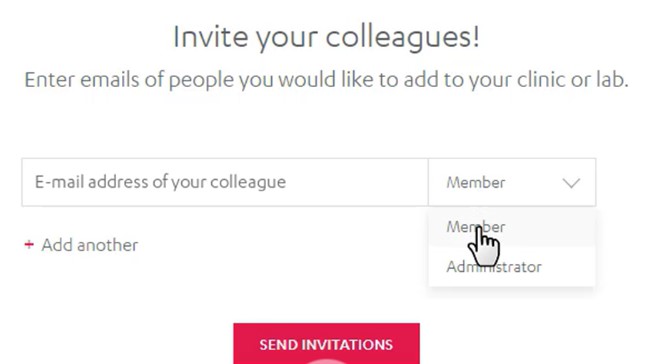
1. Press NEXT from the confirmation page after your company is registered.
2. Add the clinic staff by providing their email addresses and setting their role. Select SEND INVITATIONS.
Add all the staff that will be working with your 3Shape product(s) to provide them with personal accounts to all 3Shape platforms, including e-learning courses. Members of the staff must accept the invitations within 48 hours to activate their accounts.
3. You are now ready to get started with your company’s 3Shape Account. Press the Let’s Get Started button to use your new account.
4. Check the required permissions and press the Submit button. Now you have access to all 3Shape platforms and services!
With a 3Shape Account, you additionally can have the following opportunities:
- Create multiple companies with the same name (different email addresses though!)
- Create multiple teams with the same name and email address, but under different companies.
- Subsequently, it is possible to have 1 Invisalign account connected to different teams that have different emails.
Unfortunately, you cannot:
- Have the same team's name under the same company.
- Have the same email address for different companies – the uniqueness of the email is kept.
Contact 3Shape Support if you have further questions.
For full information on correct usage please consult the official Safety and Setup Guide and the most current Manual.