RAYFace - 3Shape Unite integration guide
02/04/2024This Workflow is designed for the end-users who have in-house RAYFace solution in clinic.
How to install RAYFace in 3Shape Unite
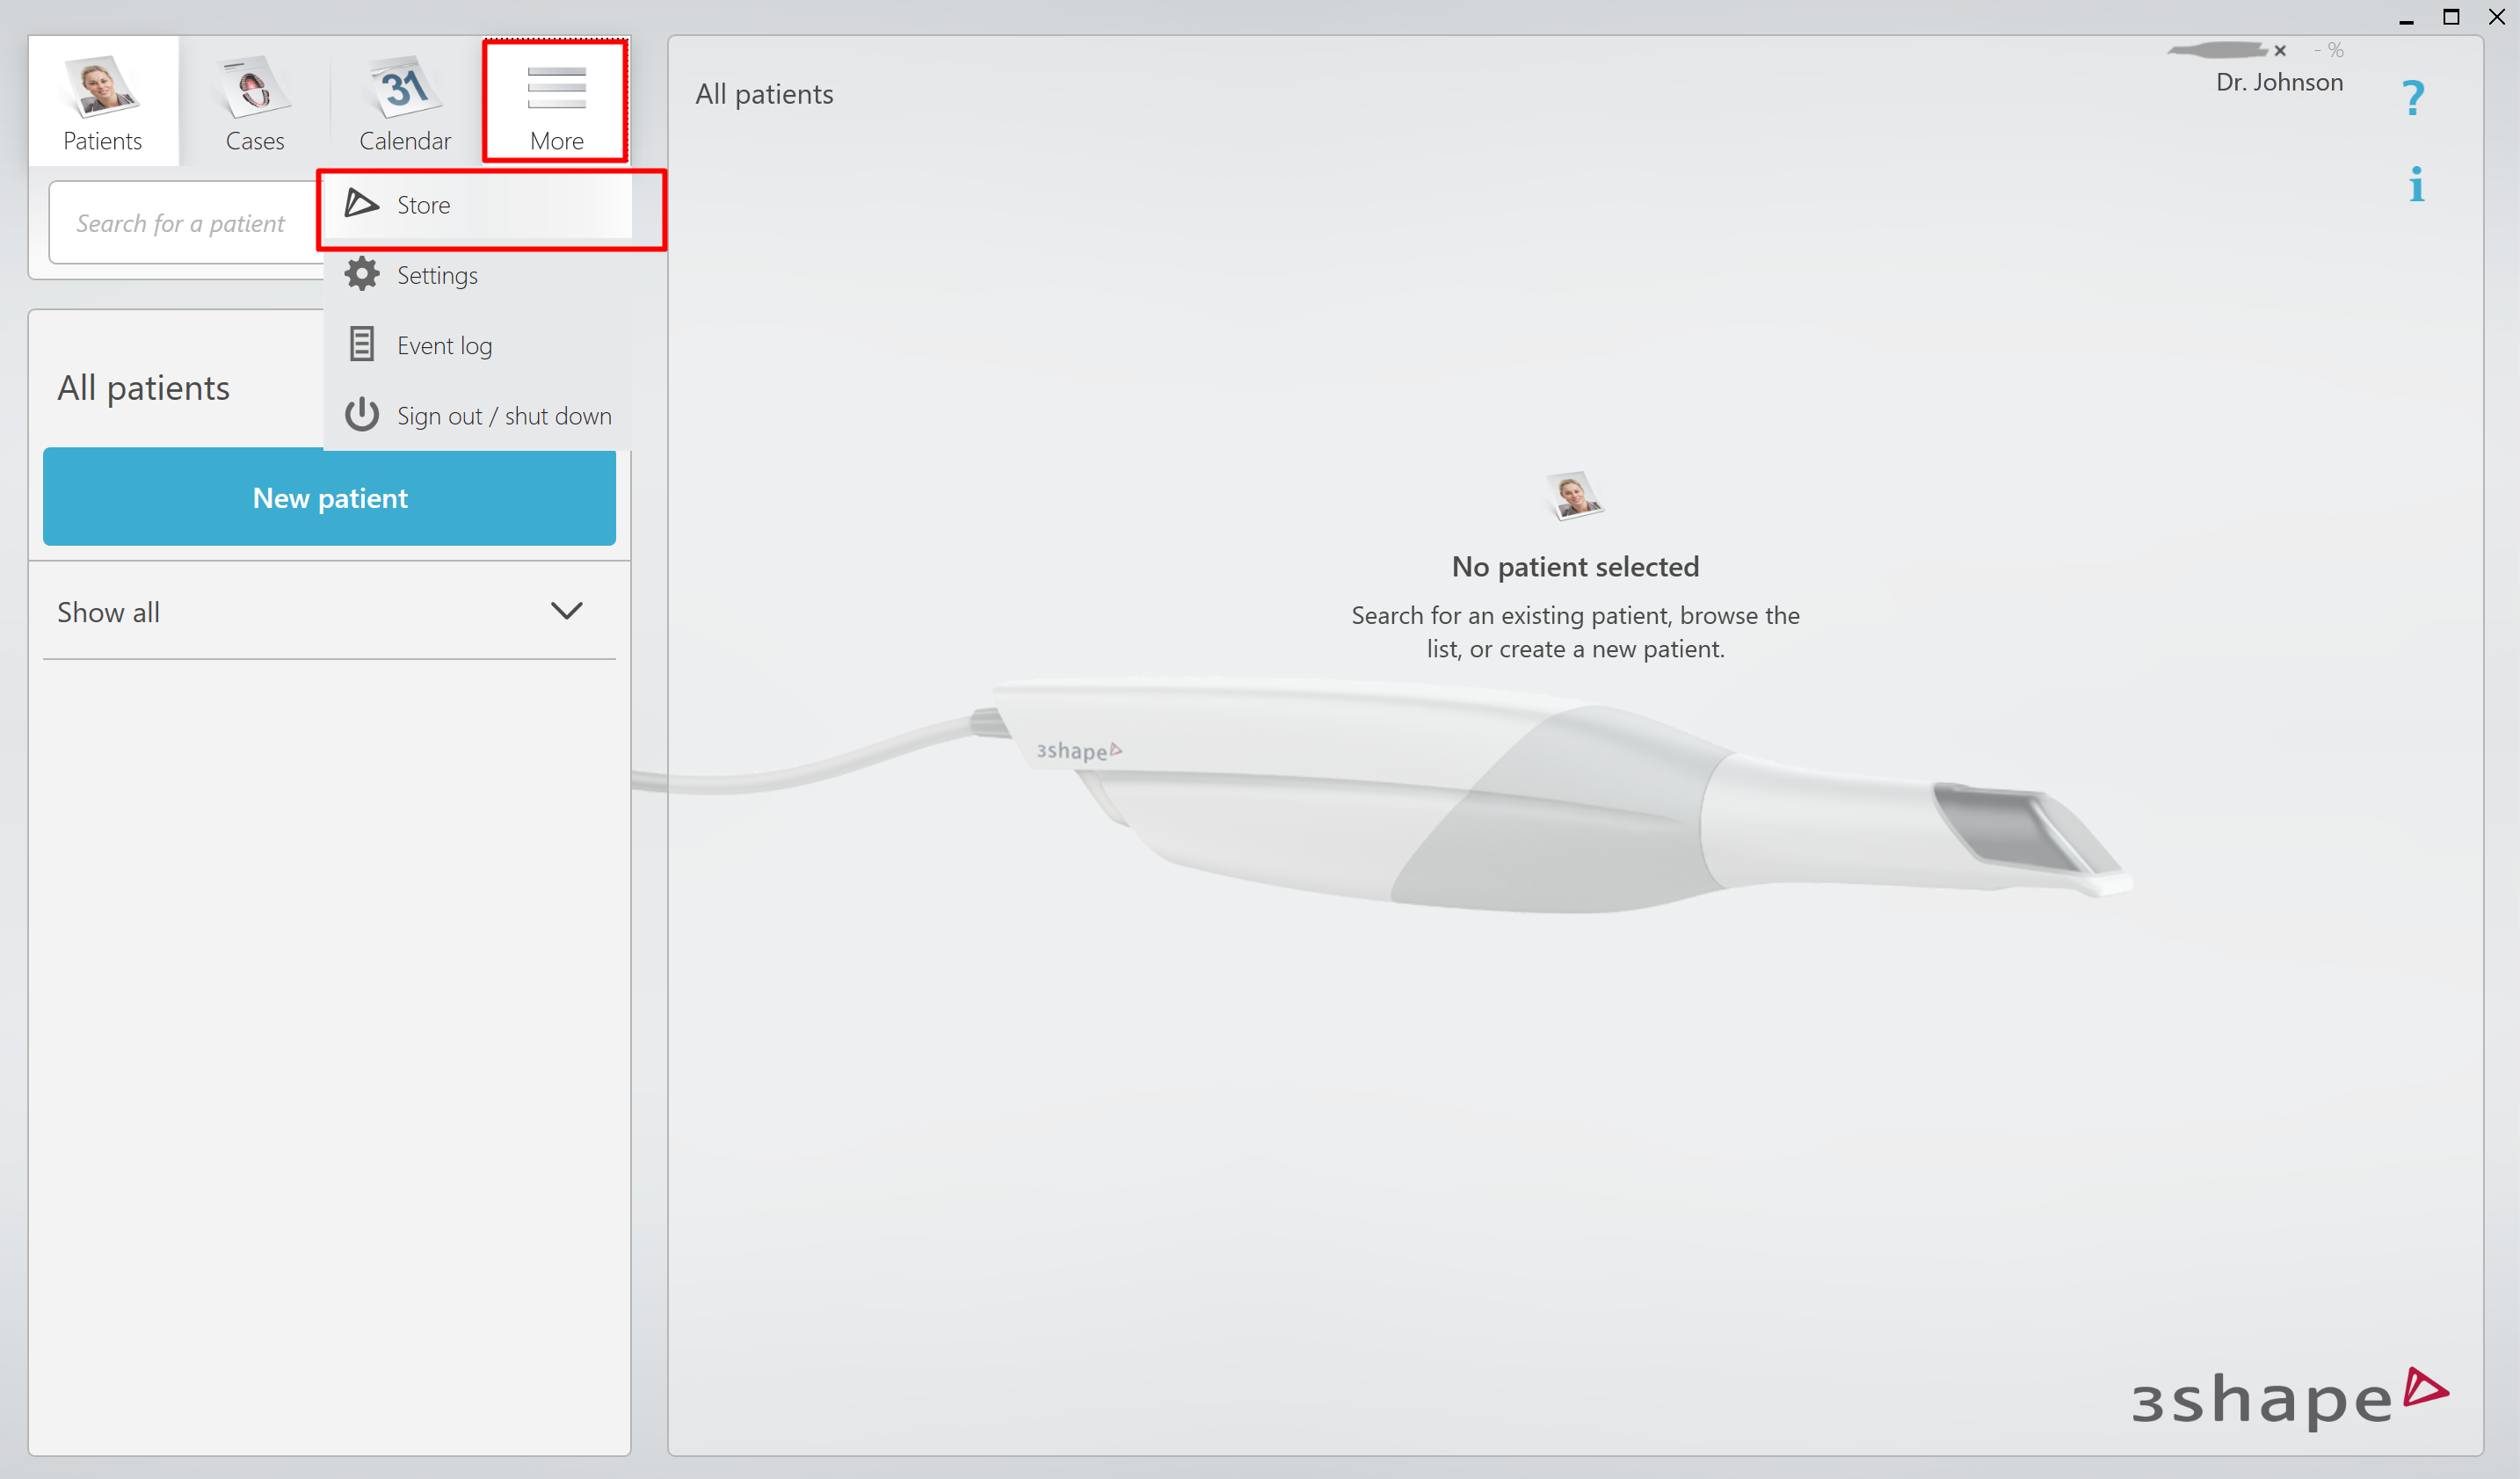
- Open 3Shape Unite, go to More> Store
- Navigate to Lab section, in the search field type RAYFace.
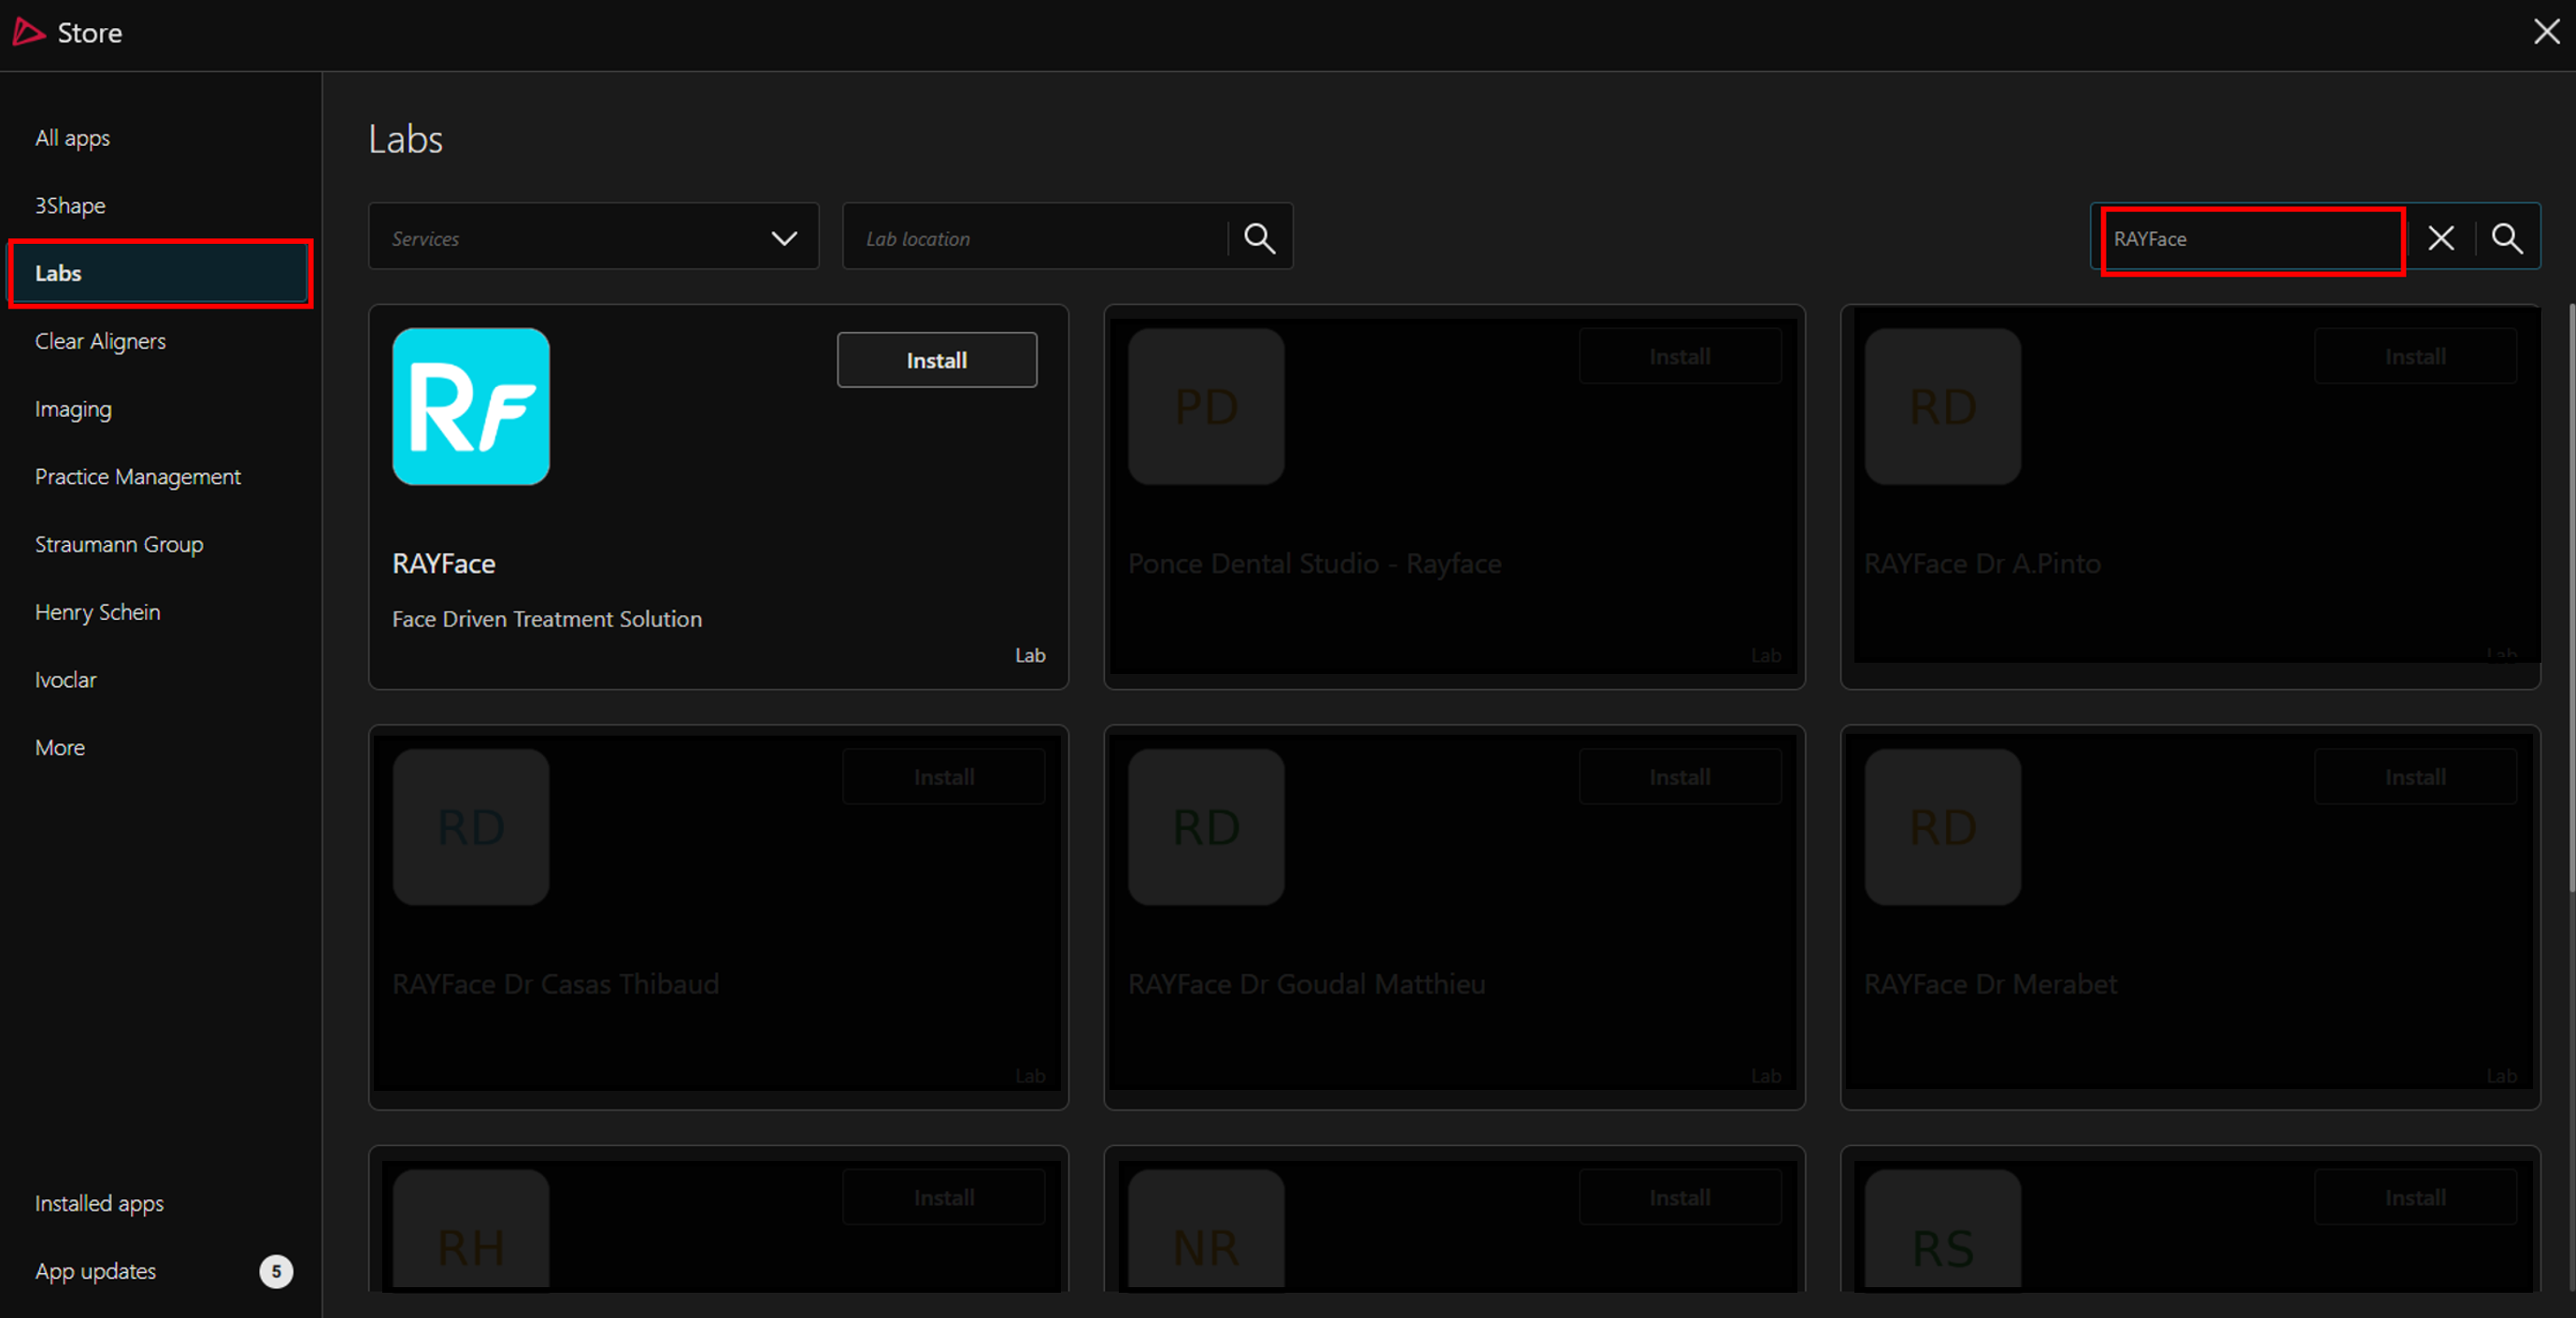
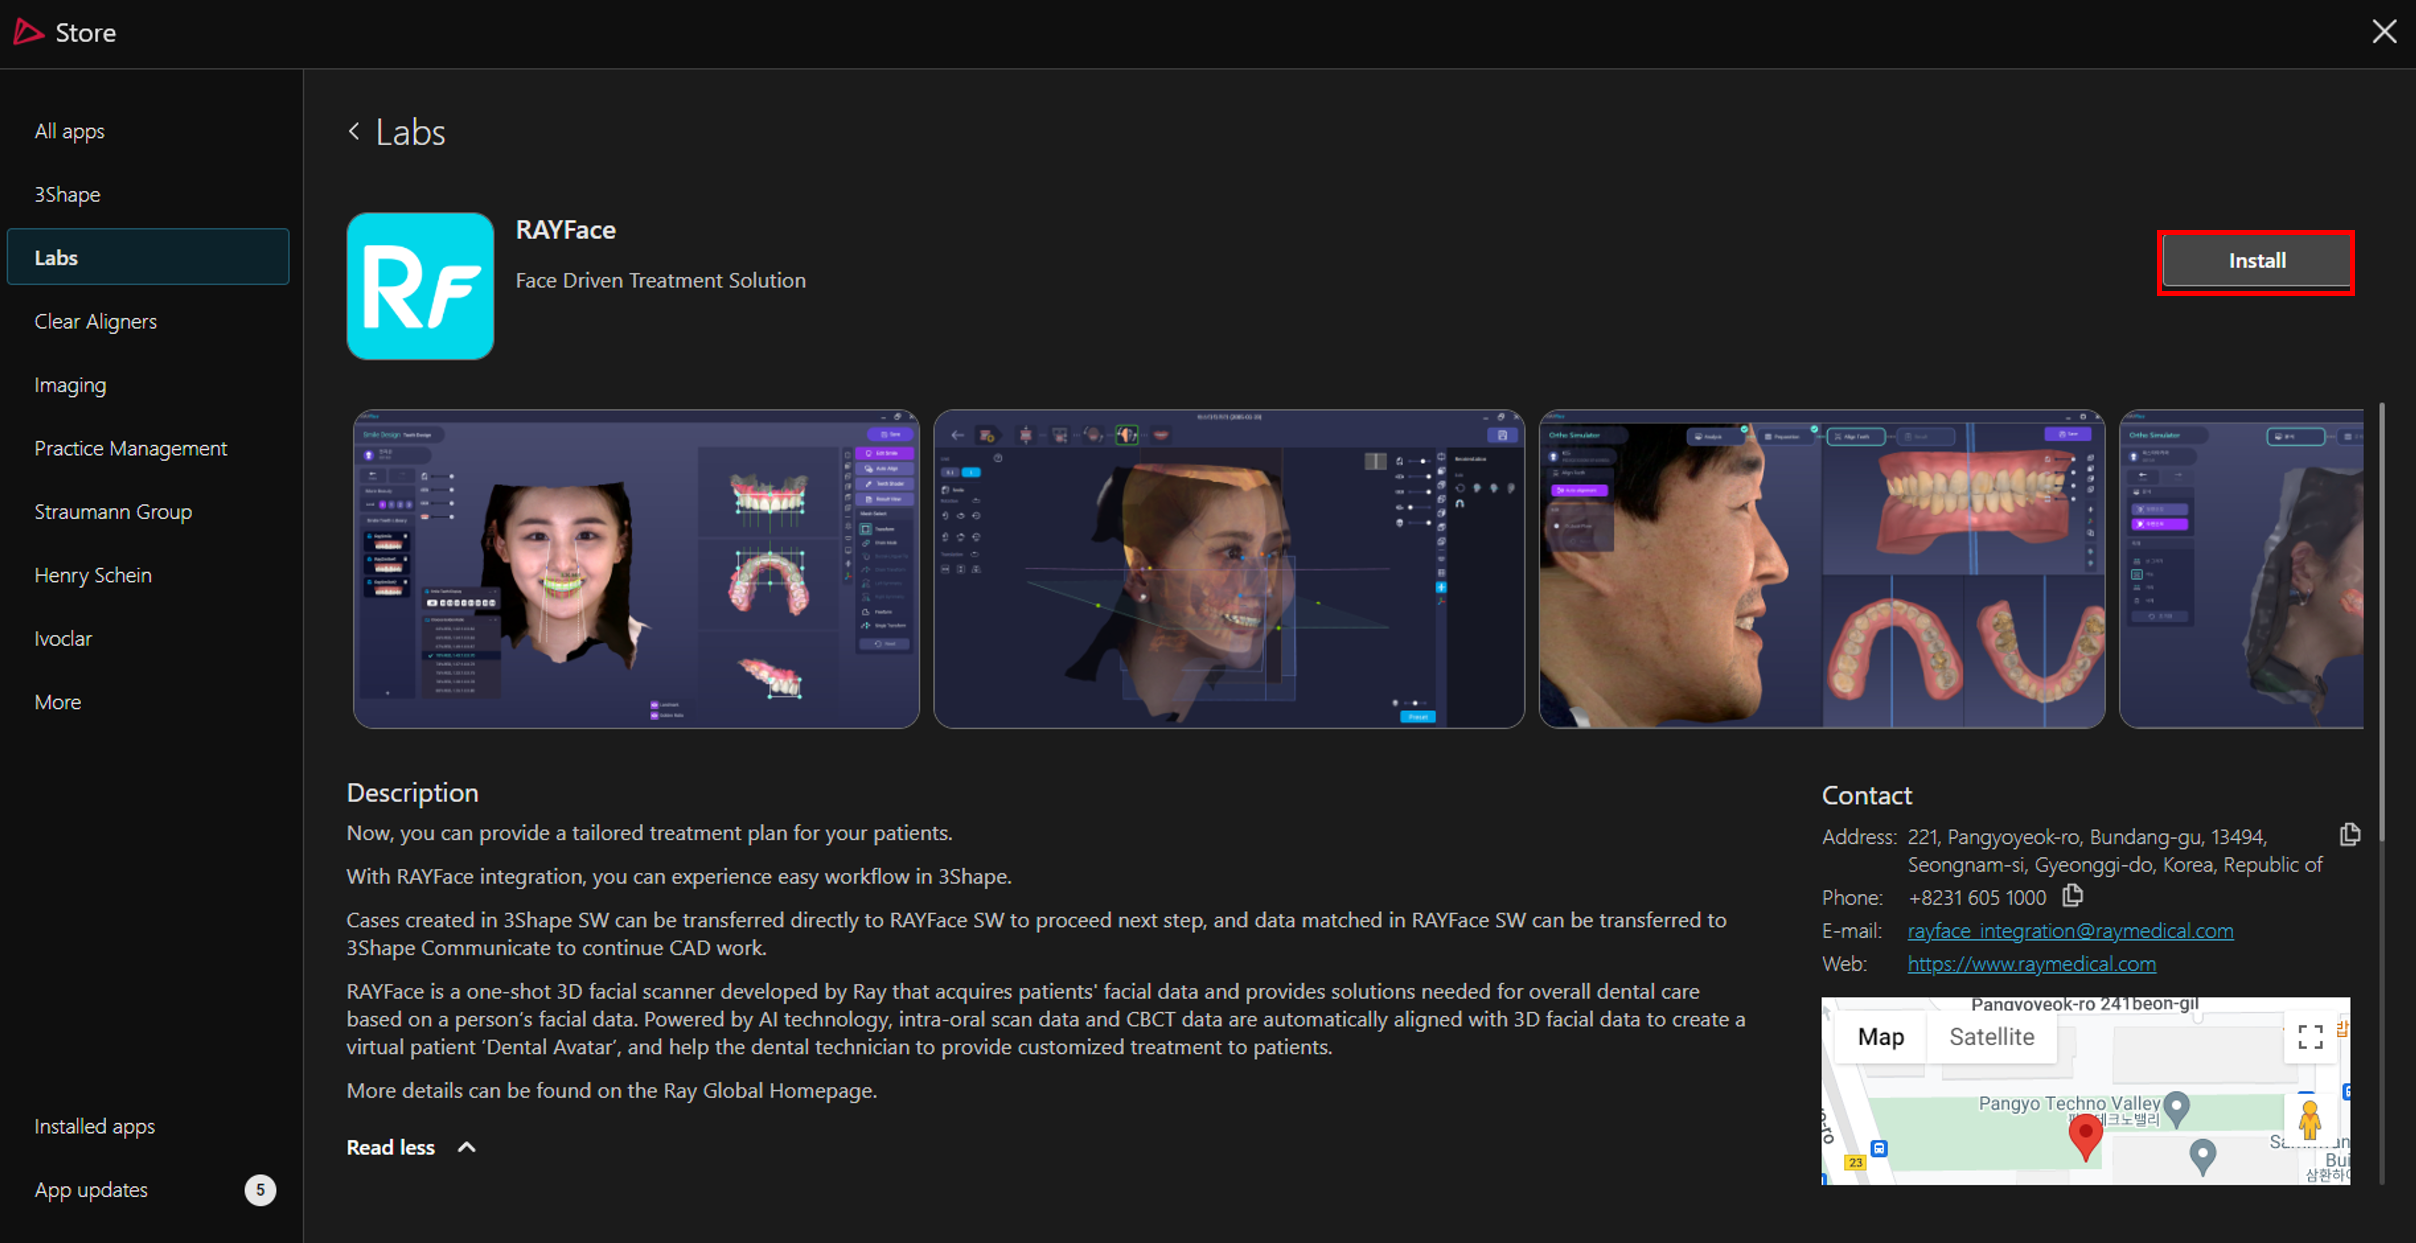
- Select RAYFace integration and click Install button.
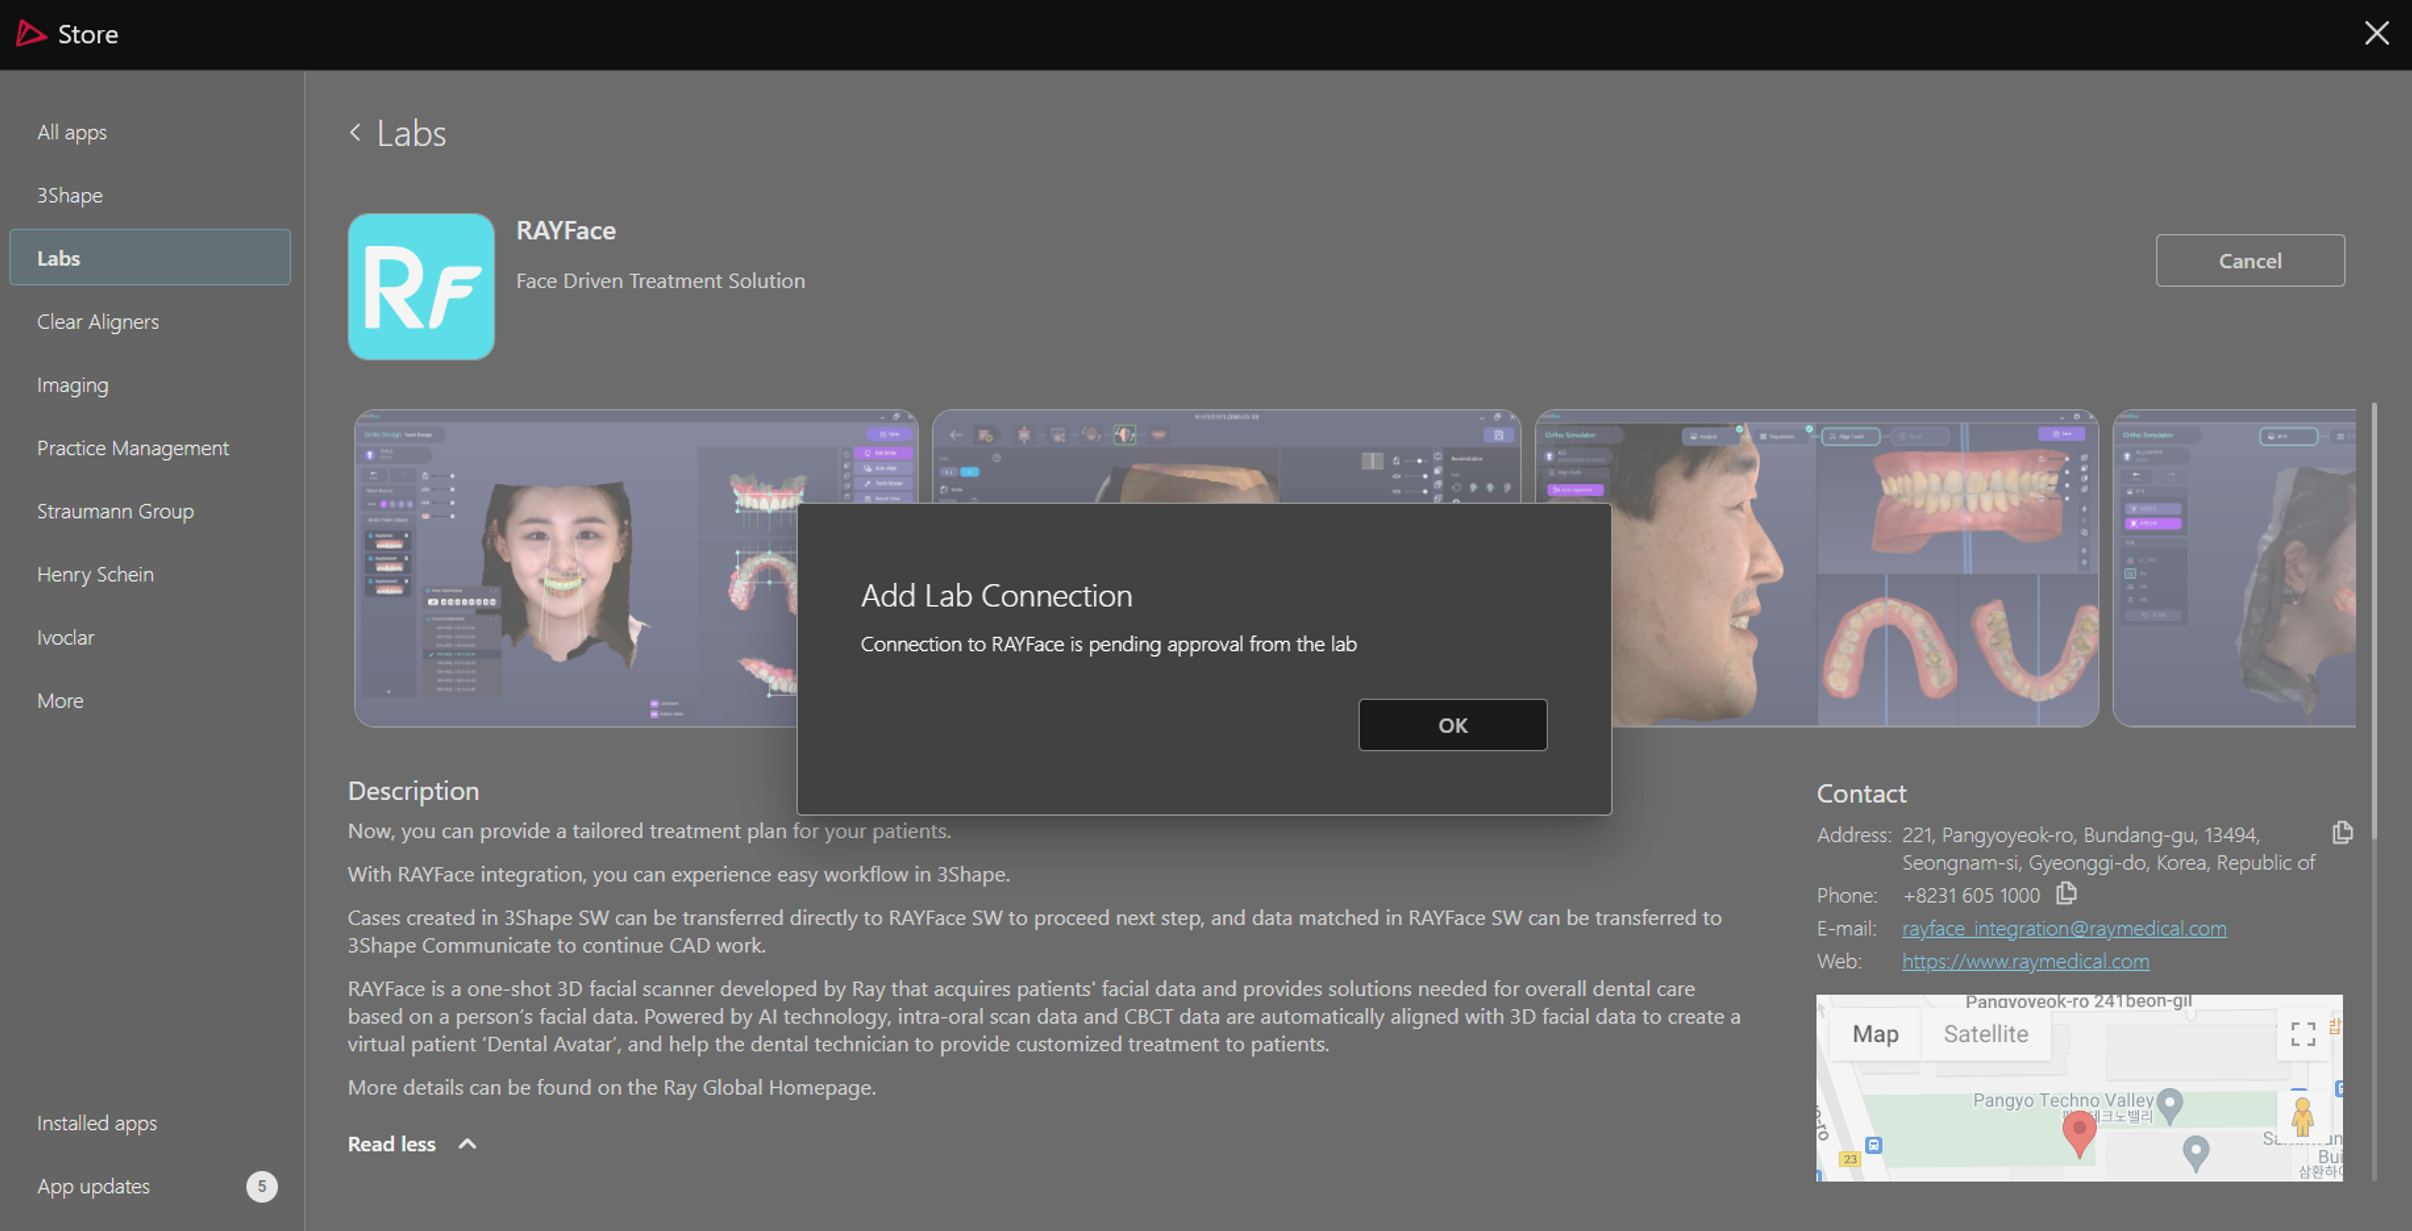
- In new pop up window, click Connect button.
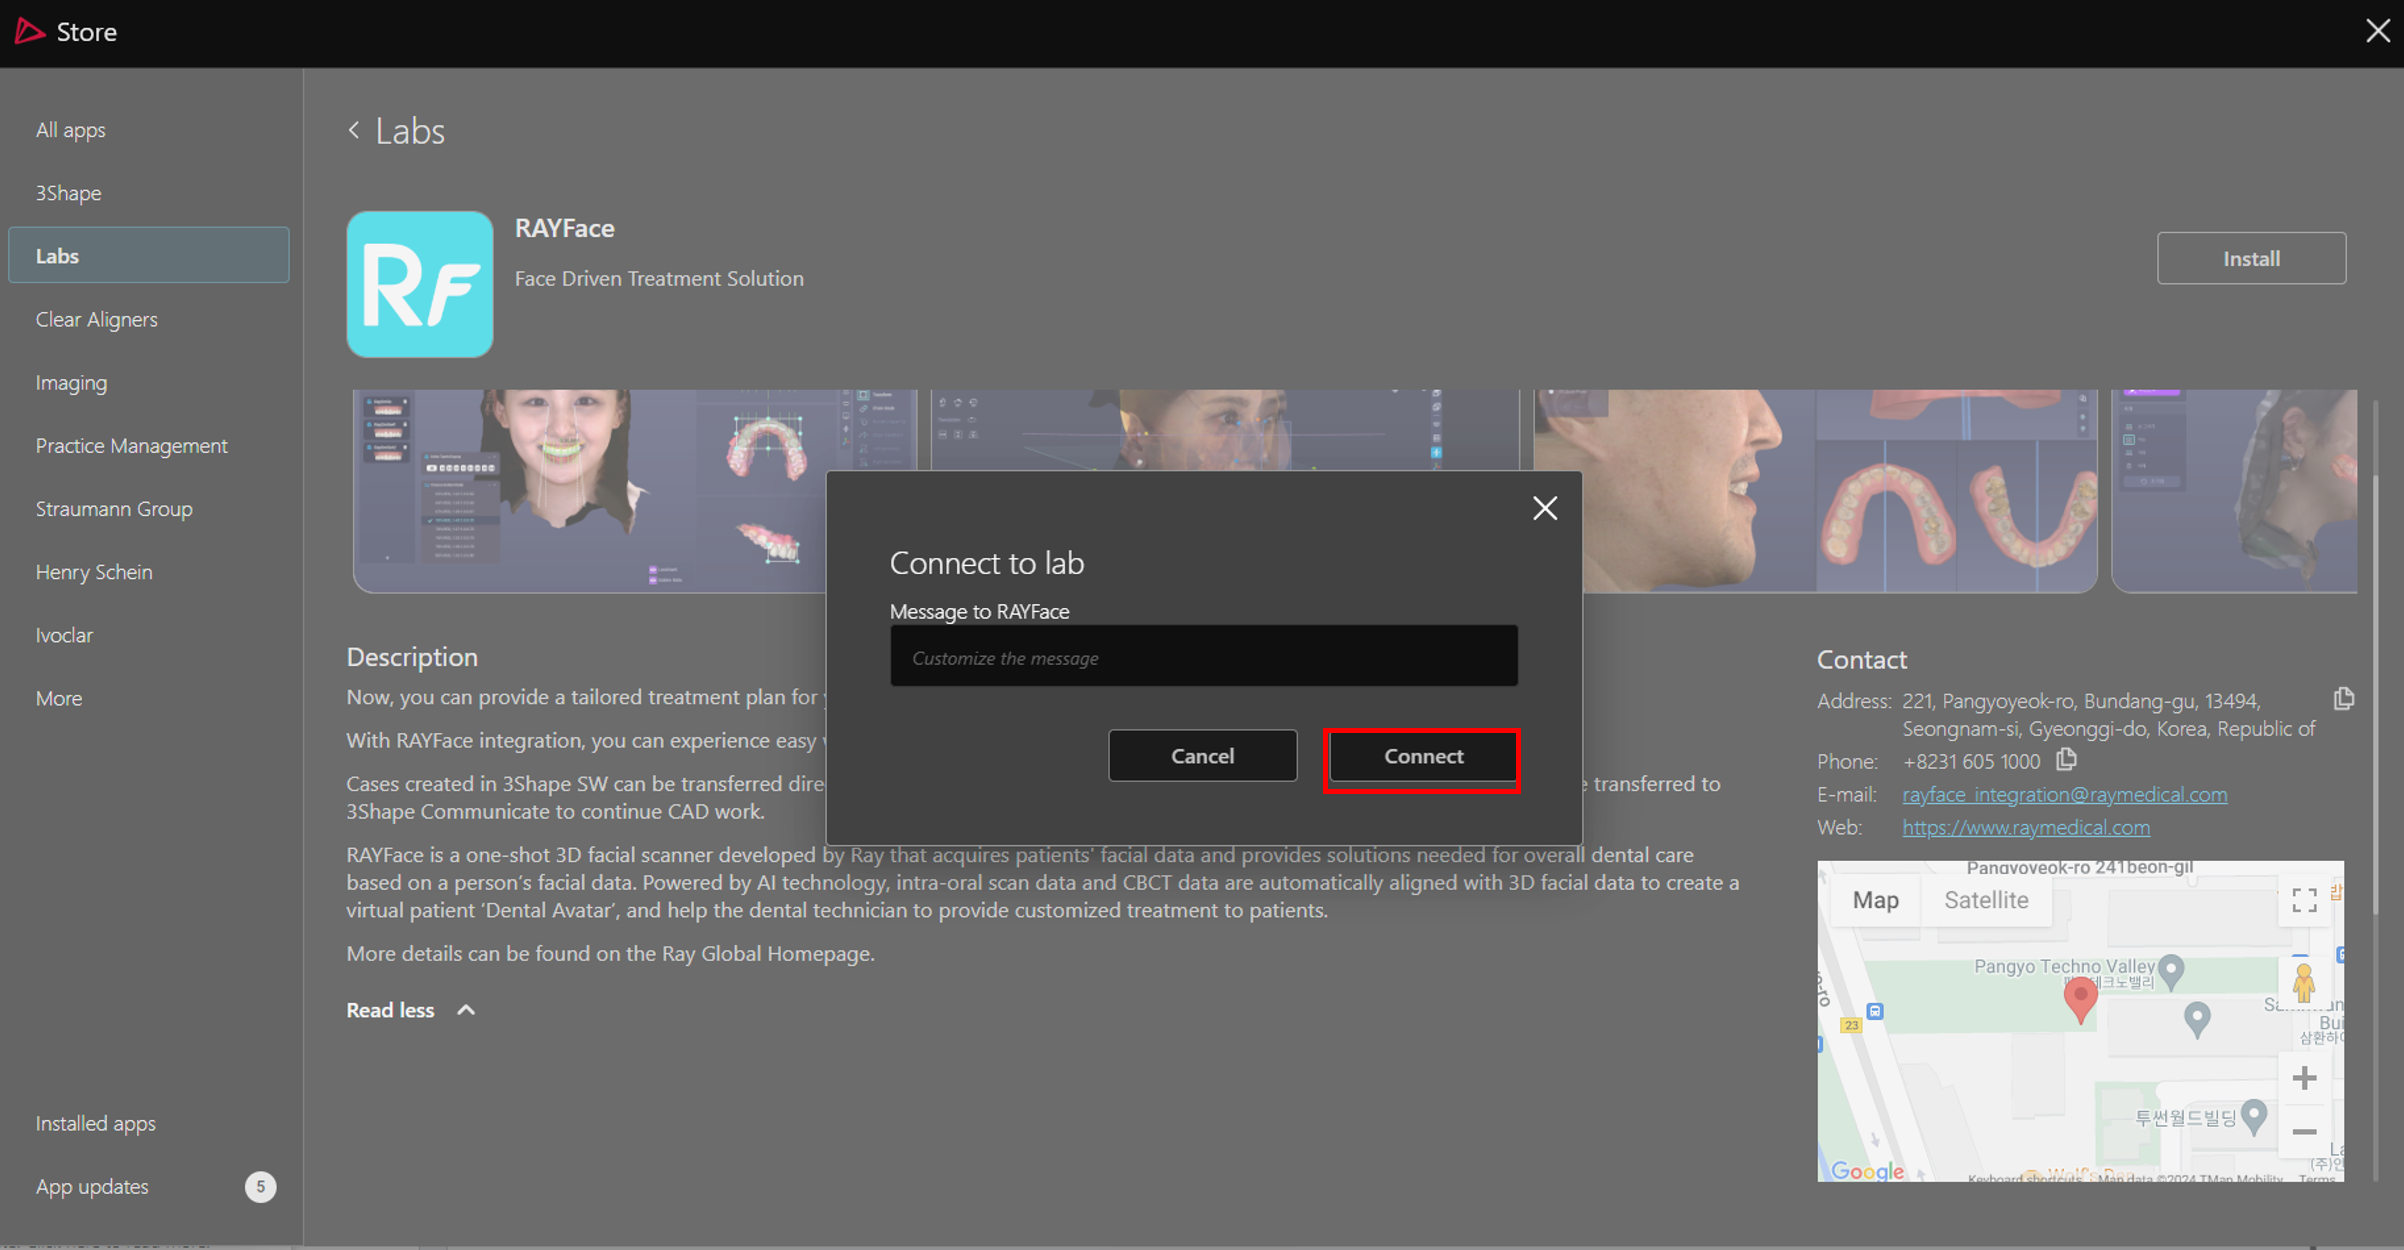
- Click OK and wait for connection approval from RAYFace team.
How to finish pairing with your RAYFace Software
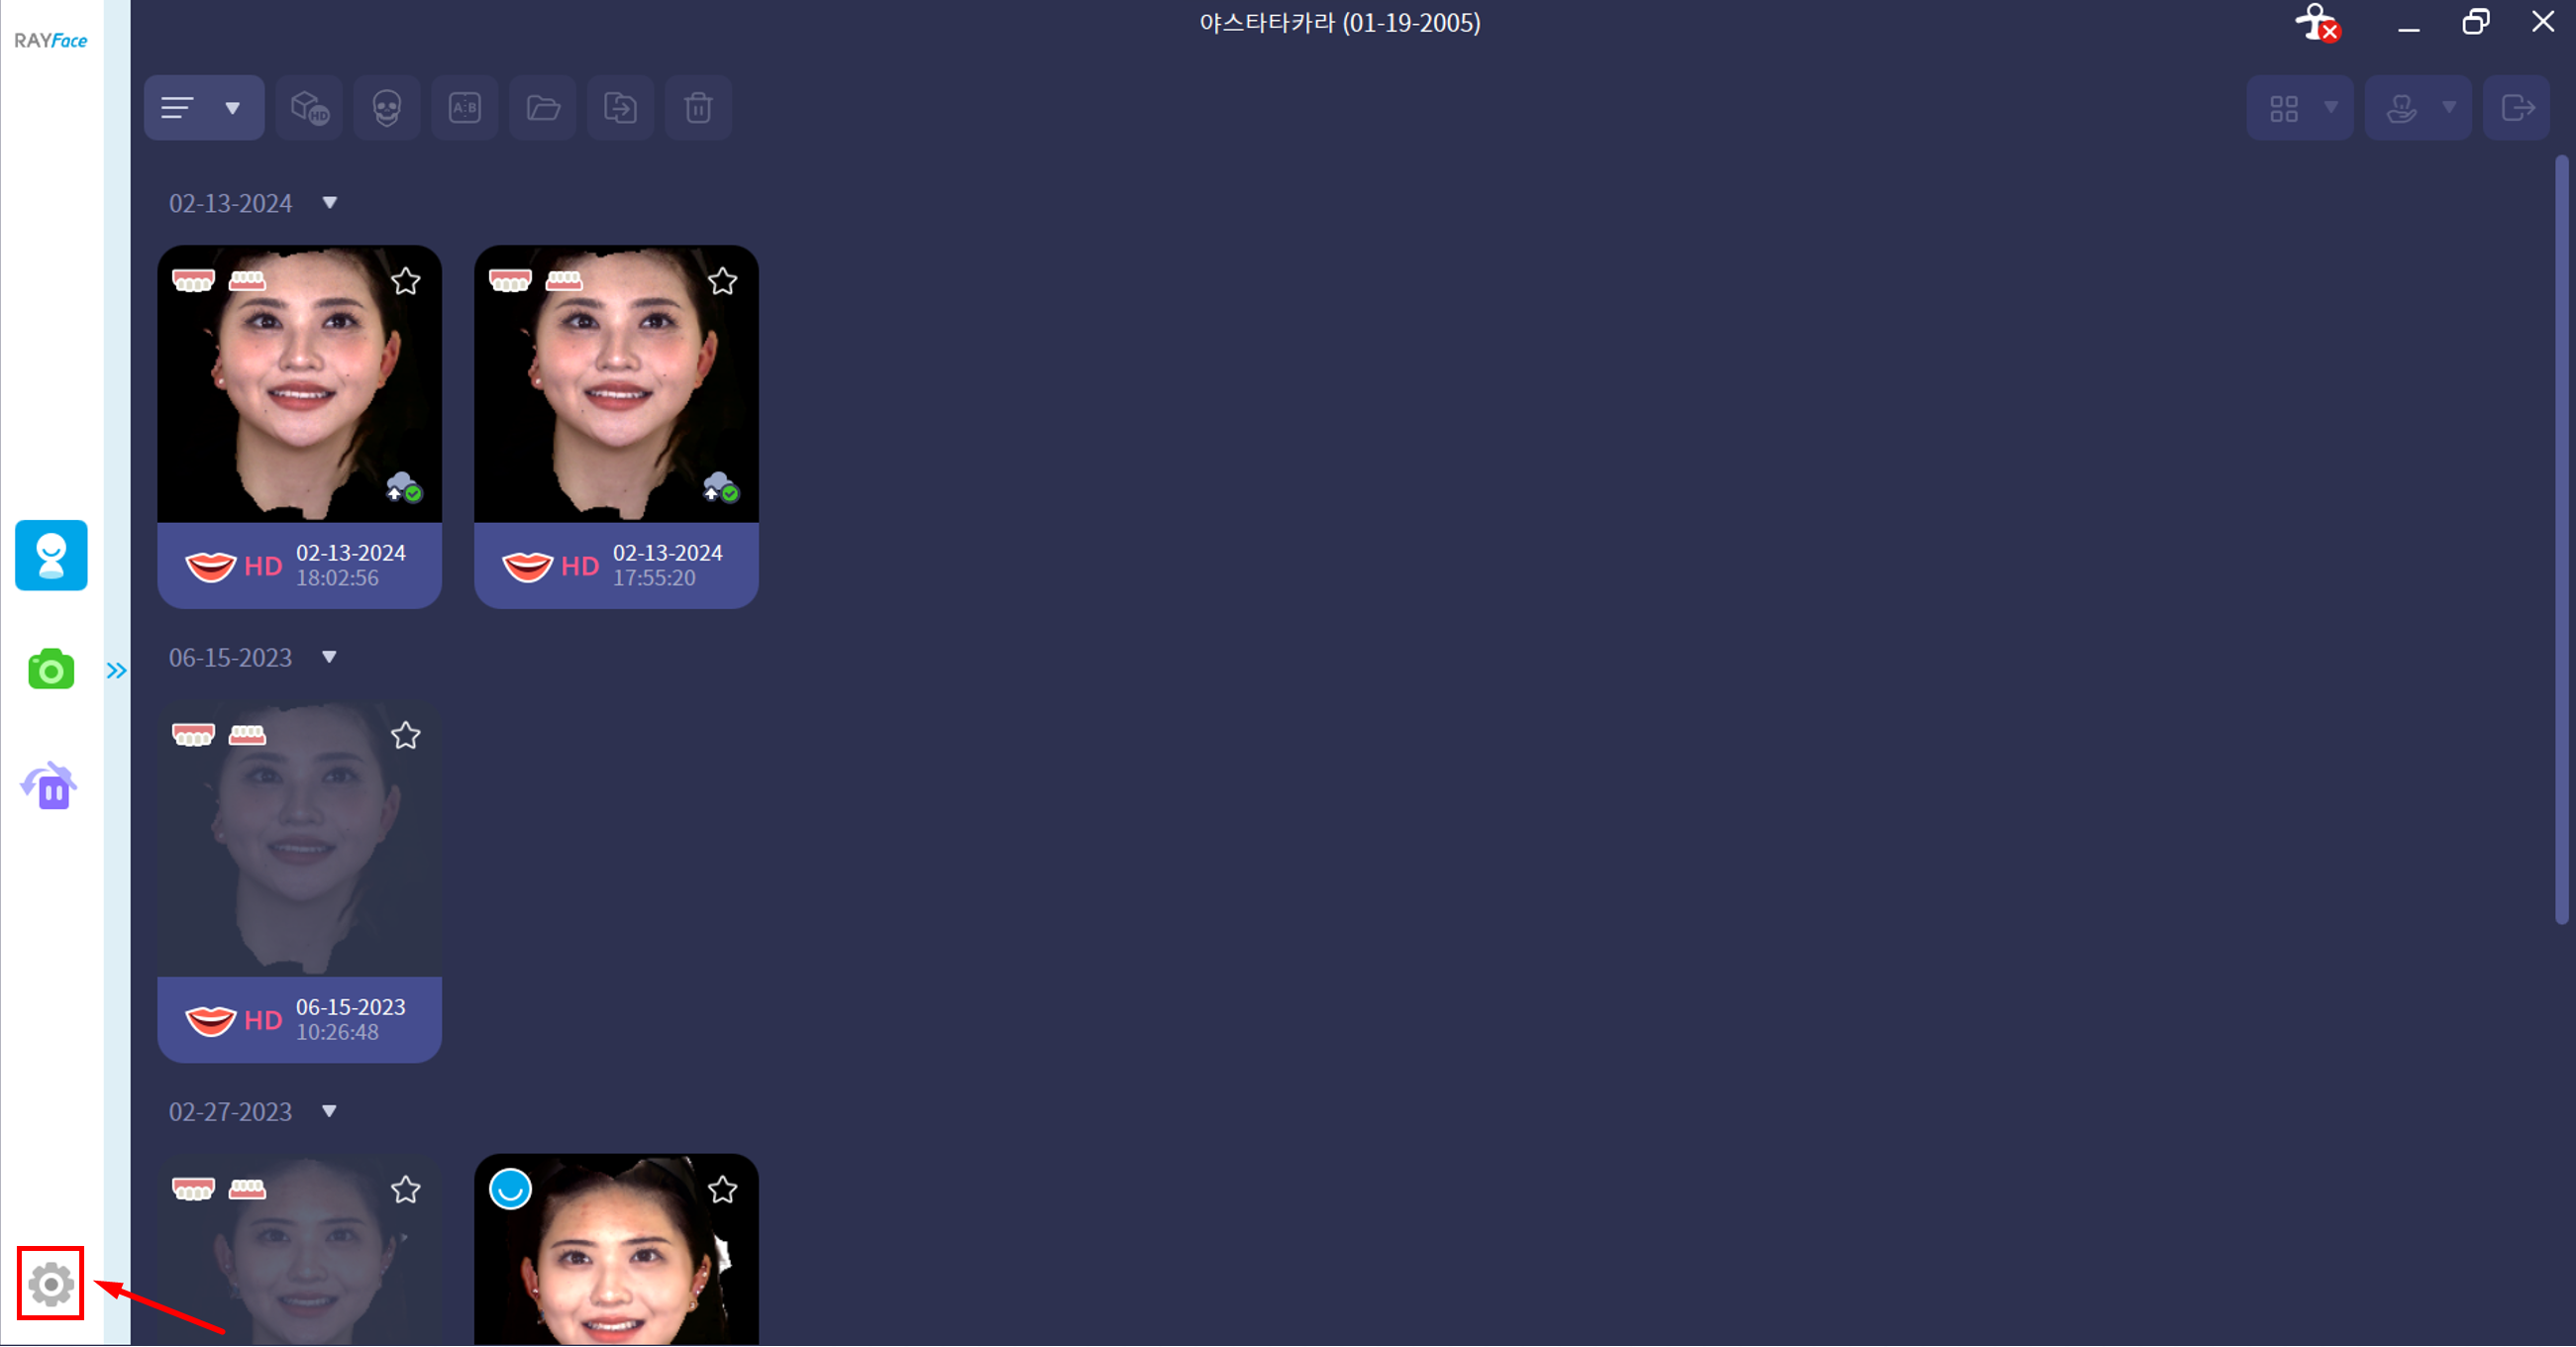
- Log in to your RAYFace software and click "Settings" button in the bottom left corner.
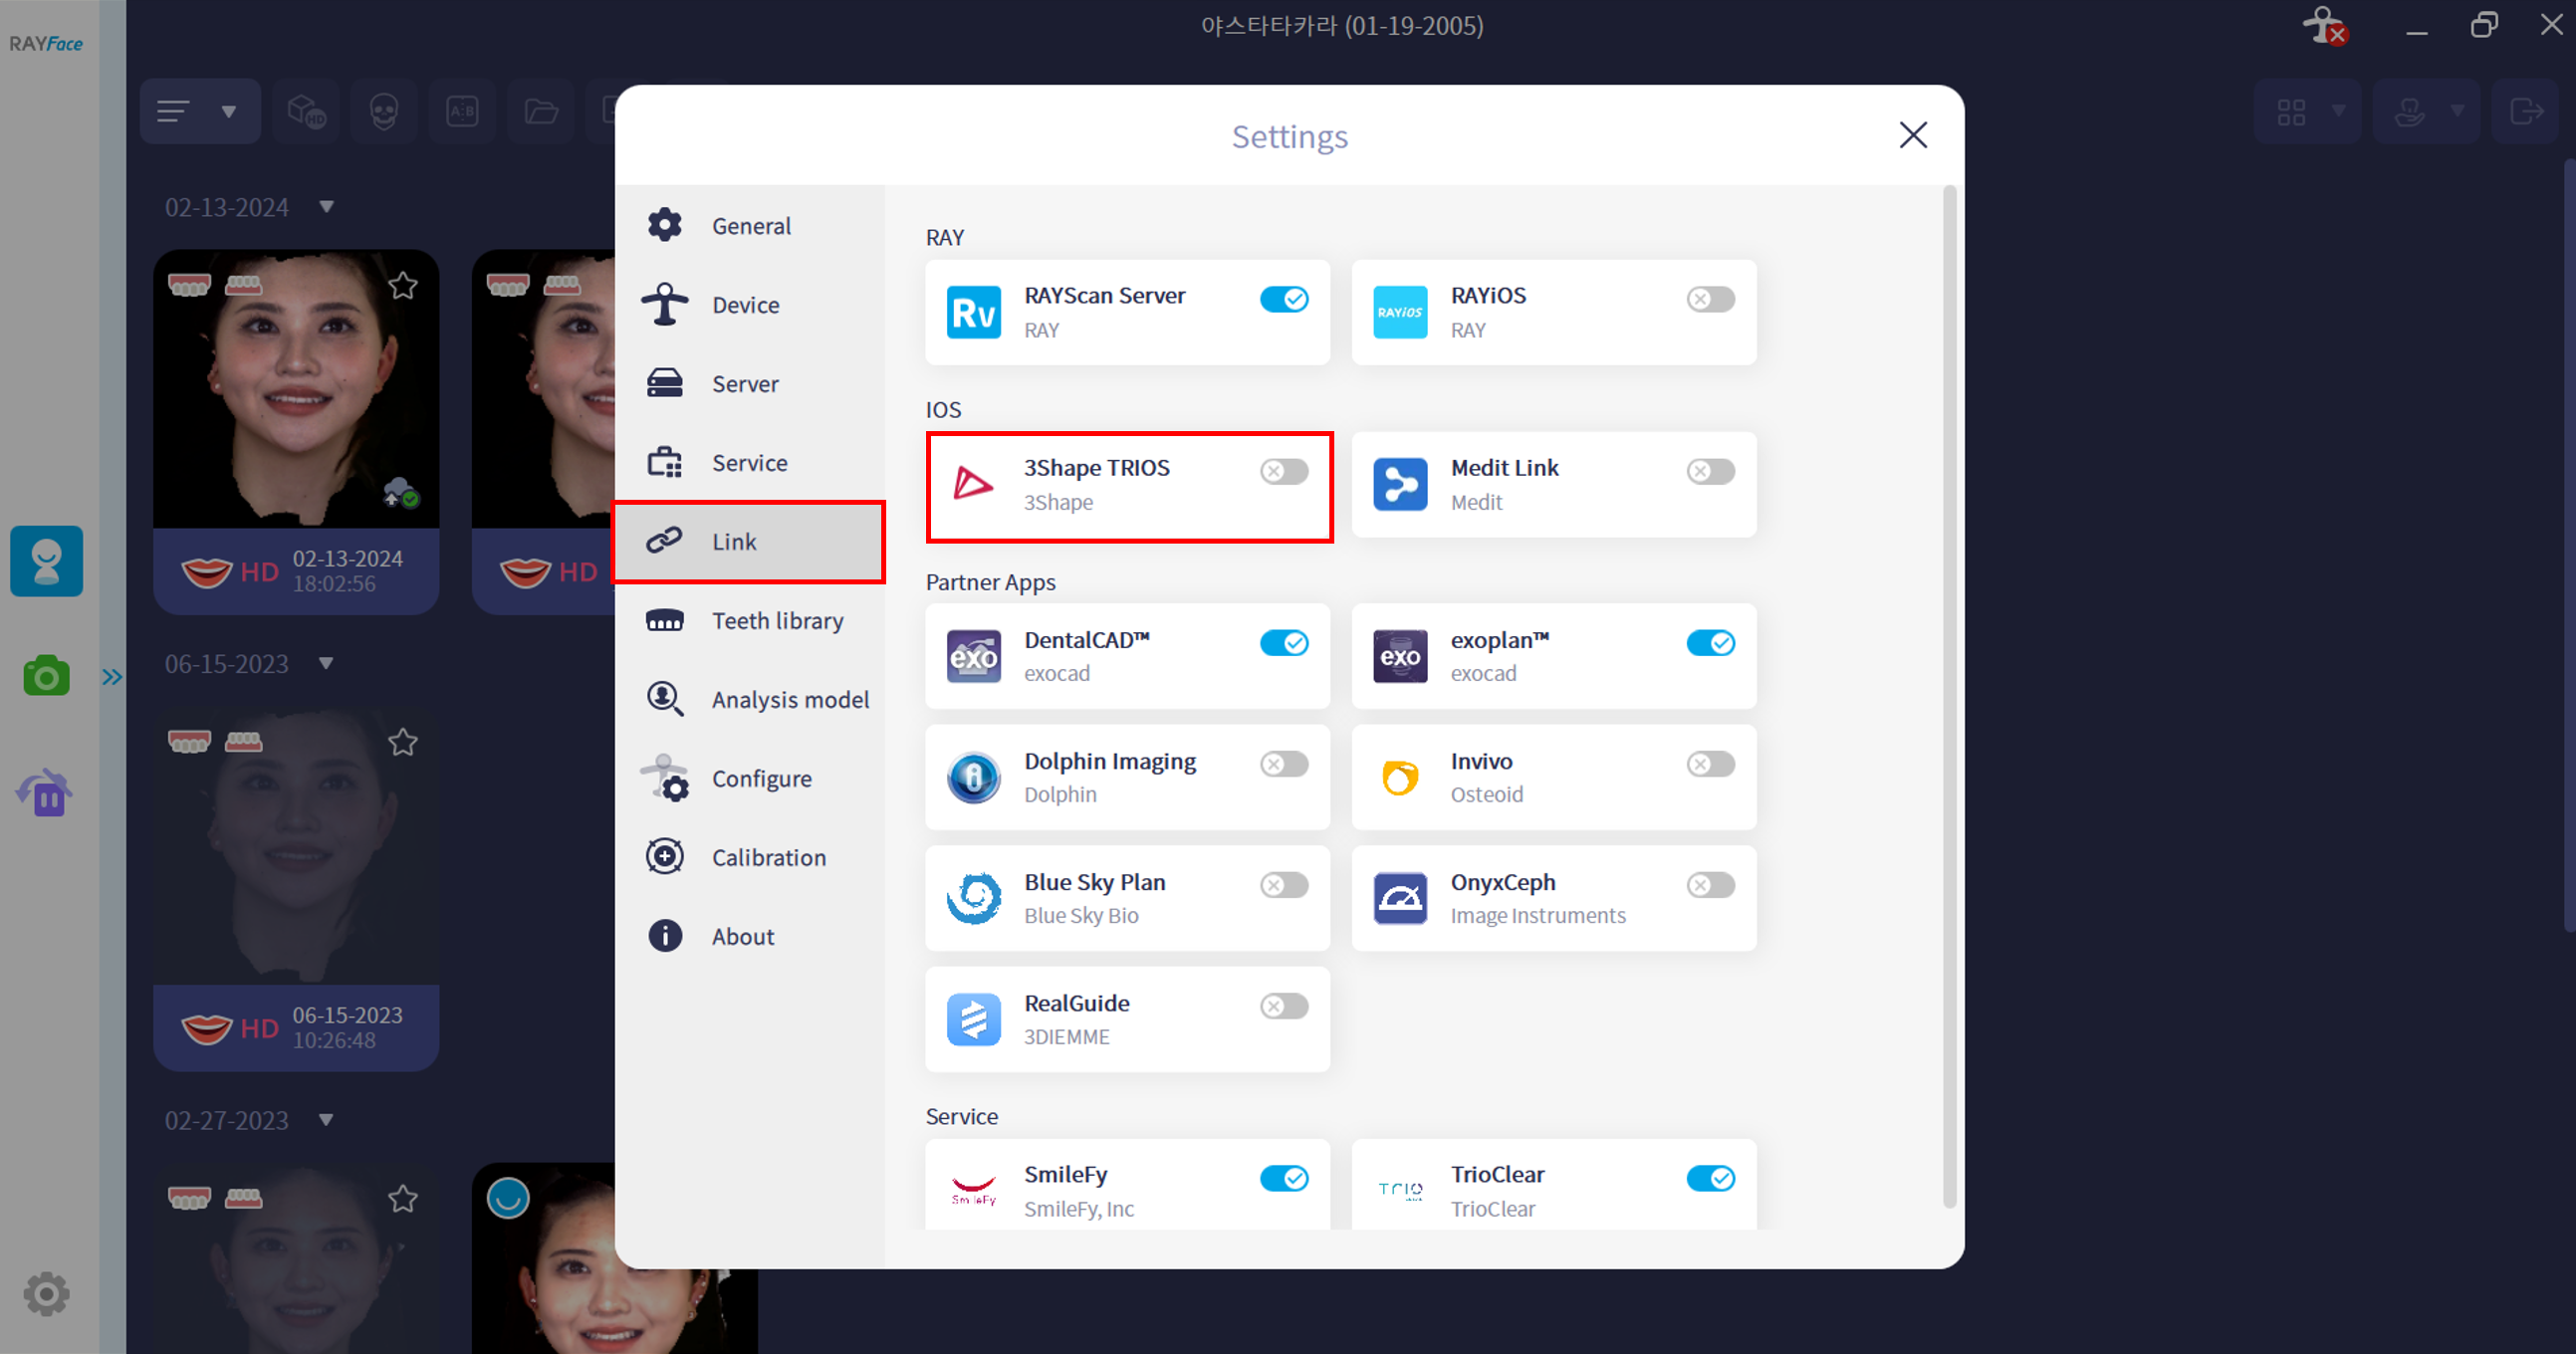
- In new pop up window, navigate to “Link” section and click 3Shape TRIOS button.
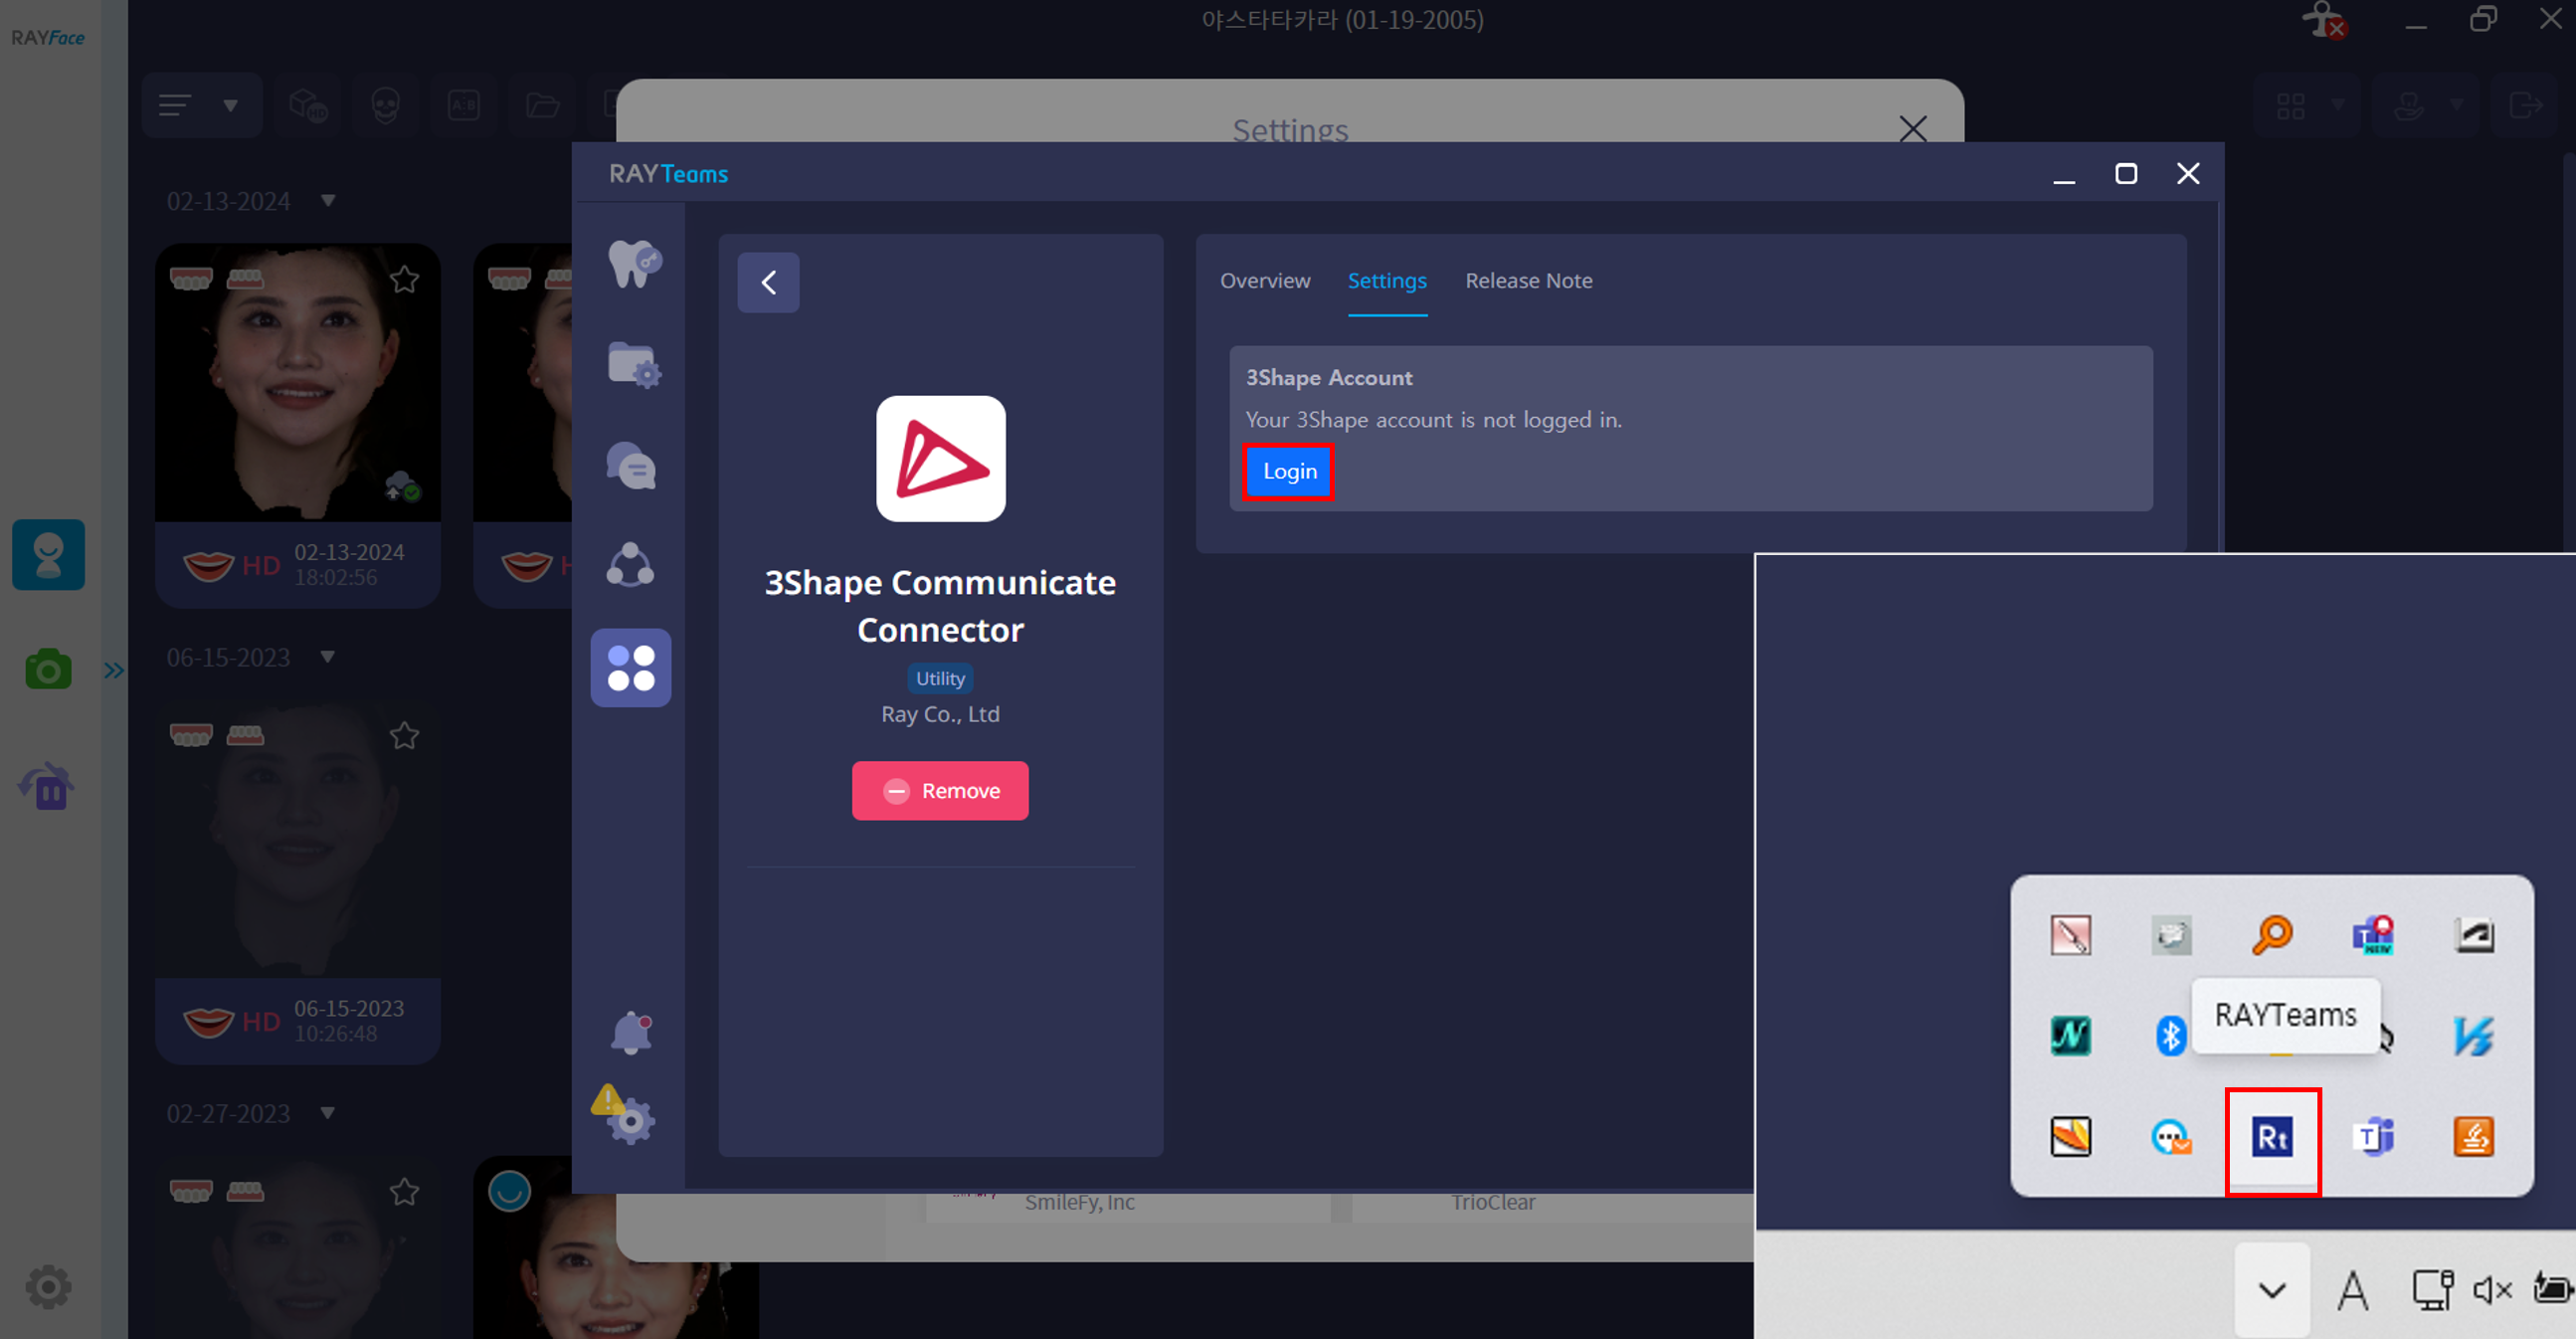
- Click Login to connect 3Shape Account. If the screen does not appear, double-click the RAYTeams icon in the window tray.
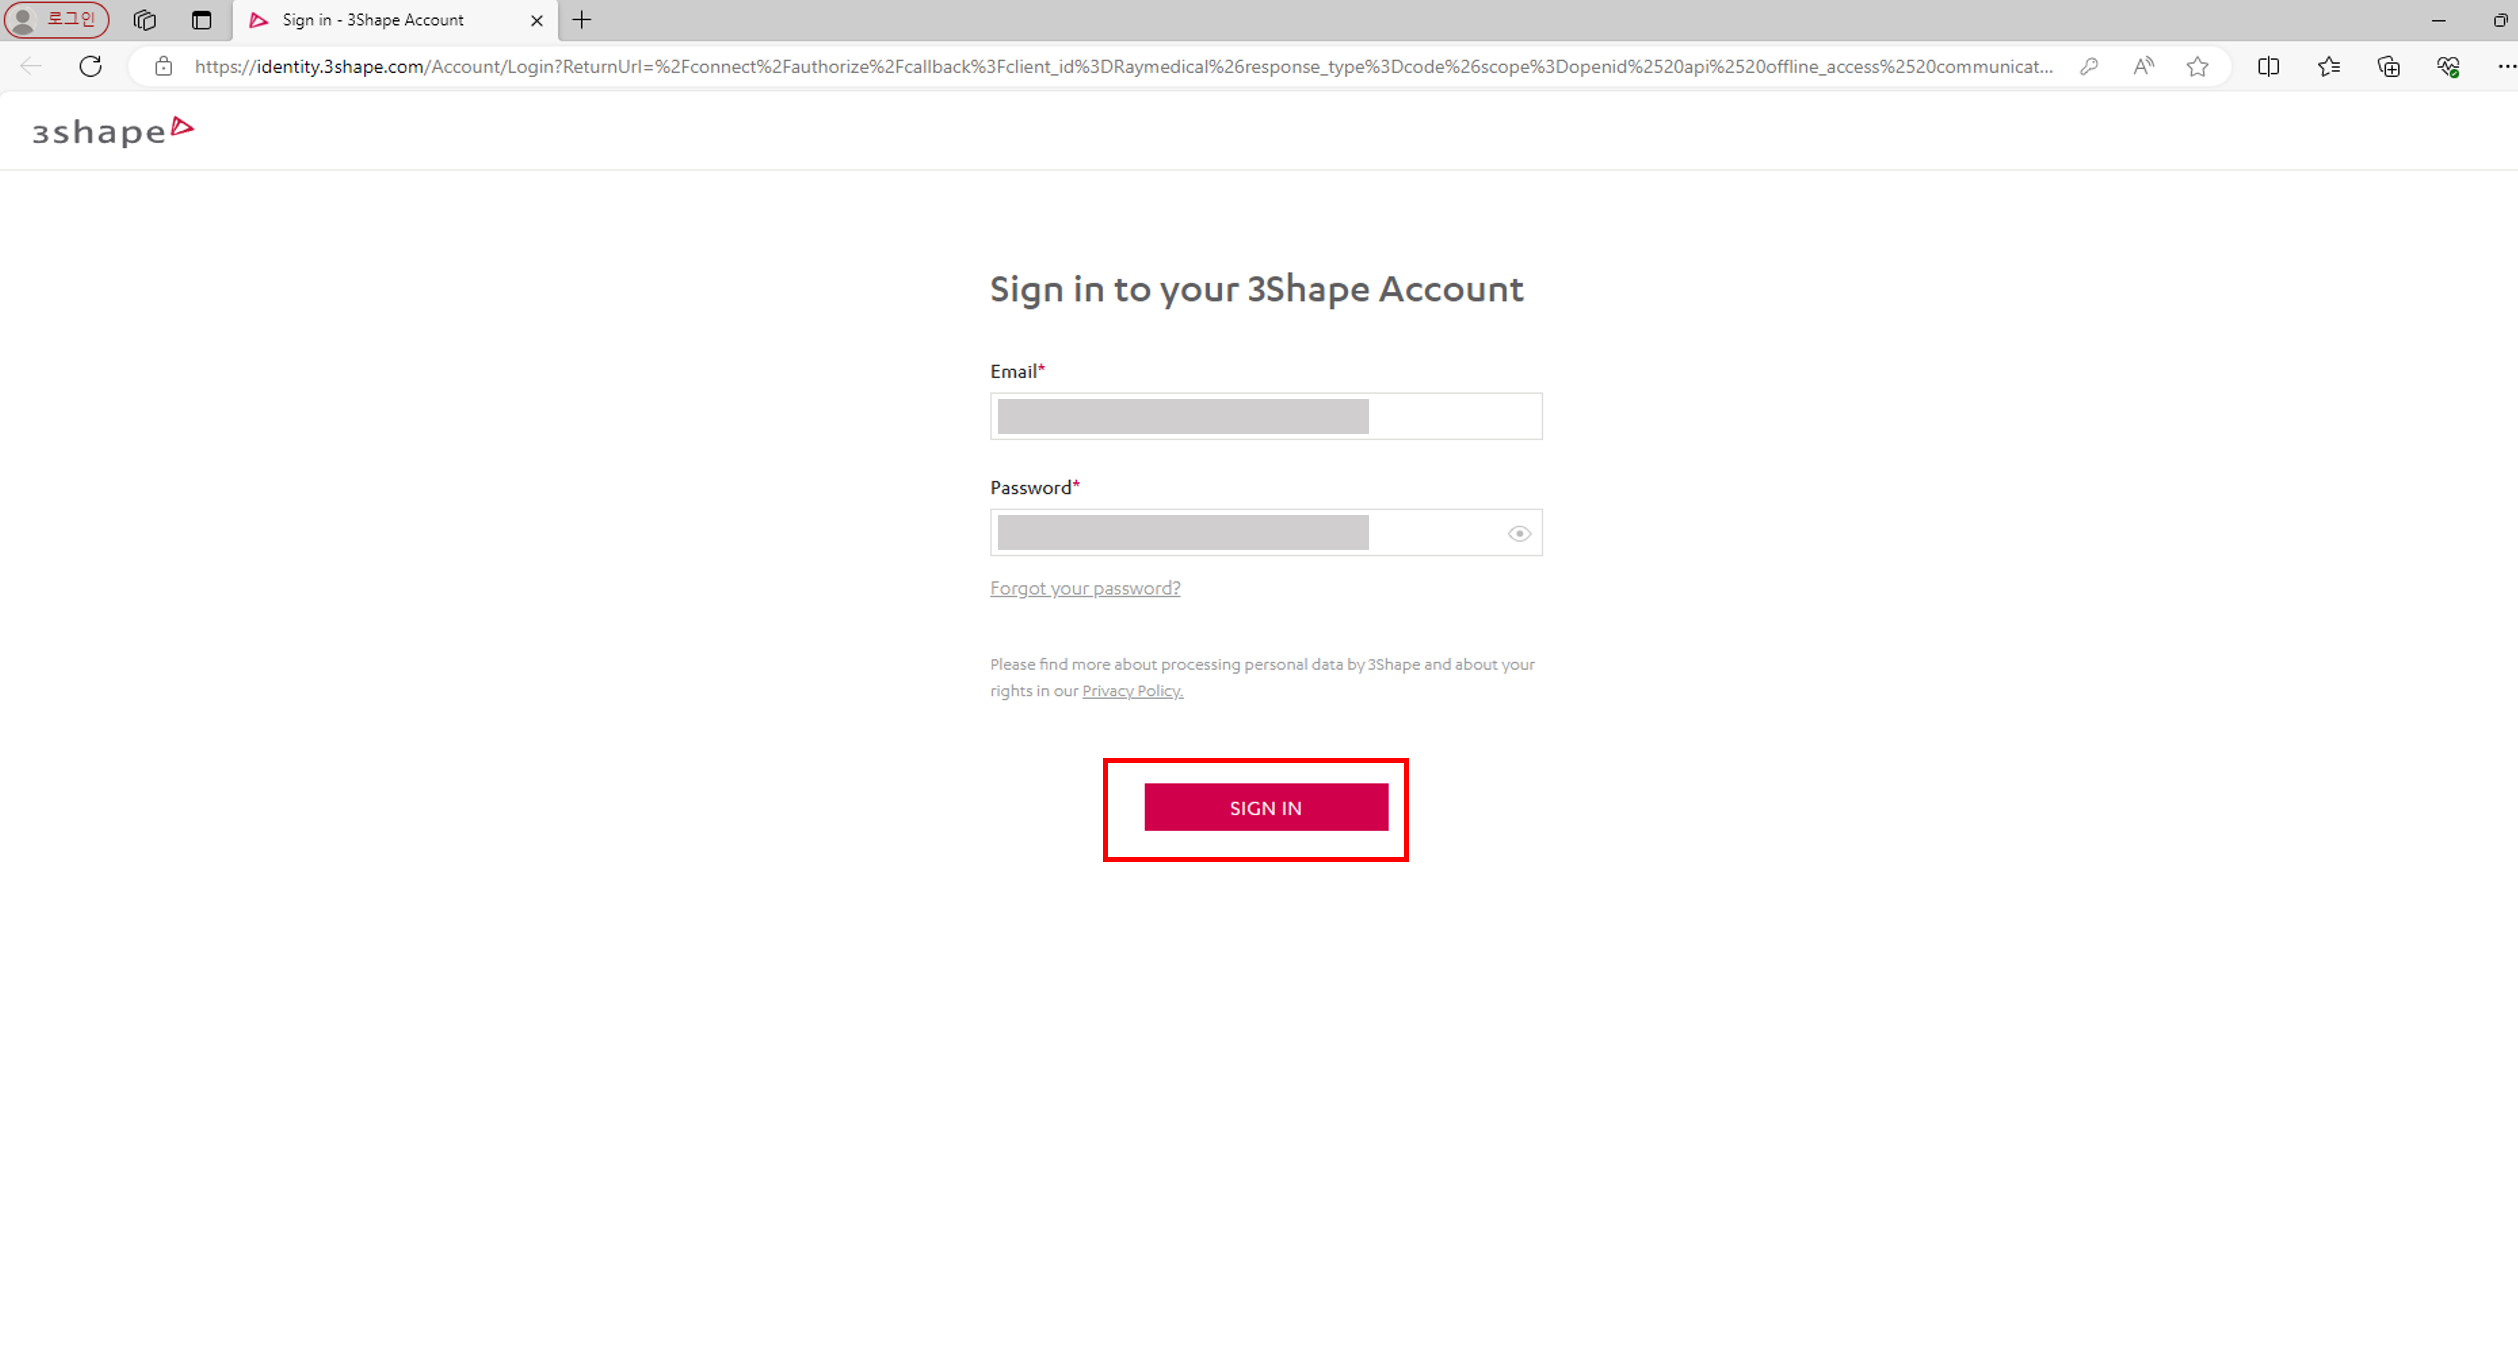
- Sign in to your 3Shape Account.
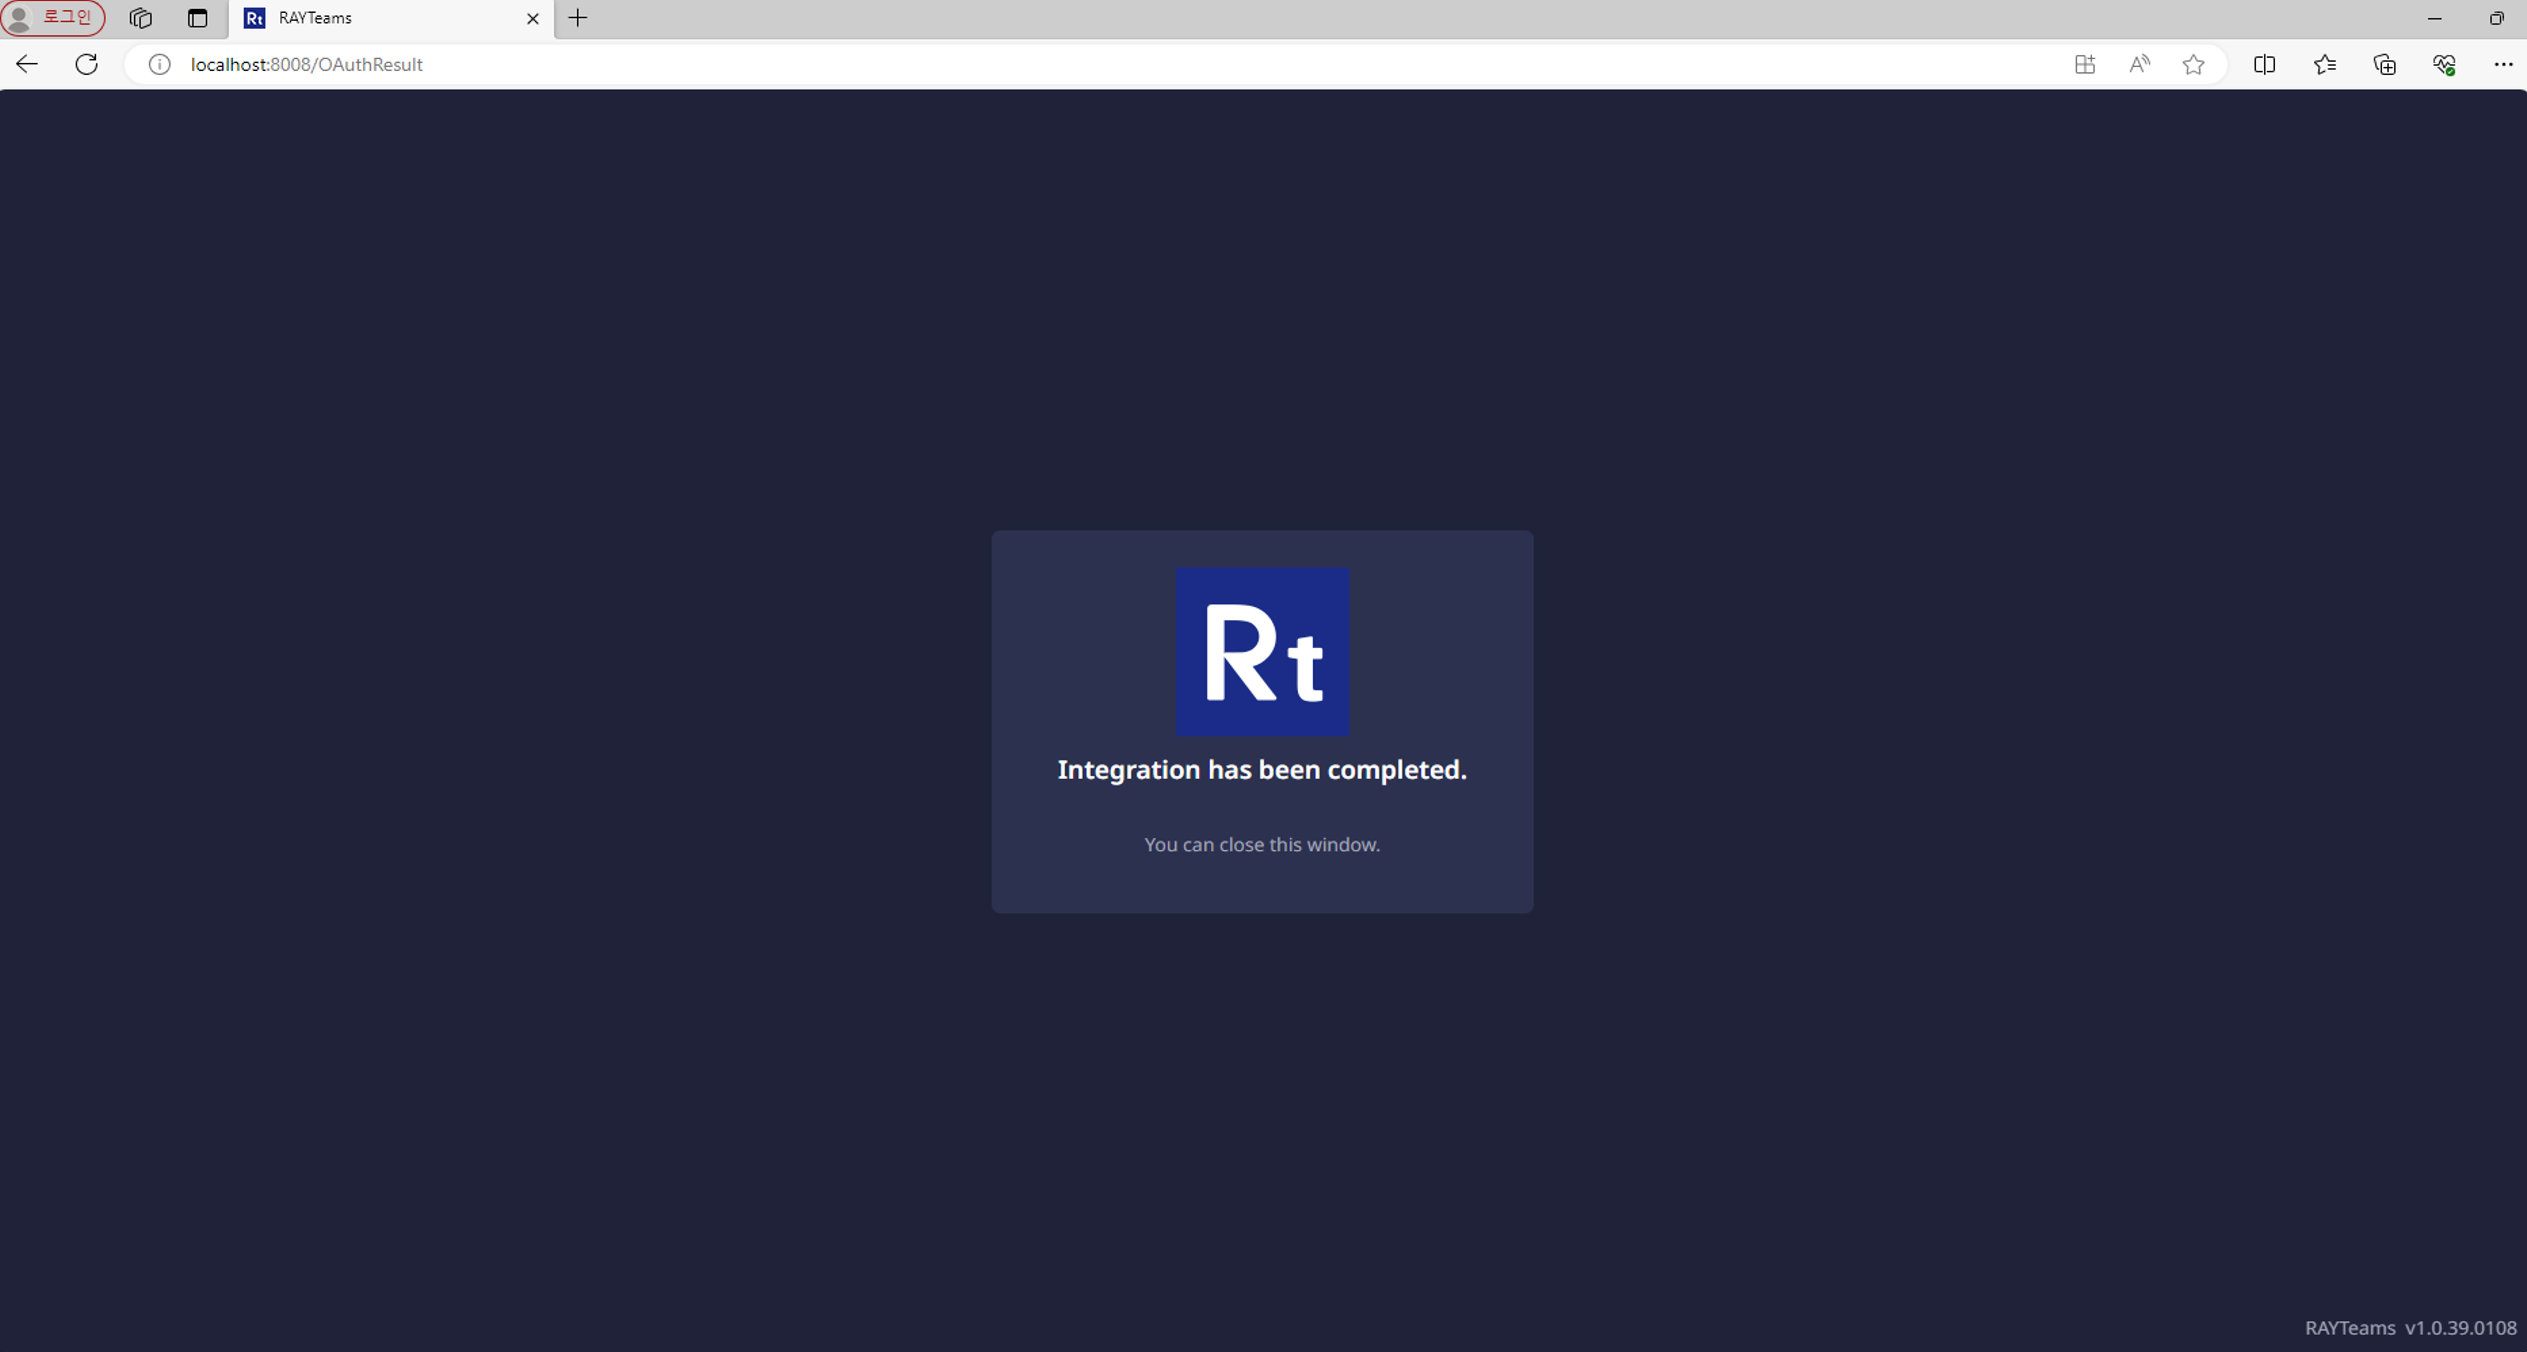
- Once your 3Shape Account is paired with RAYFace Software, you would see the “Integration has been complete” message.
Create case in 3Shape Unite and send to RAYFace
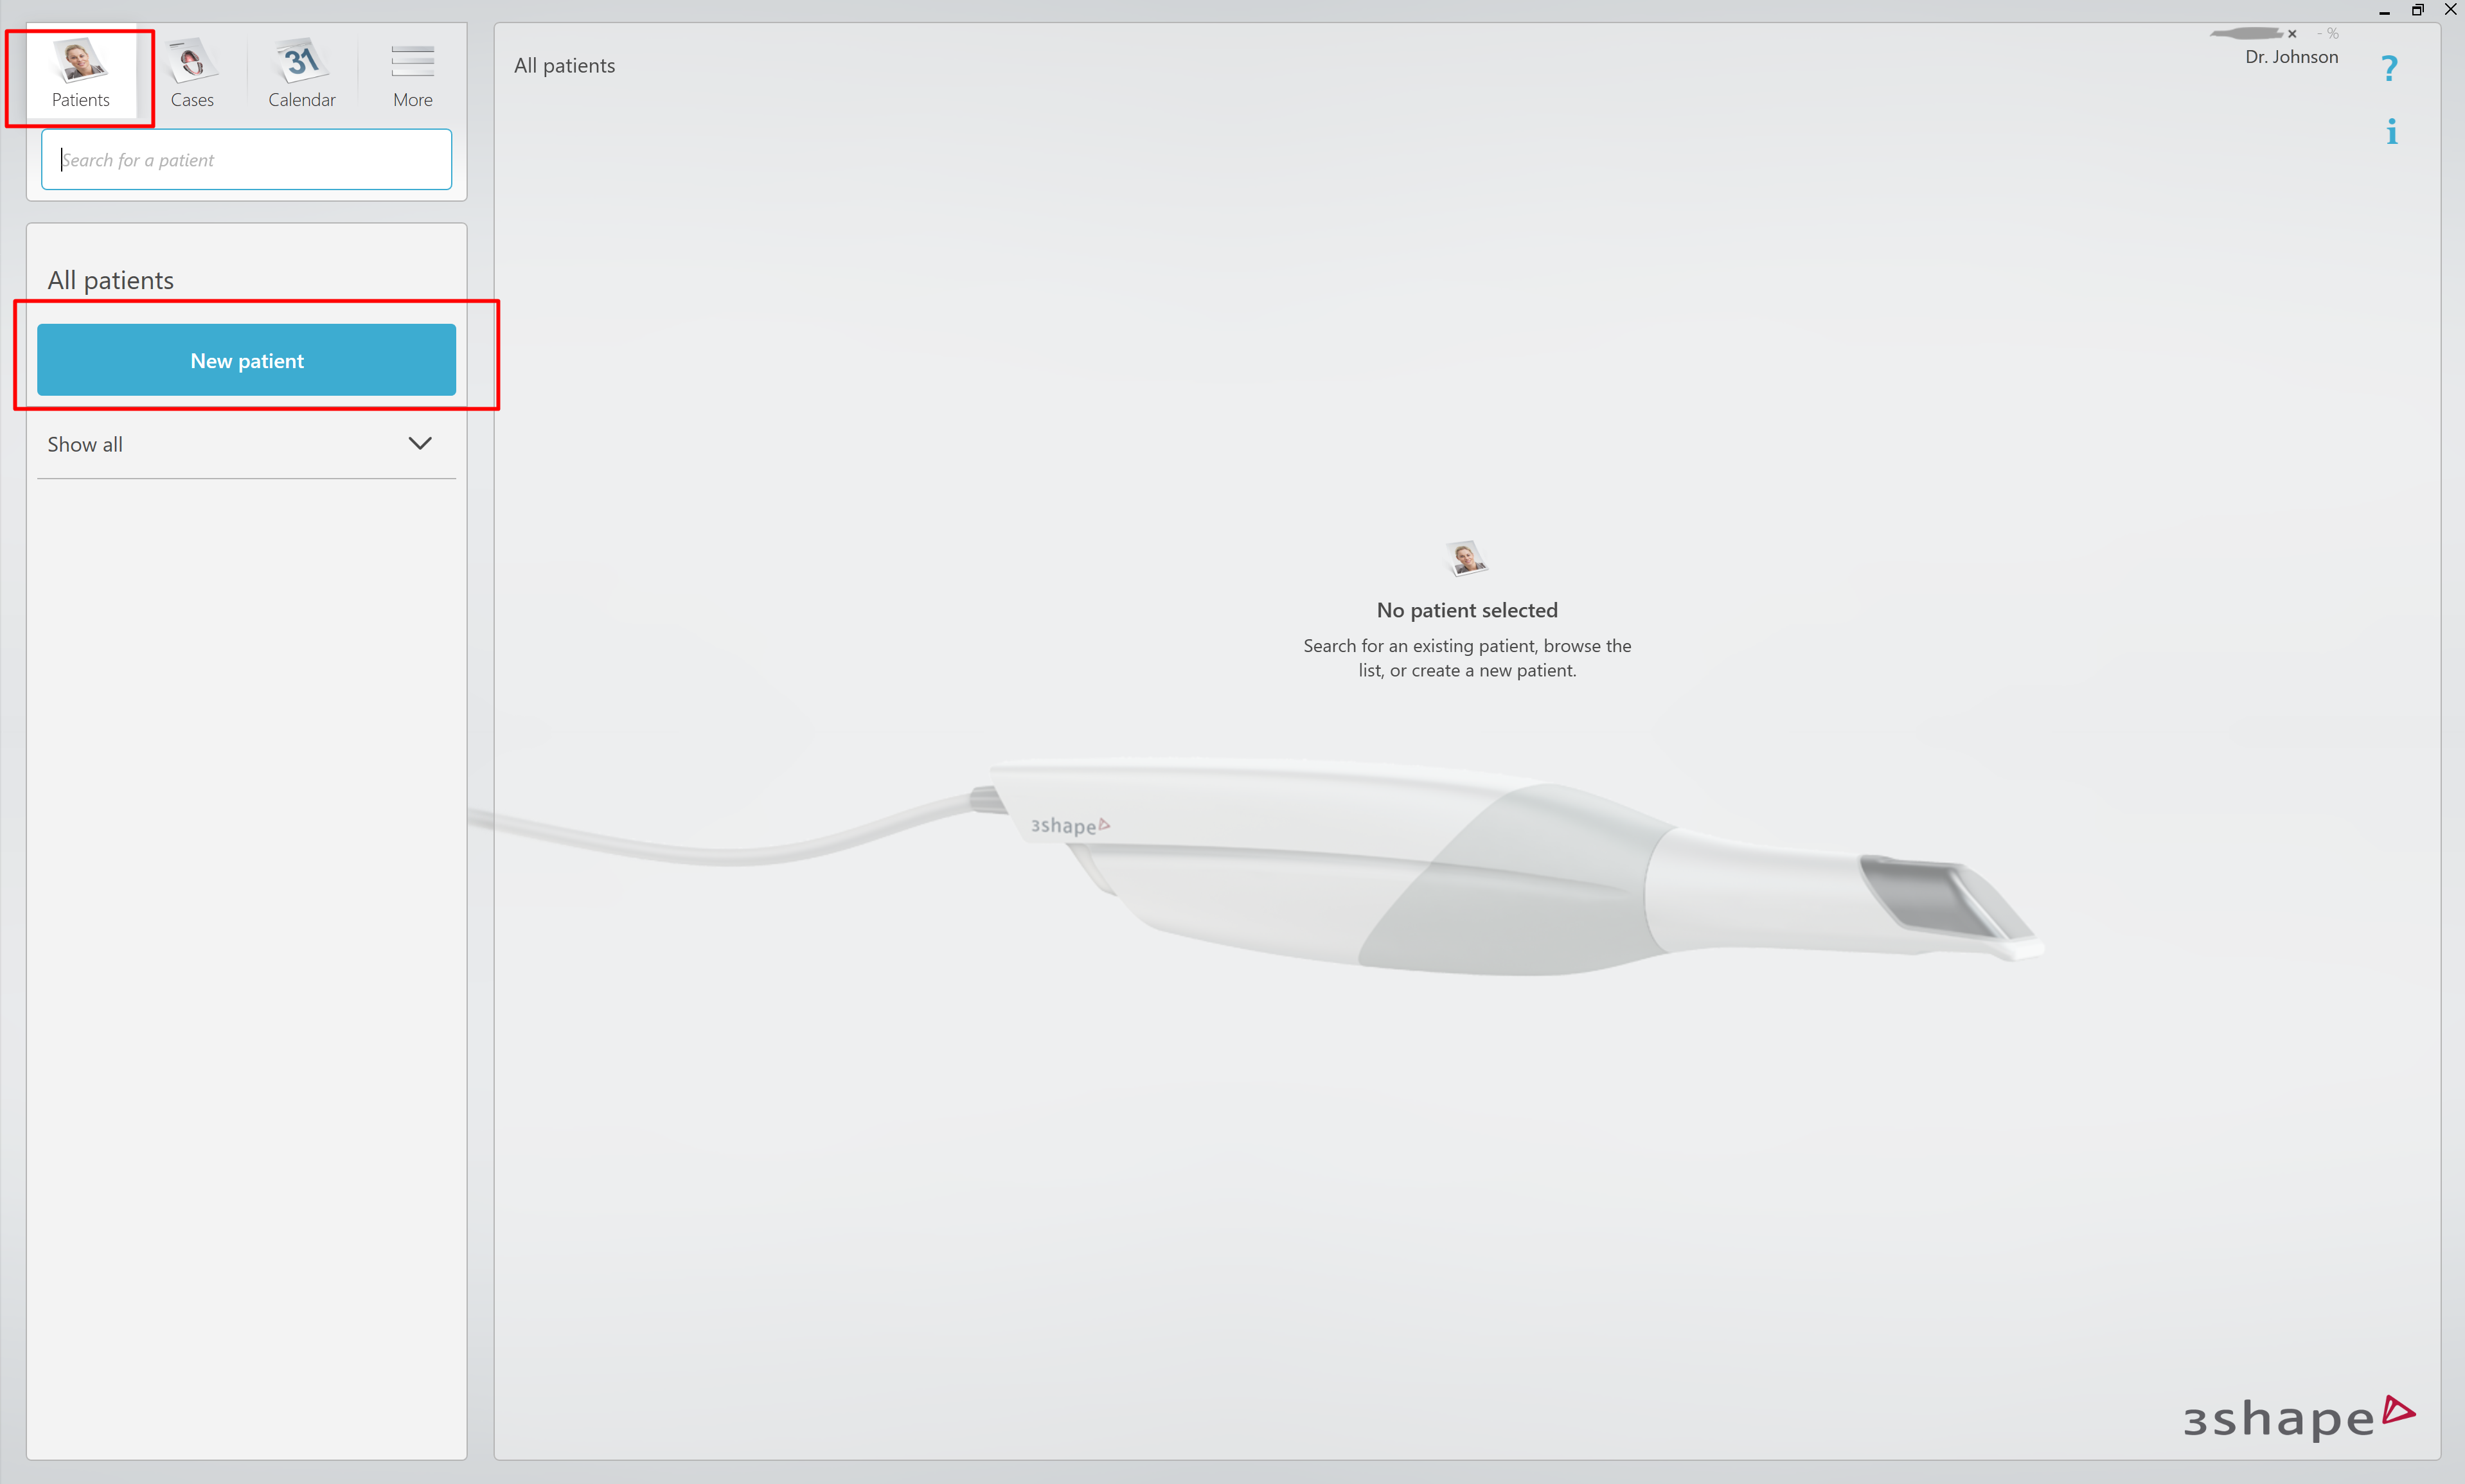
- Select the Patients tab in the upper left corner of Unite.
- Create New patient or select an existing patient.
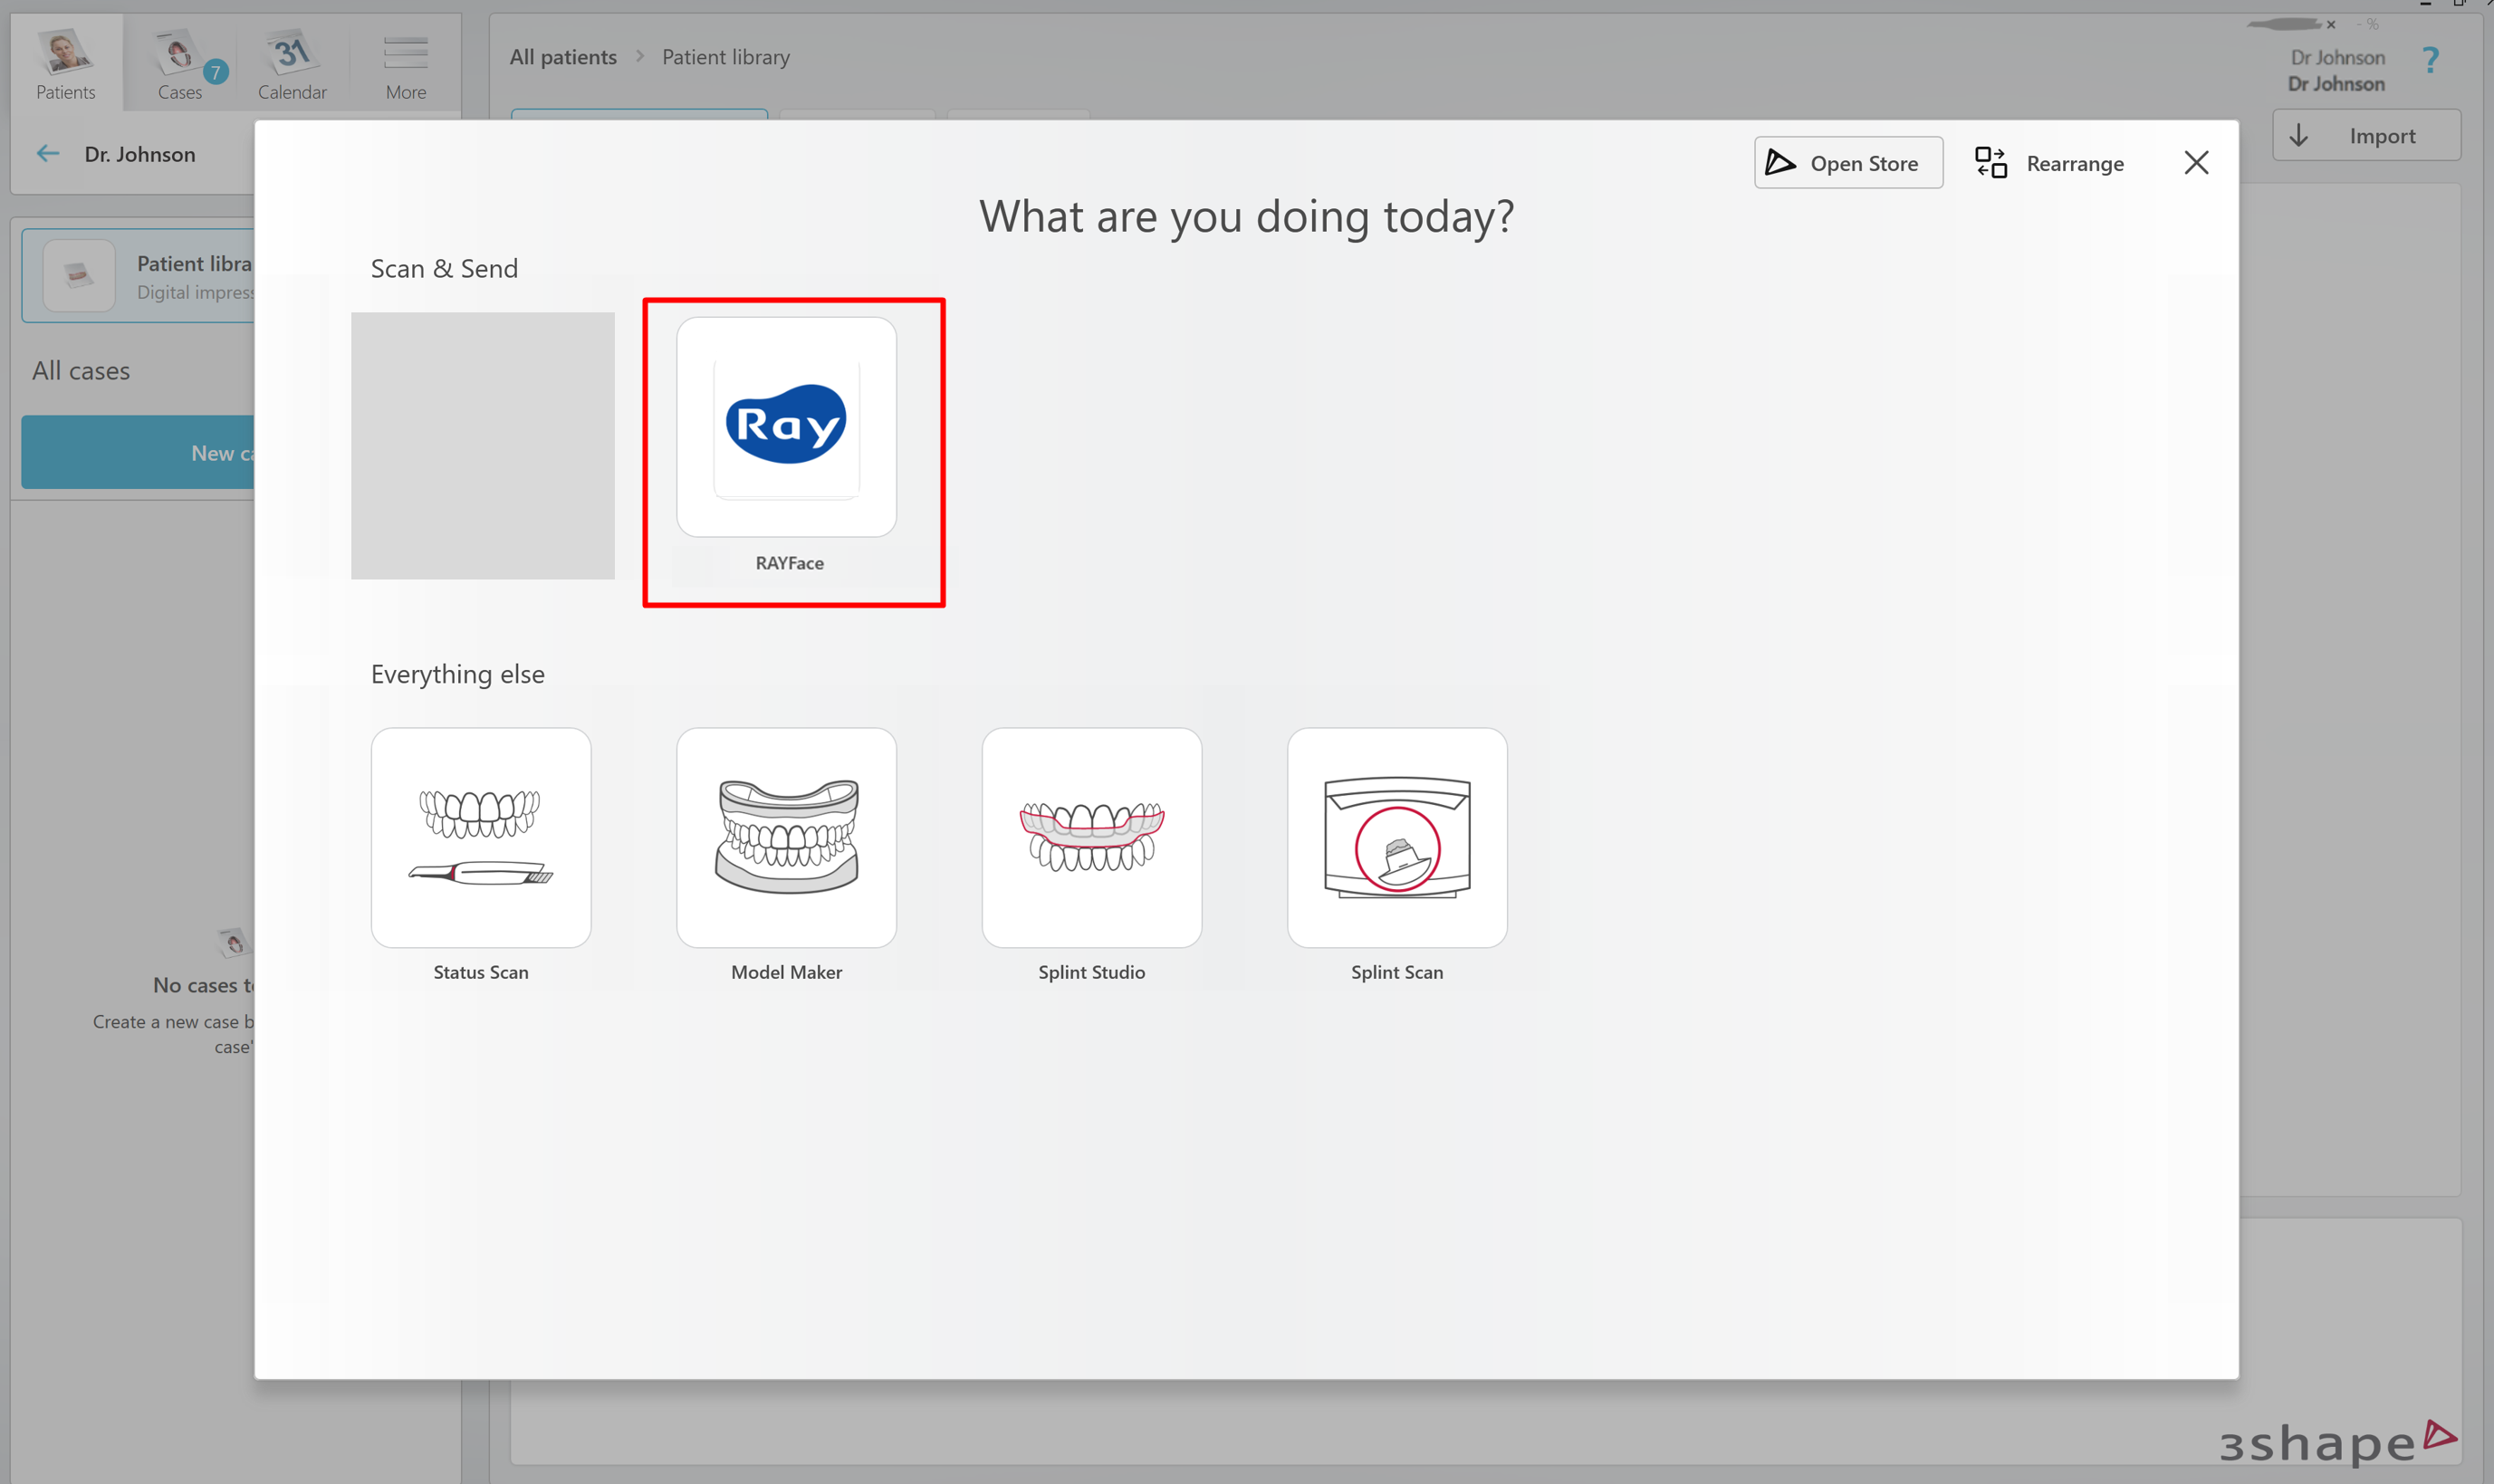
- Once the patient is created, a new window appears.
- Under the Scan & Send menu, select RAYFace
- Choose restoration type in the Order Form and click Save
- Proceed with TRIOS scanning for the Lower, Upper jaws and a Bite scan.

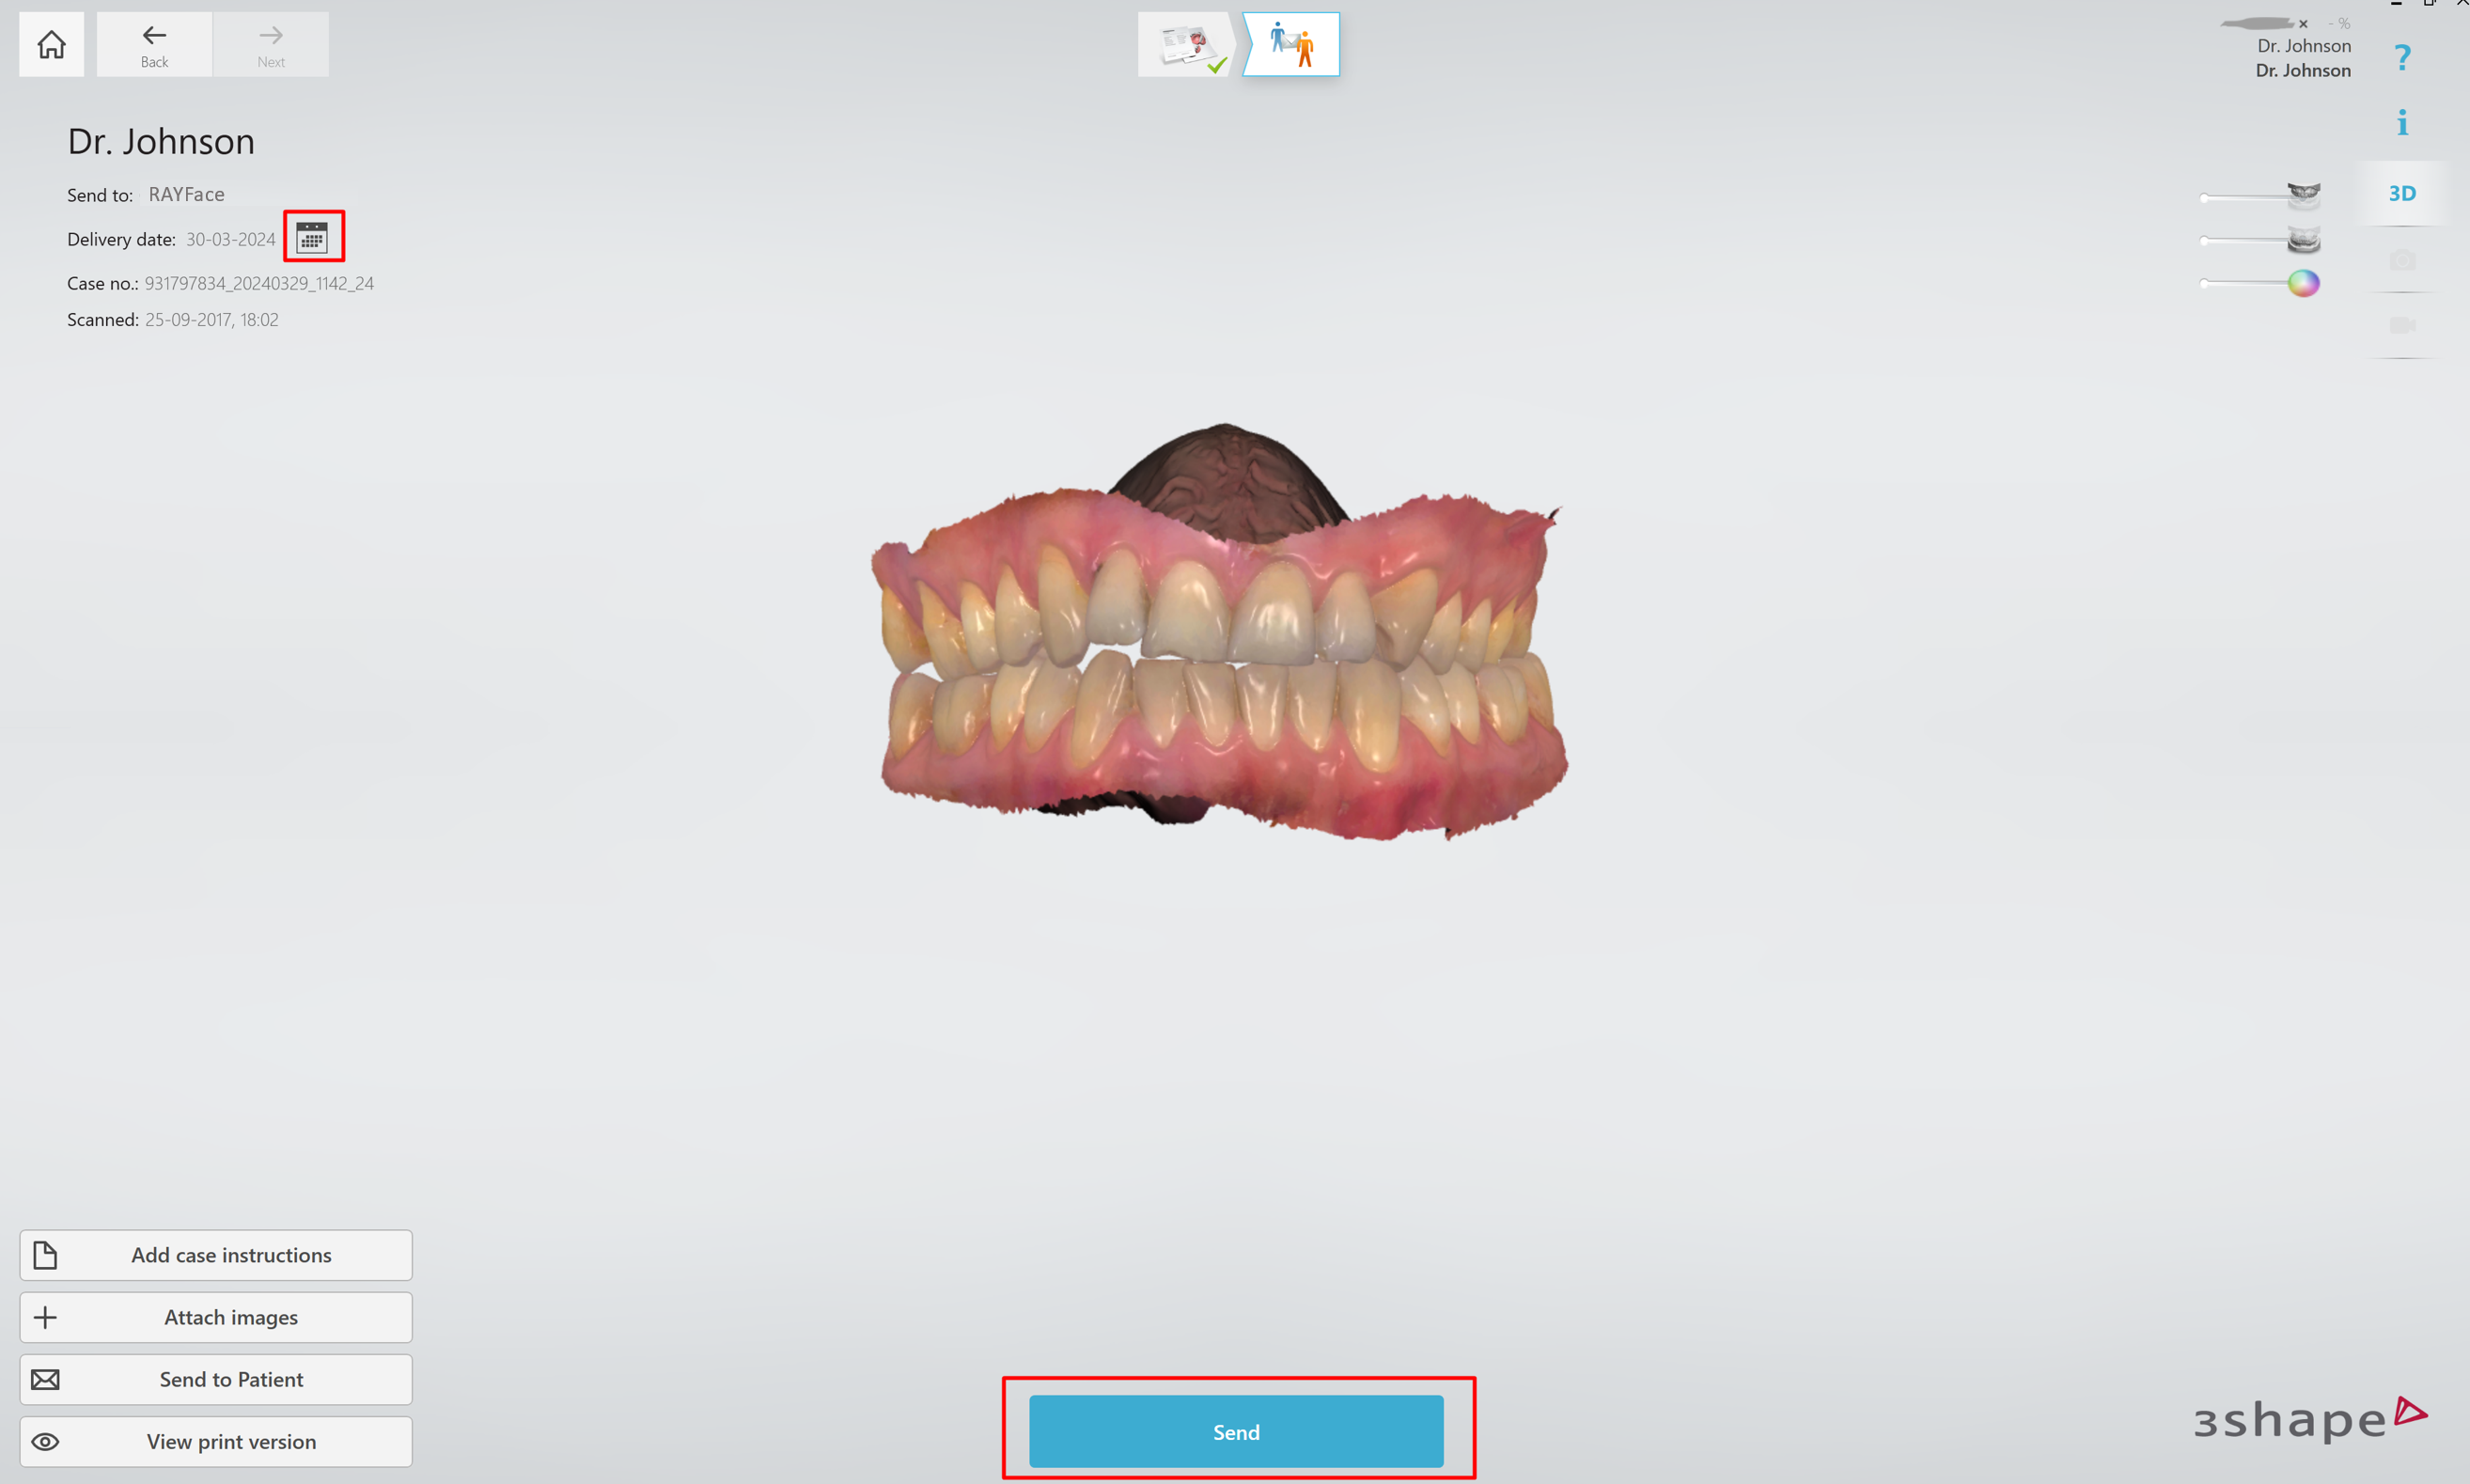
- Choose delivery date and click “Send” button.
Proceed with the workflow in RAYFace Software
- Import 3Shape scans in RAYFace Software.
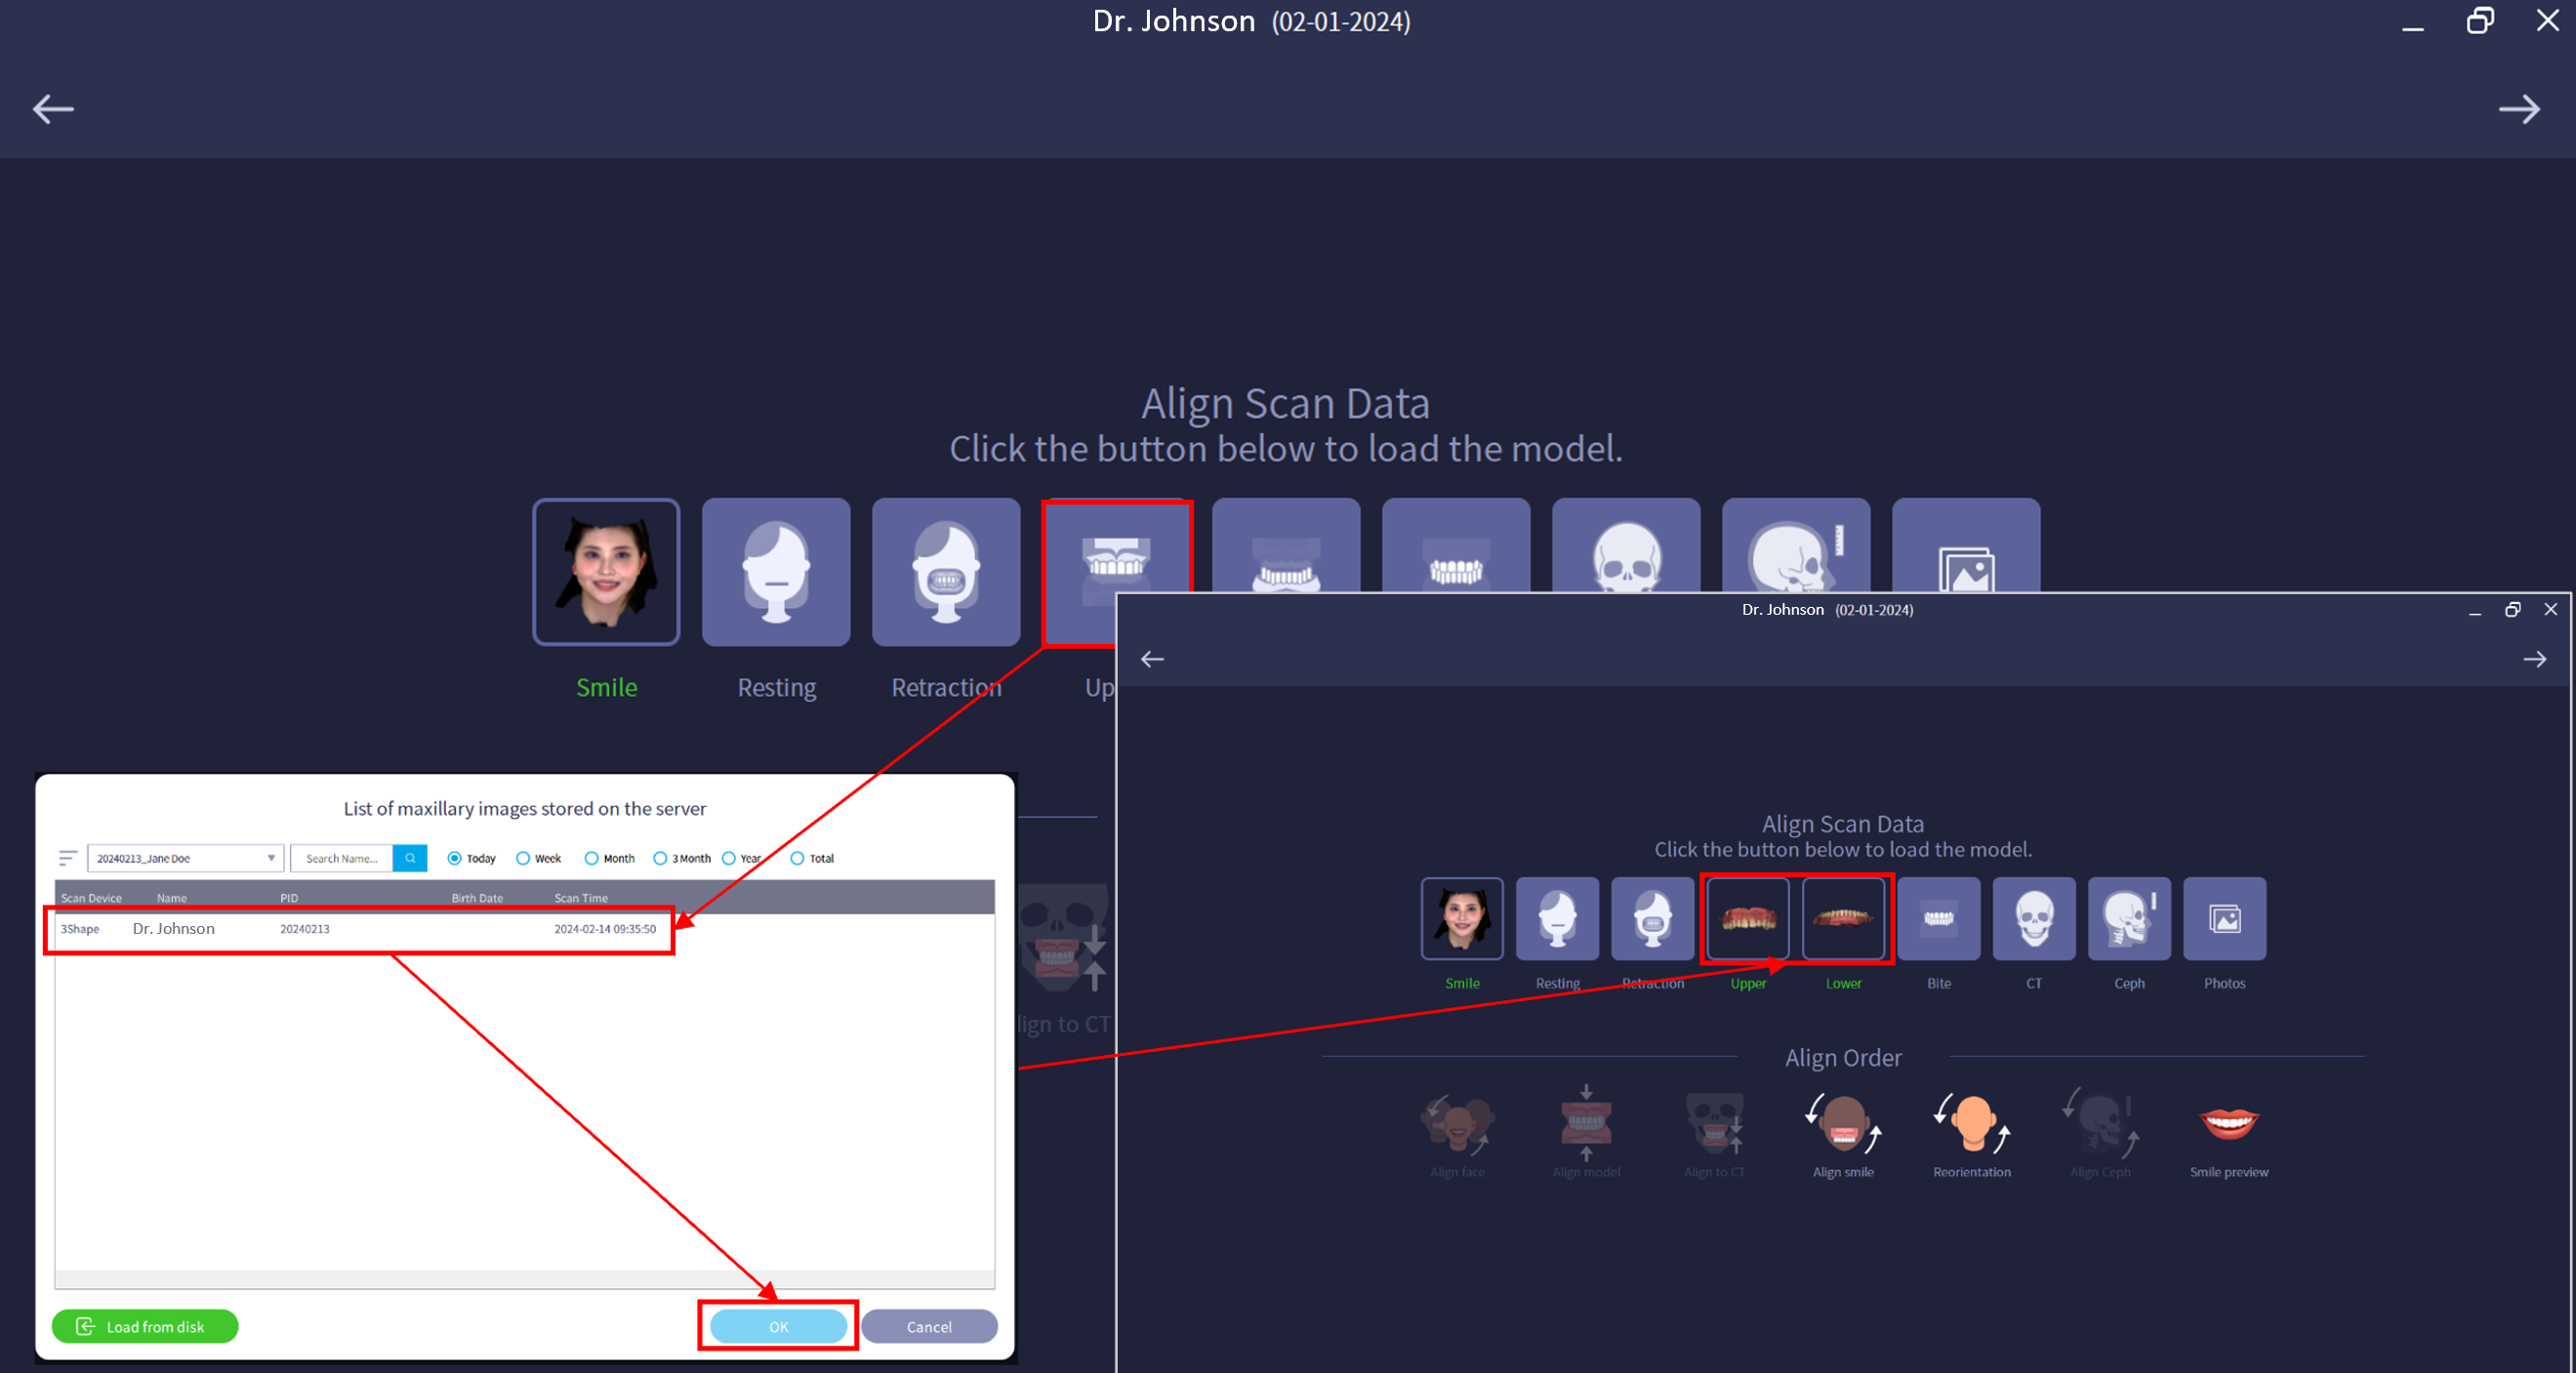
-
Merge face scan data and TRIOS scan data in RAYFace Software.

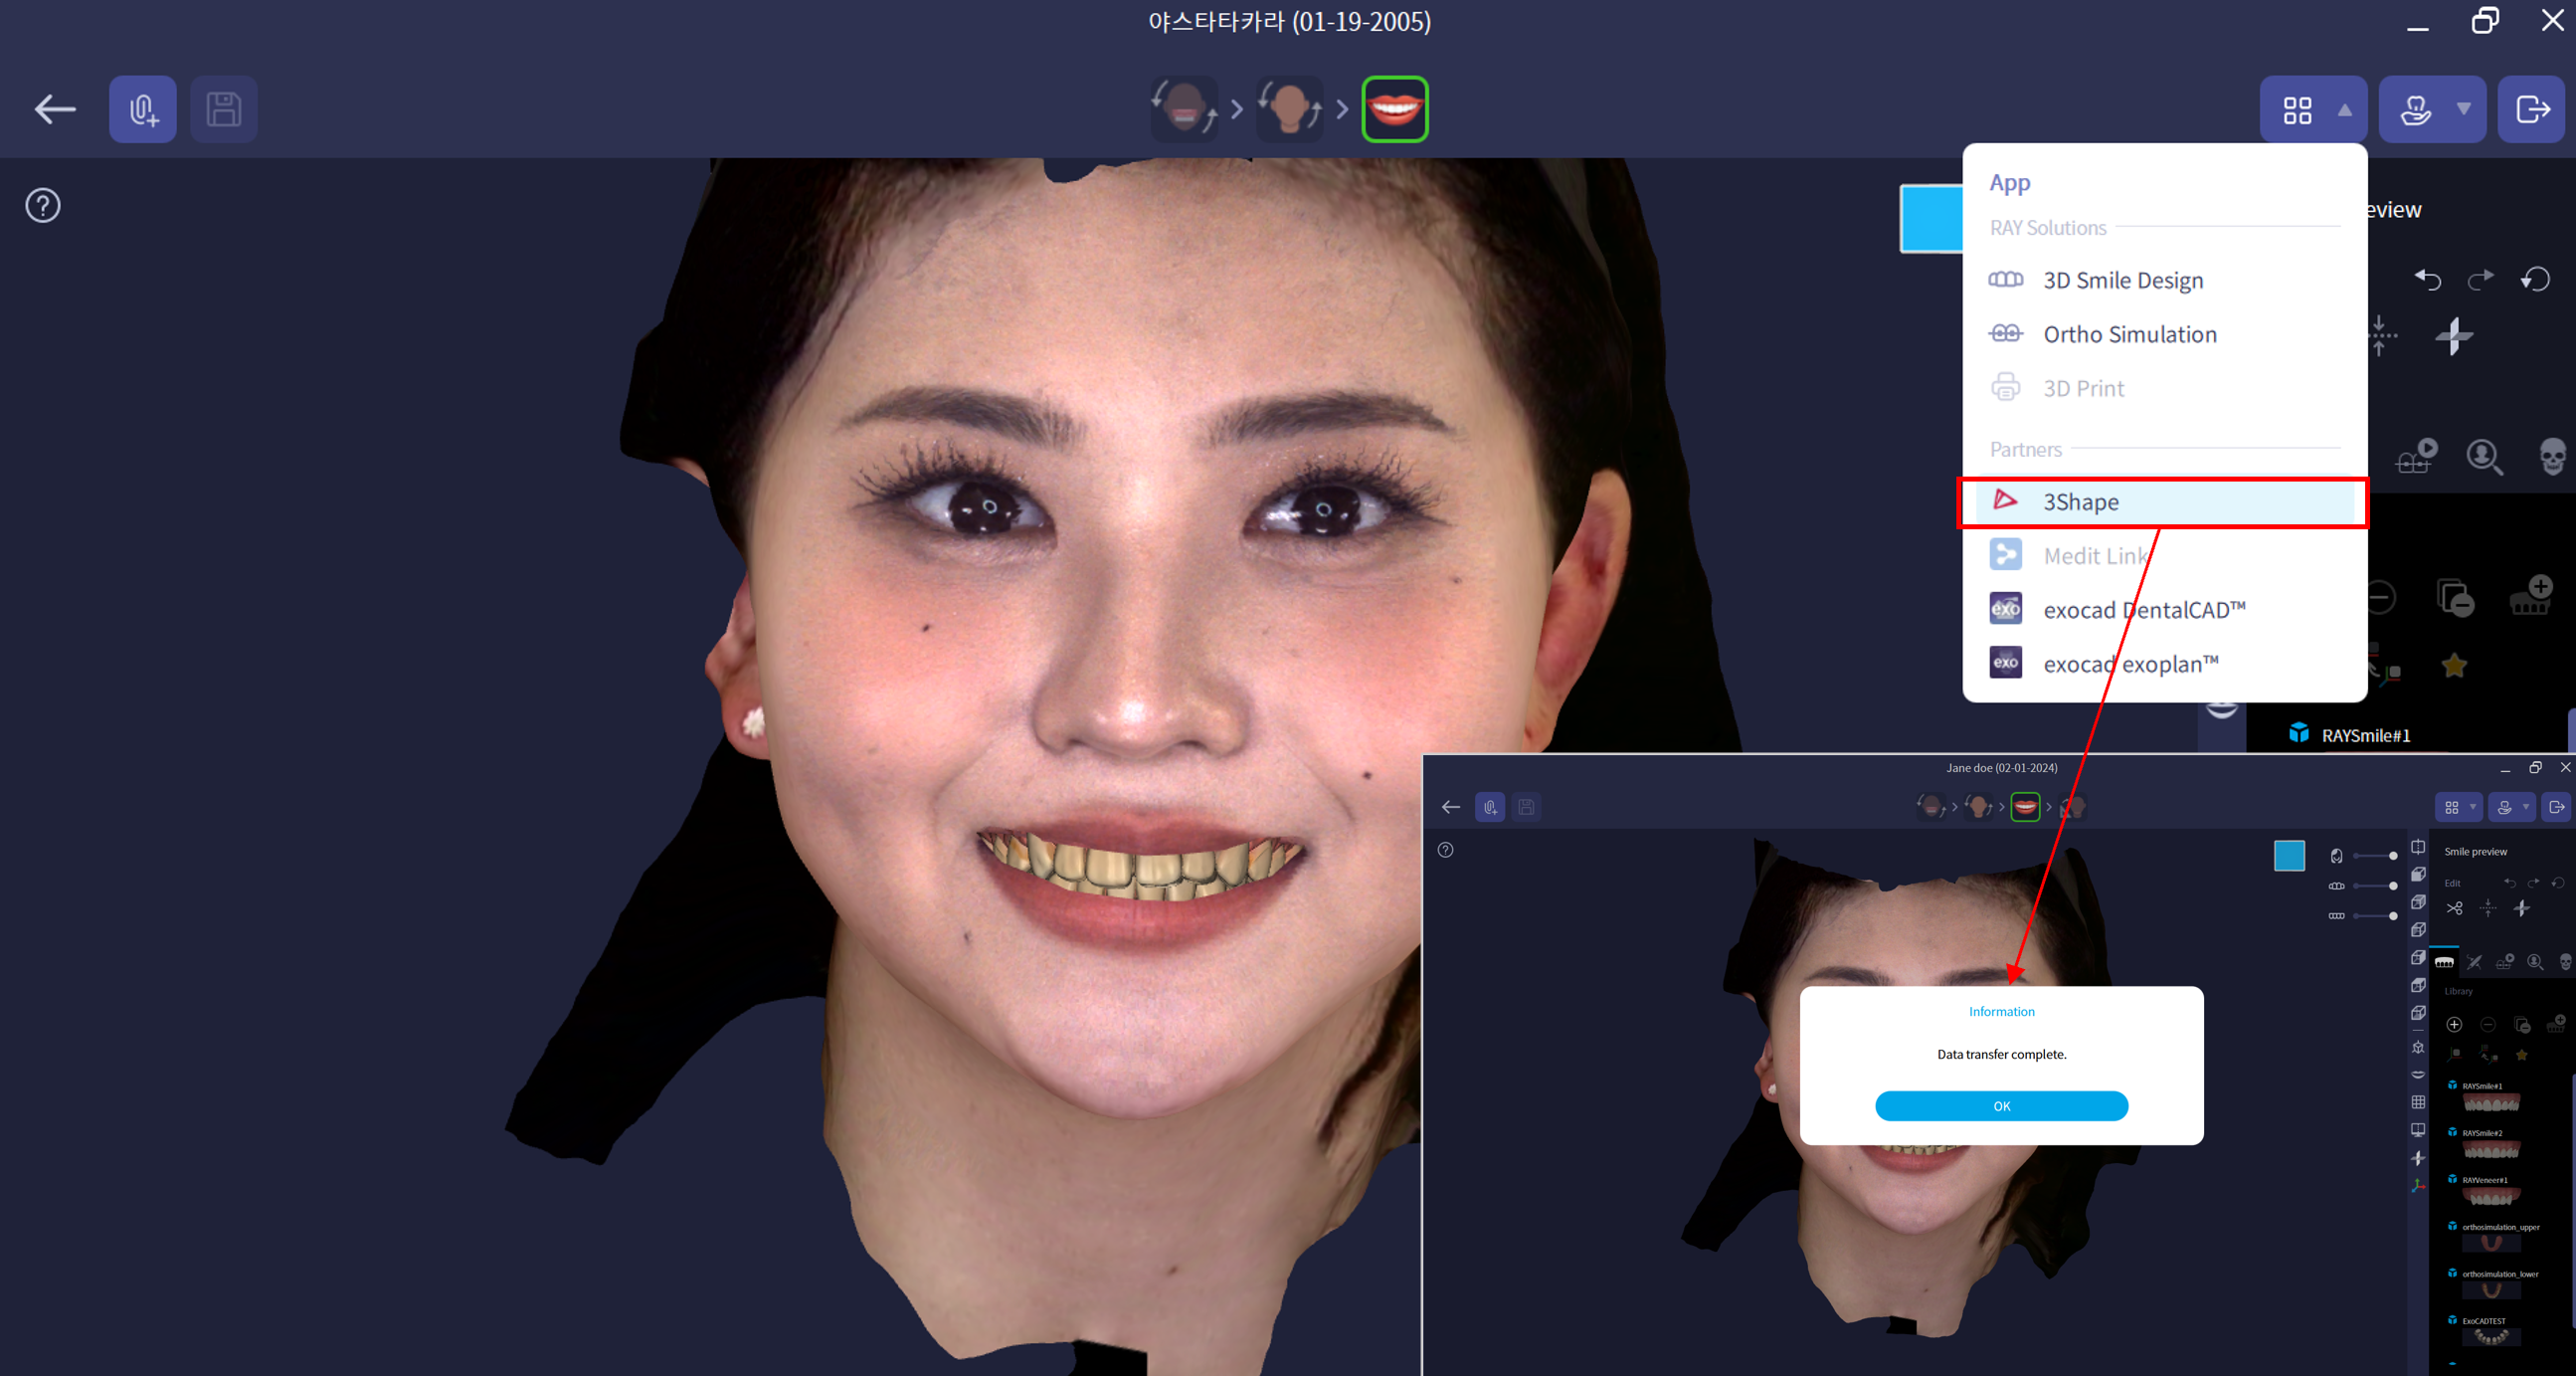
- Once finished, you may upload the update back to 3Shape.
Start design from 3Shape Dental System
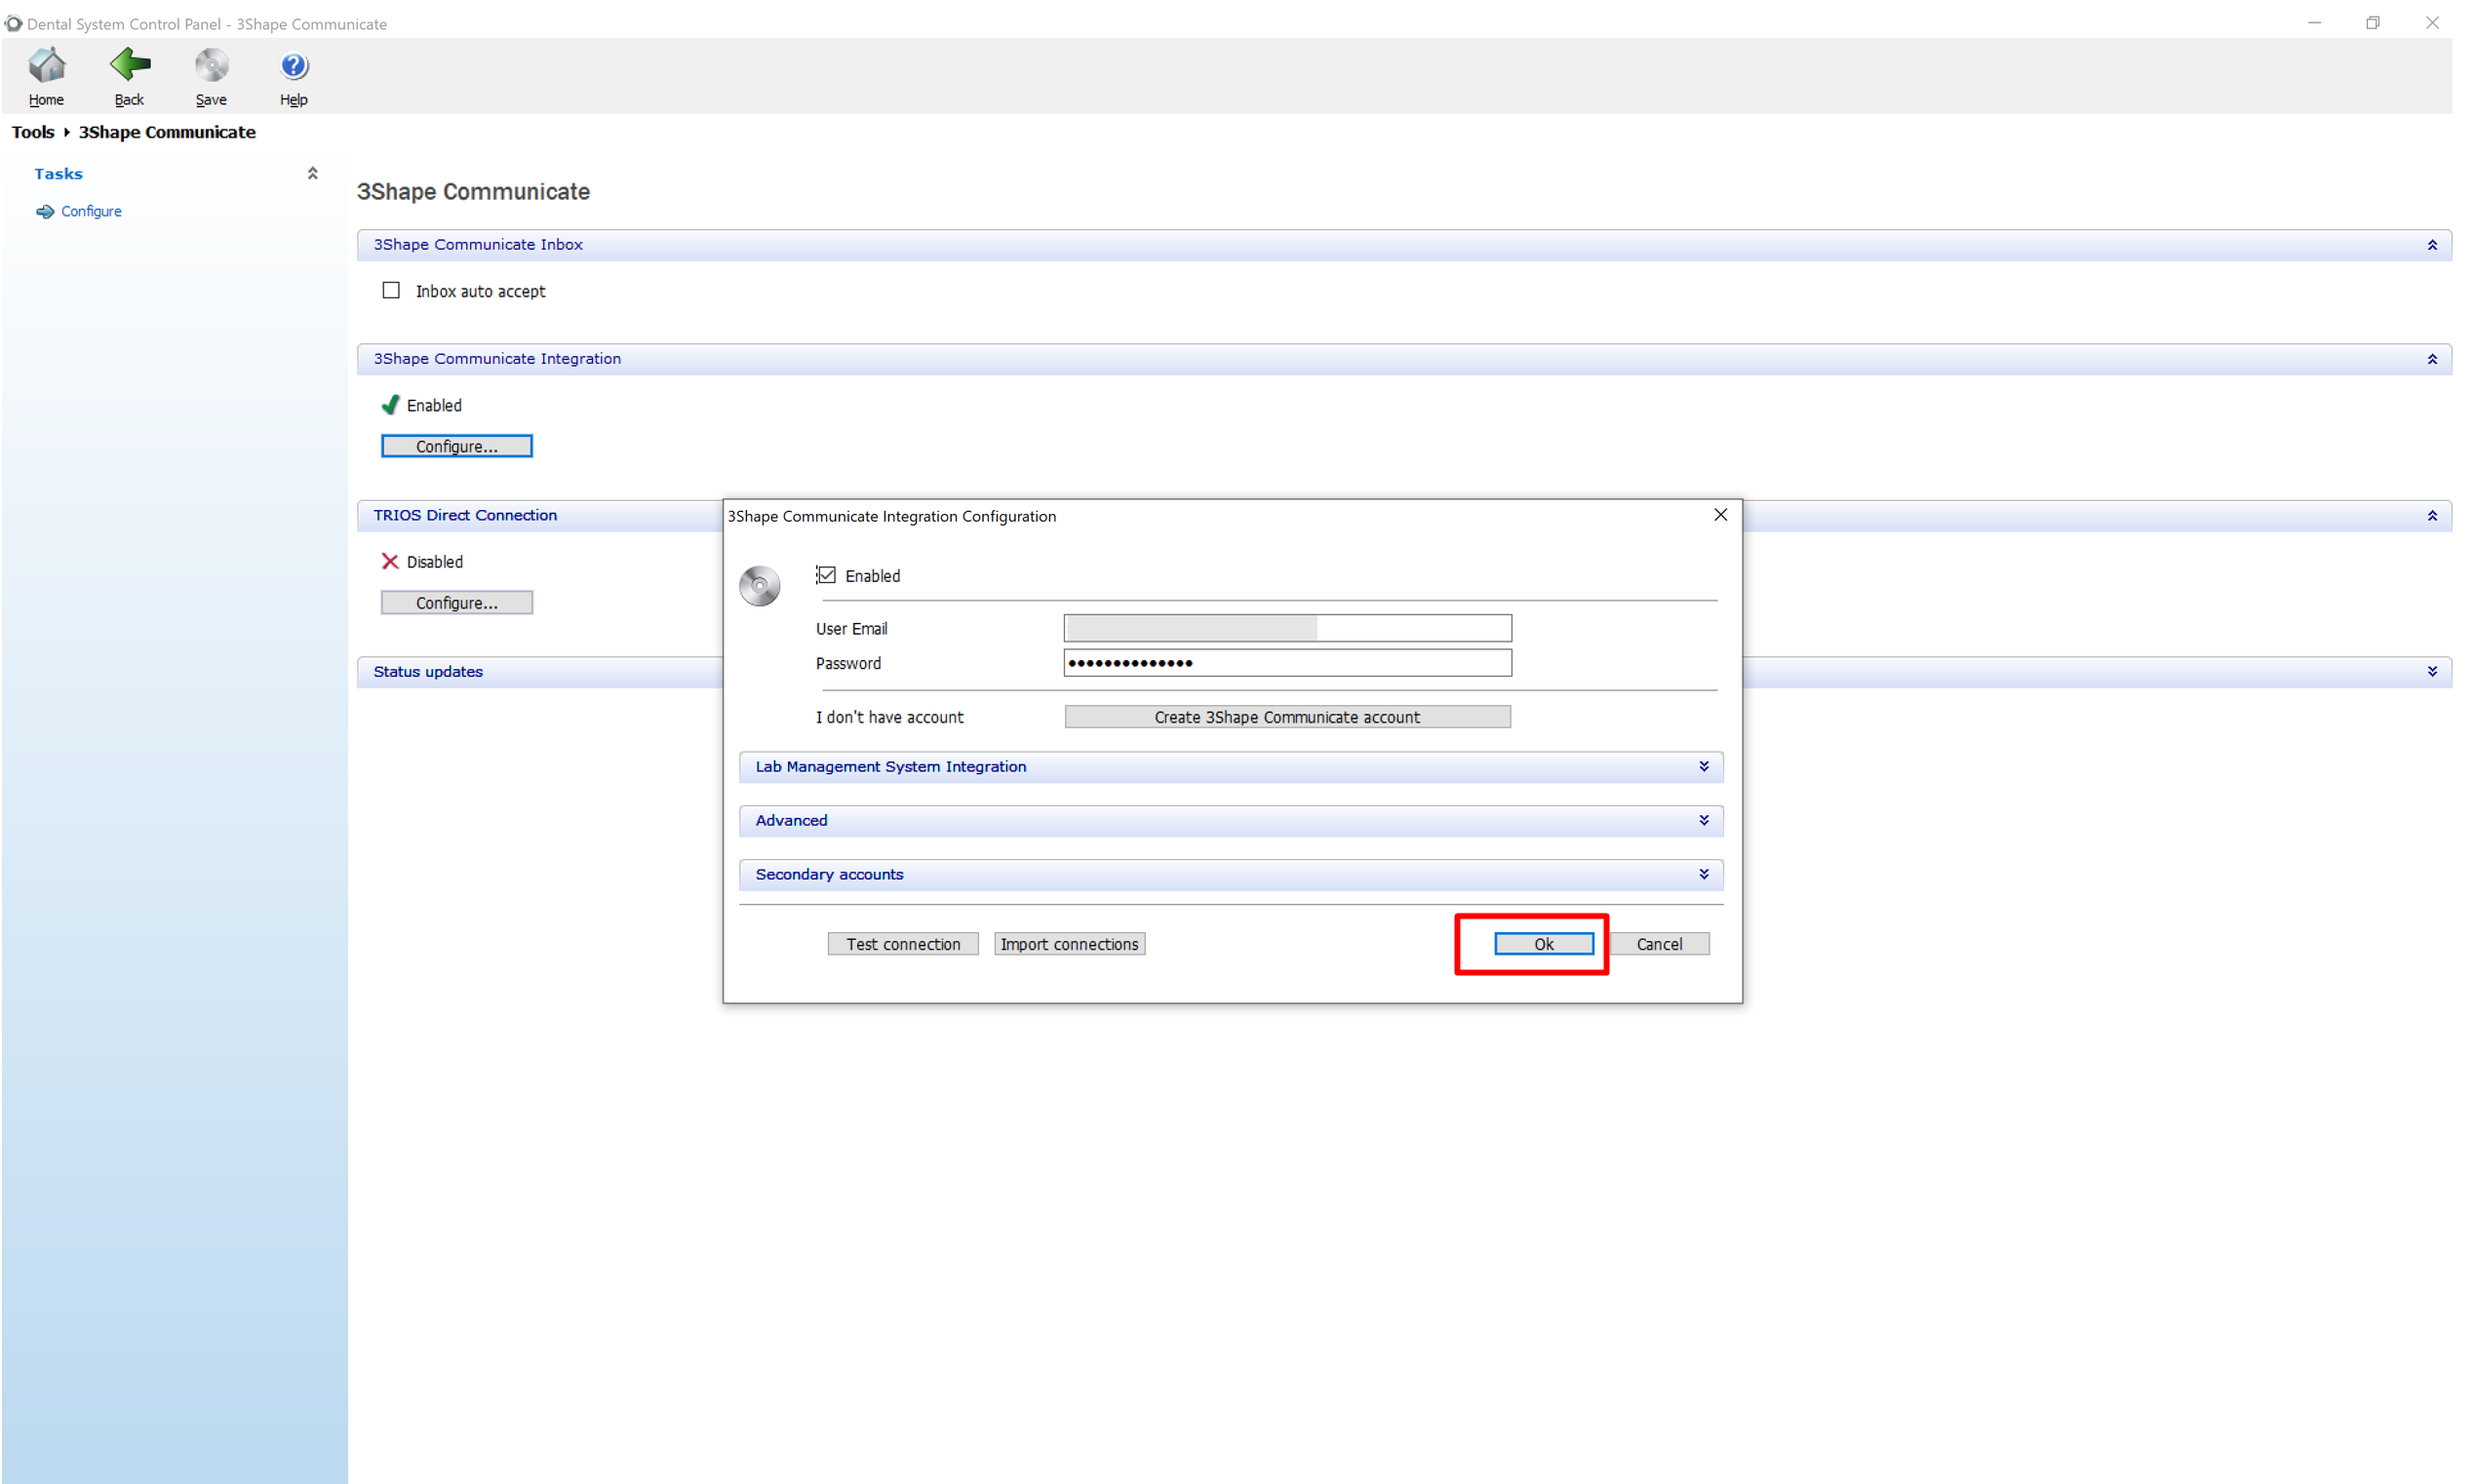
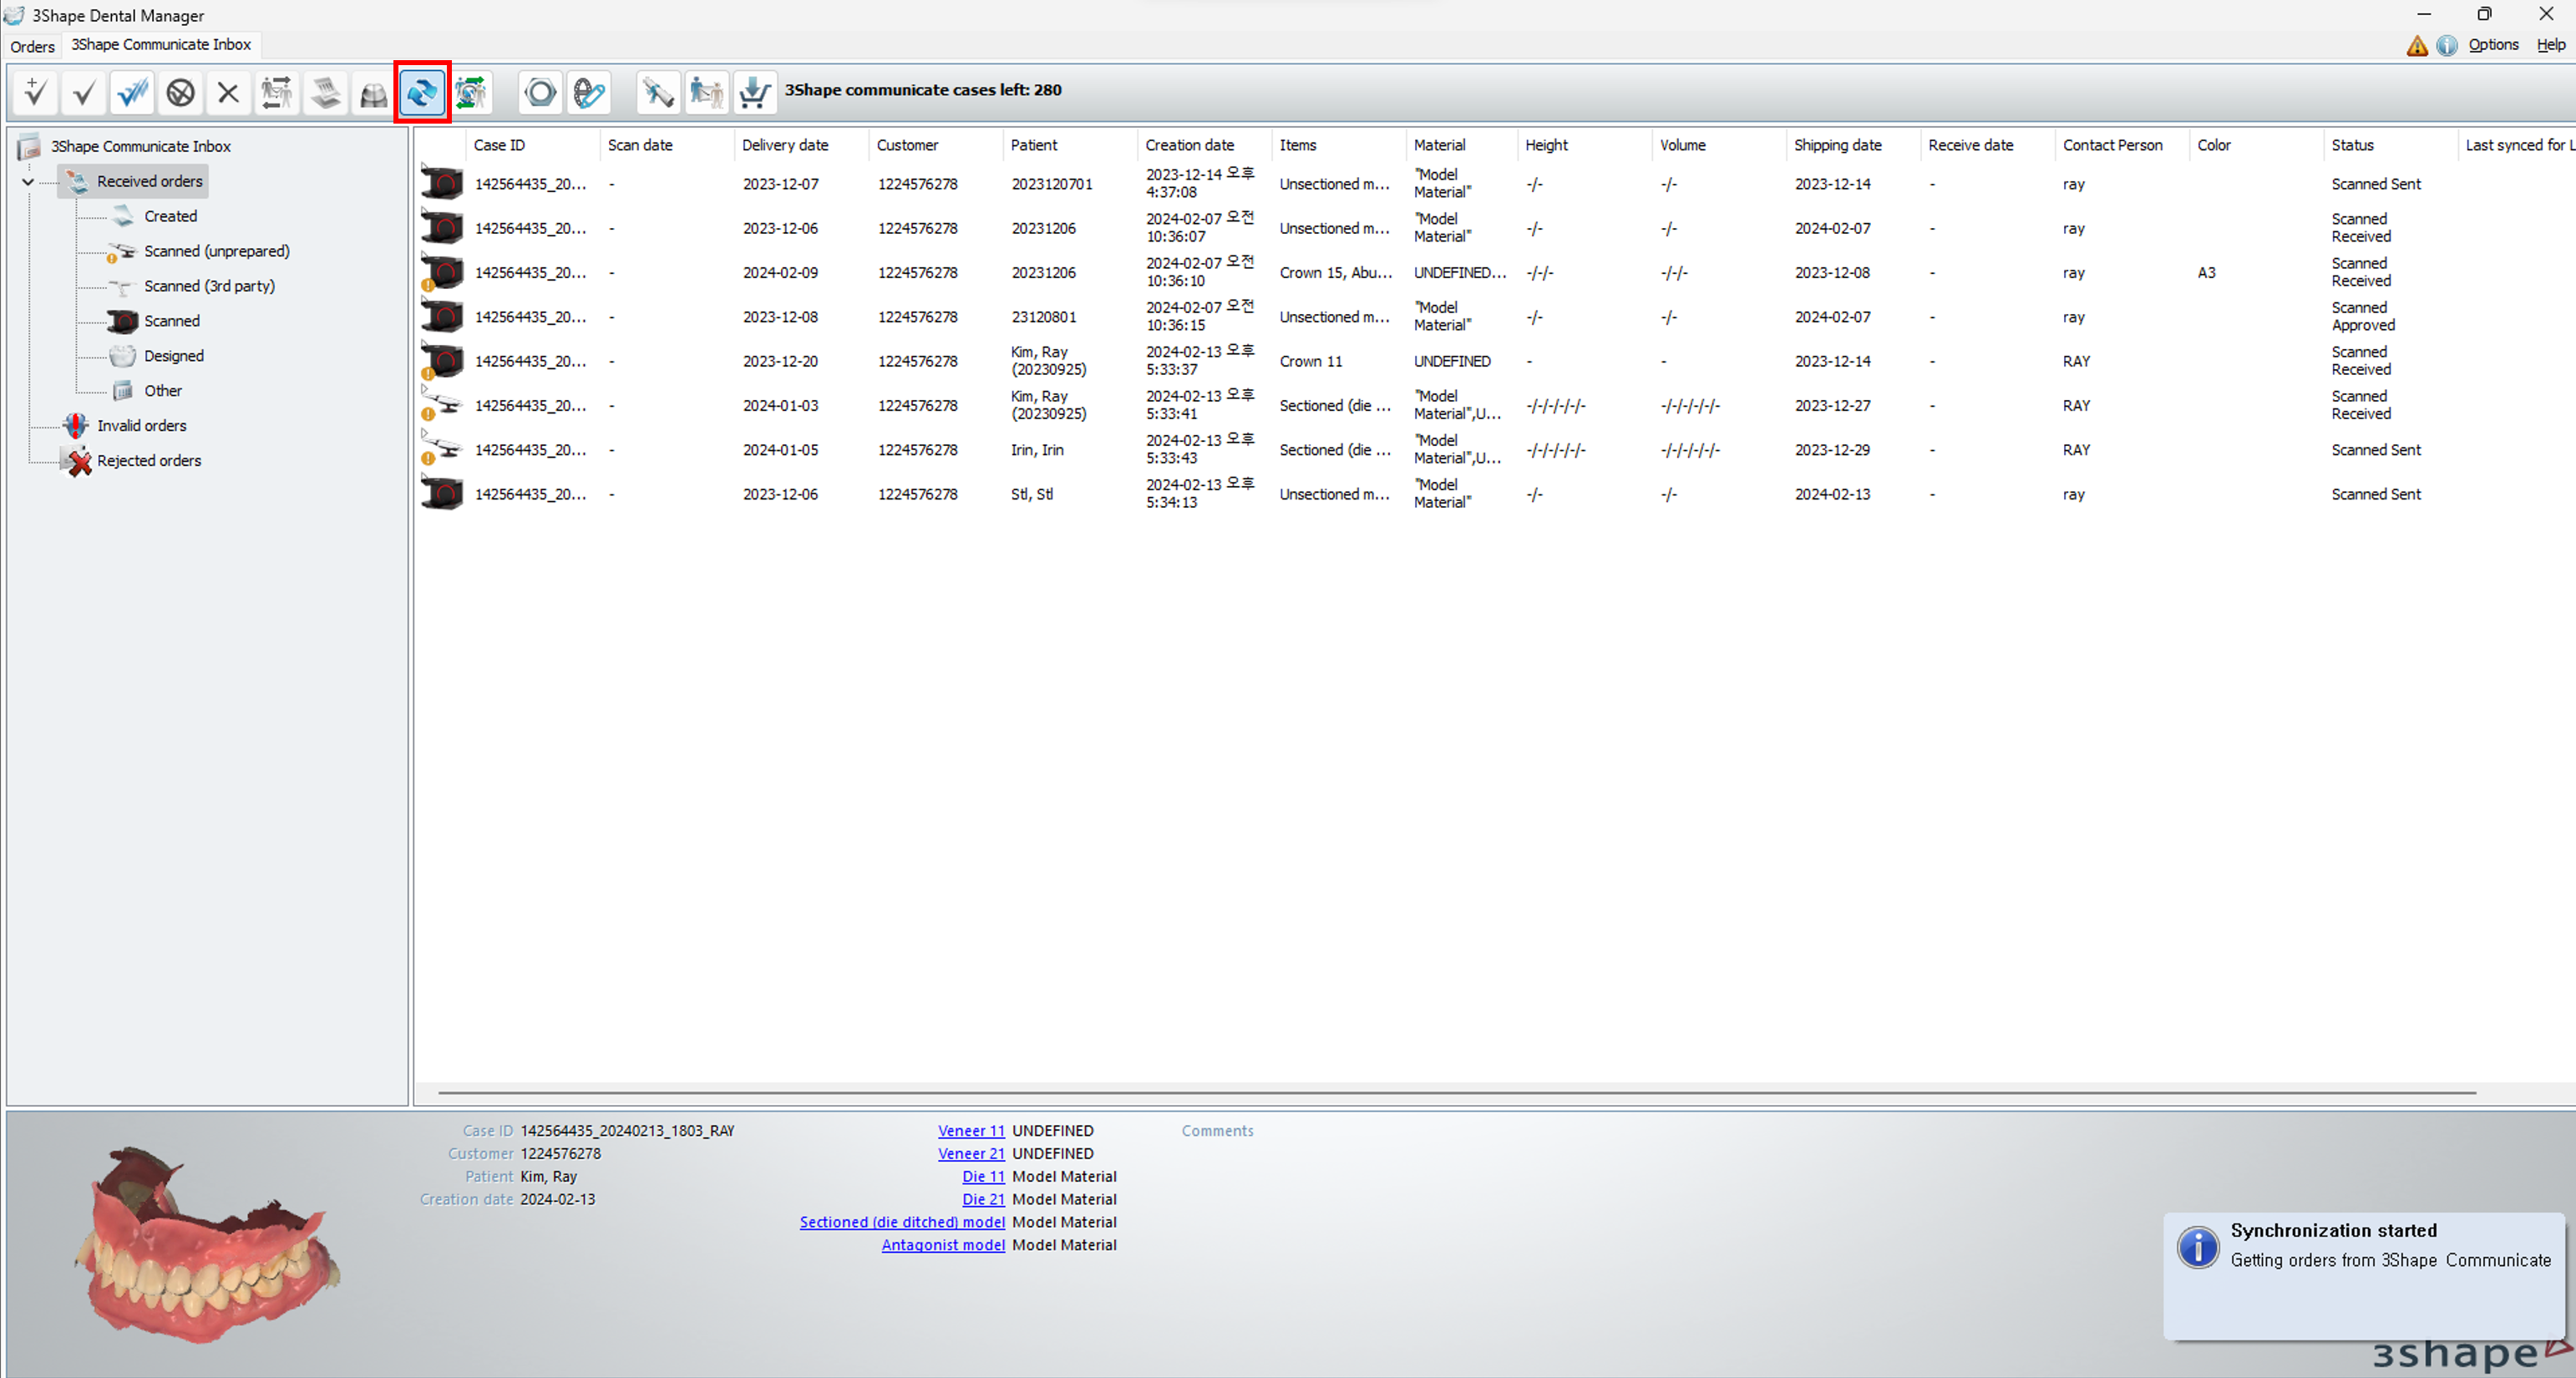
- Launch 3Shape Dental System, make sure that you use your Clinic 3Shape Communicate Account in settings. Open settings in: Dental System Control Panel > Tools > 3Shape Communicate > Configure > enter you Clinic 3Shape Communicate Account and click ok
- Proceed with uploading case from 3Shape Communicate.
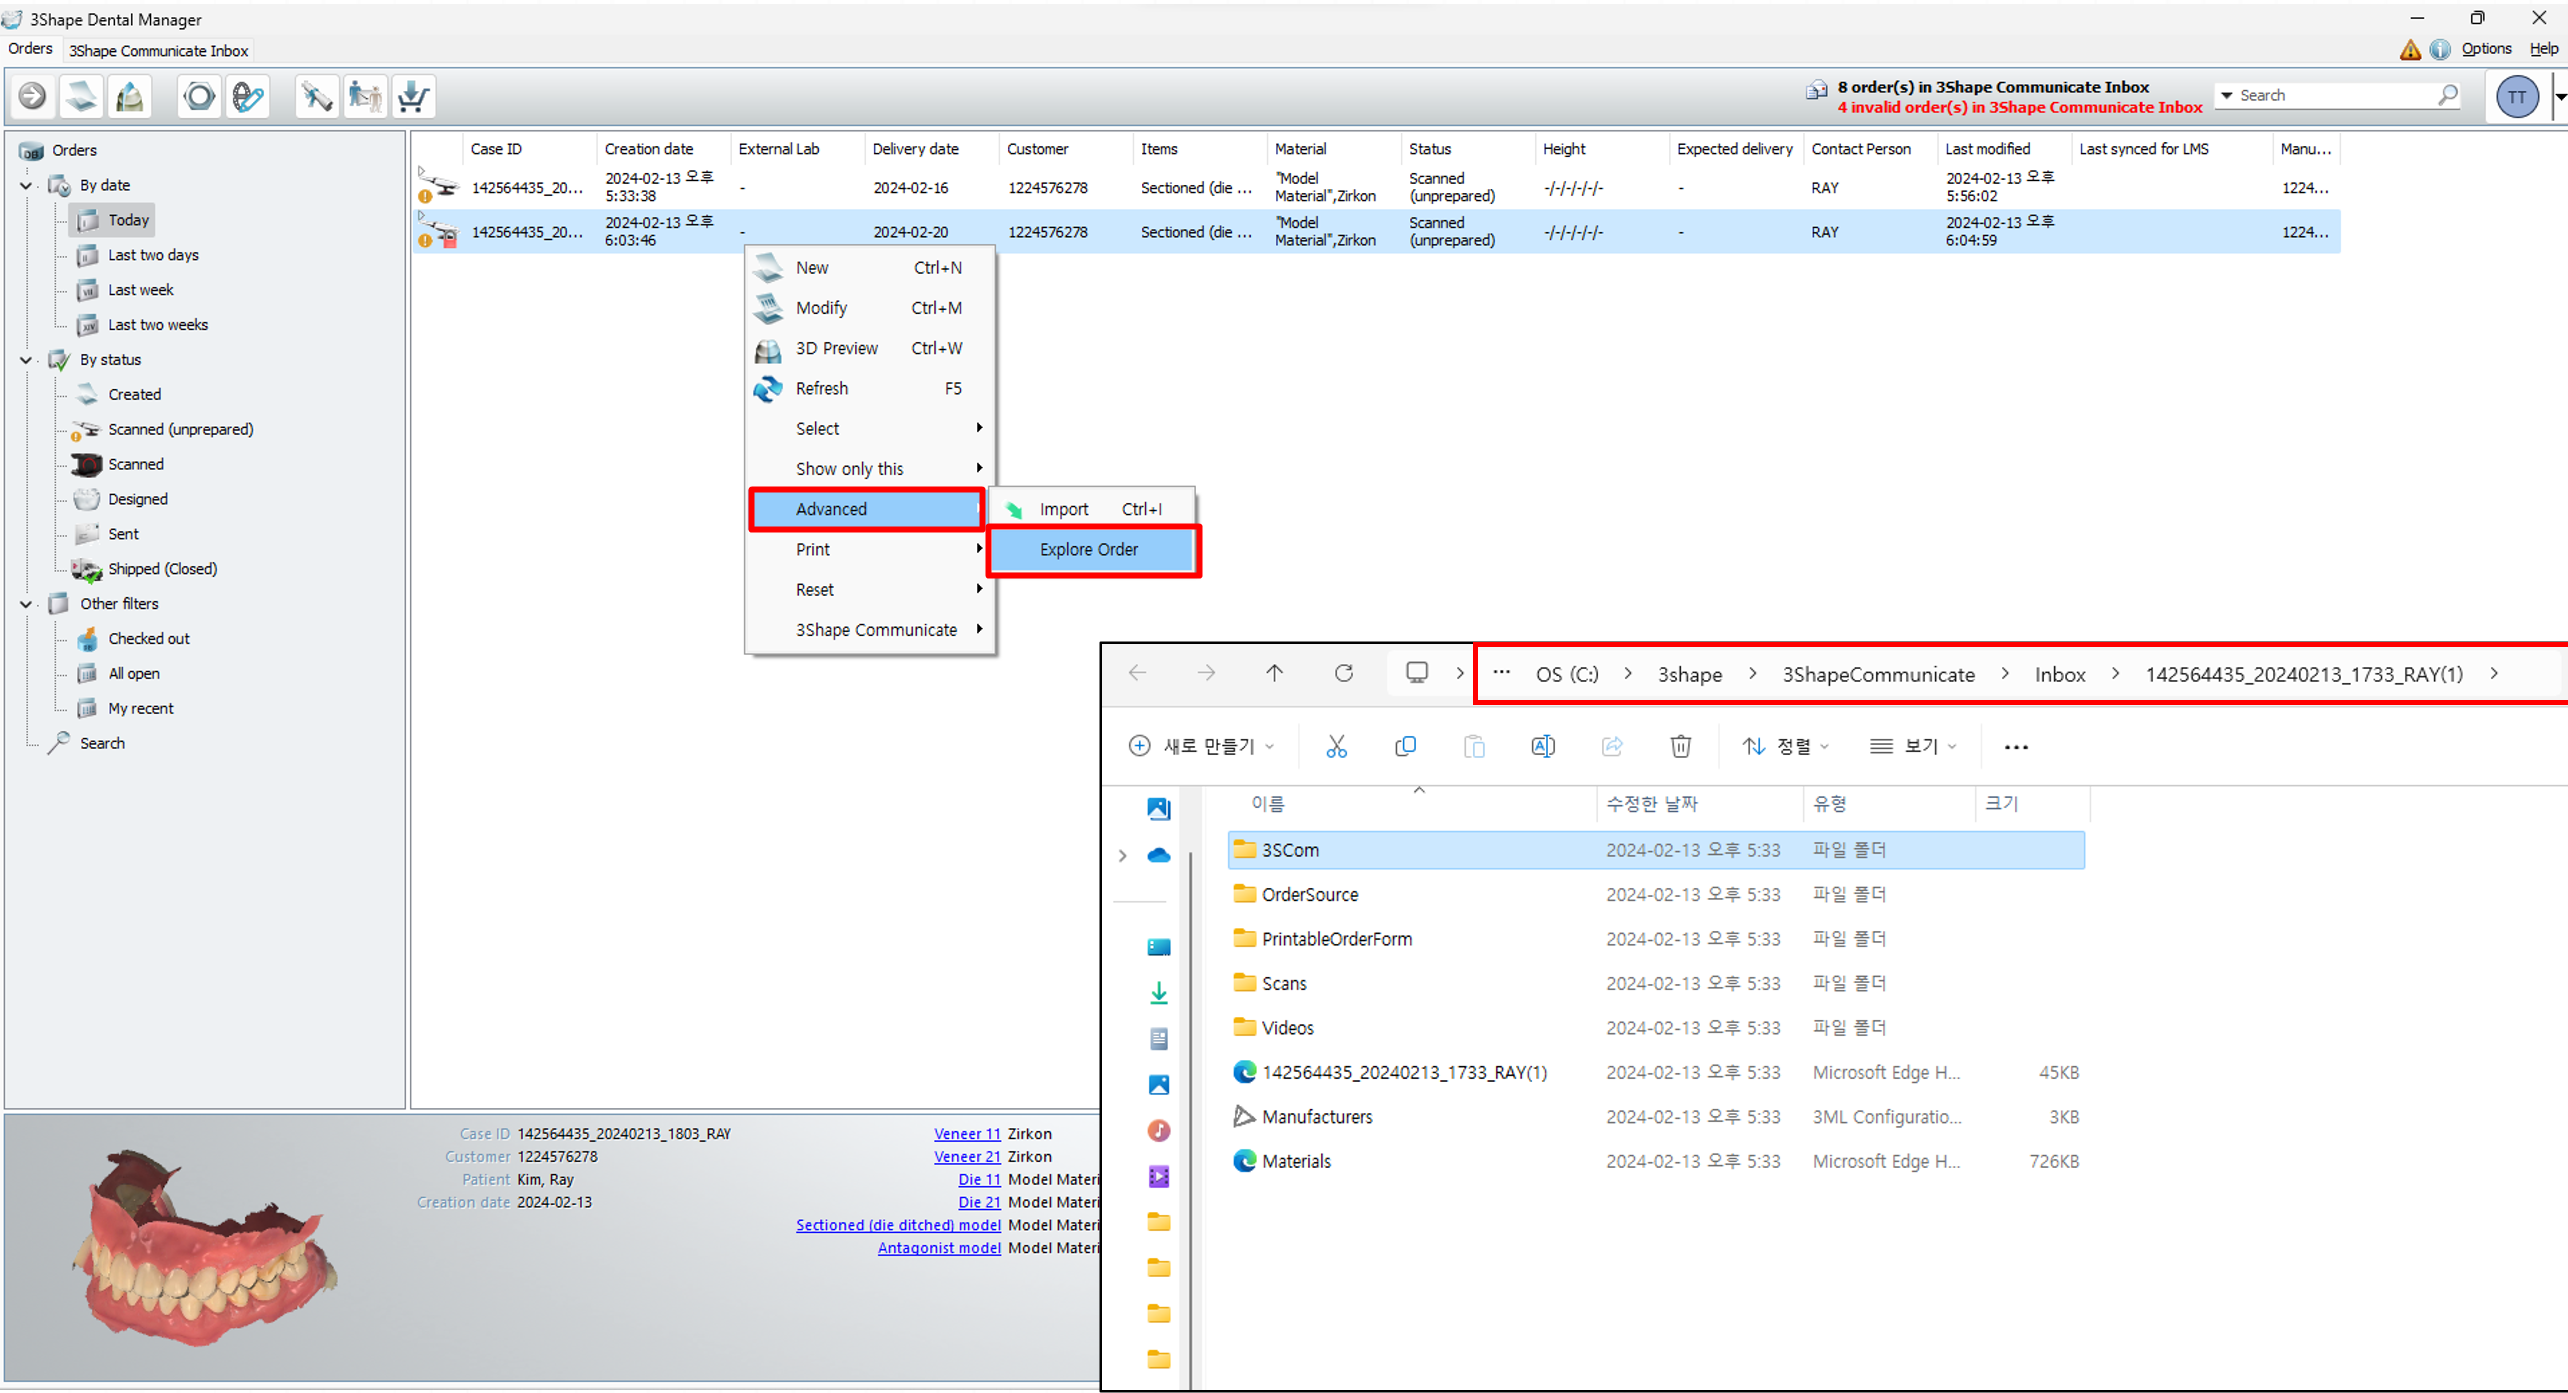
- Before proceeding with the design, please check the 3Shape case path for data import. For this, right-click on the case > Advanced > Explore order > copy the path to the case. If you have standard installation, the path will look like : C:\3shape\3ShapeCommunicate\Inbox\********(Case ID)
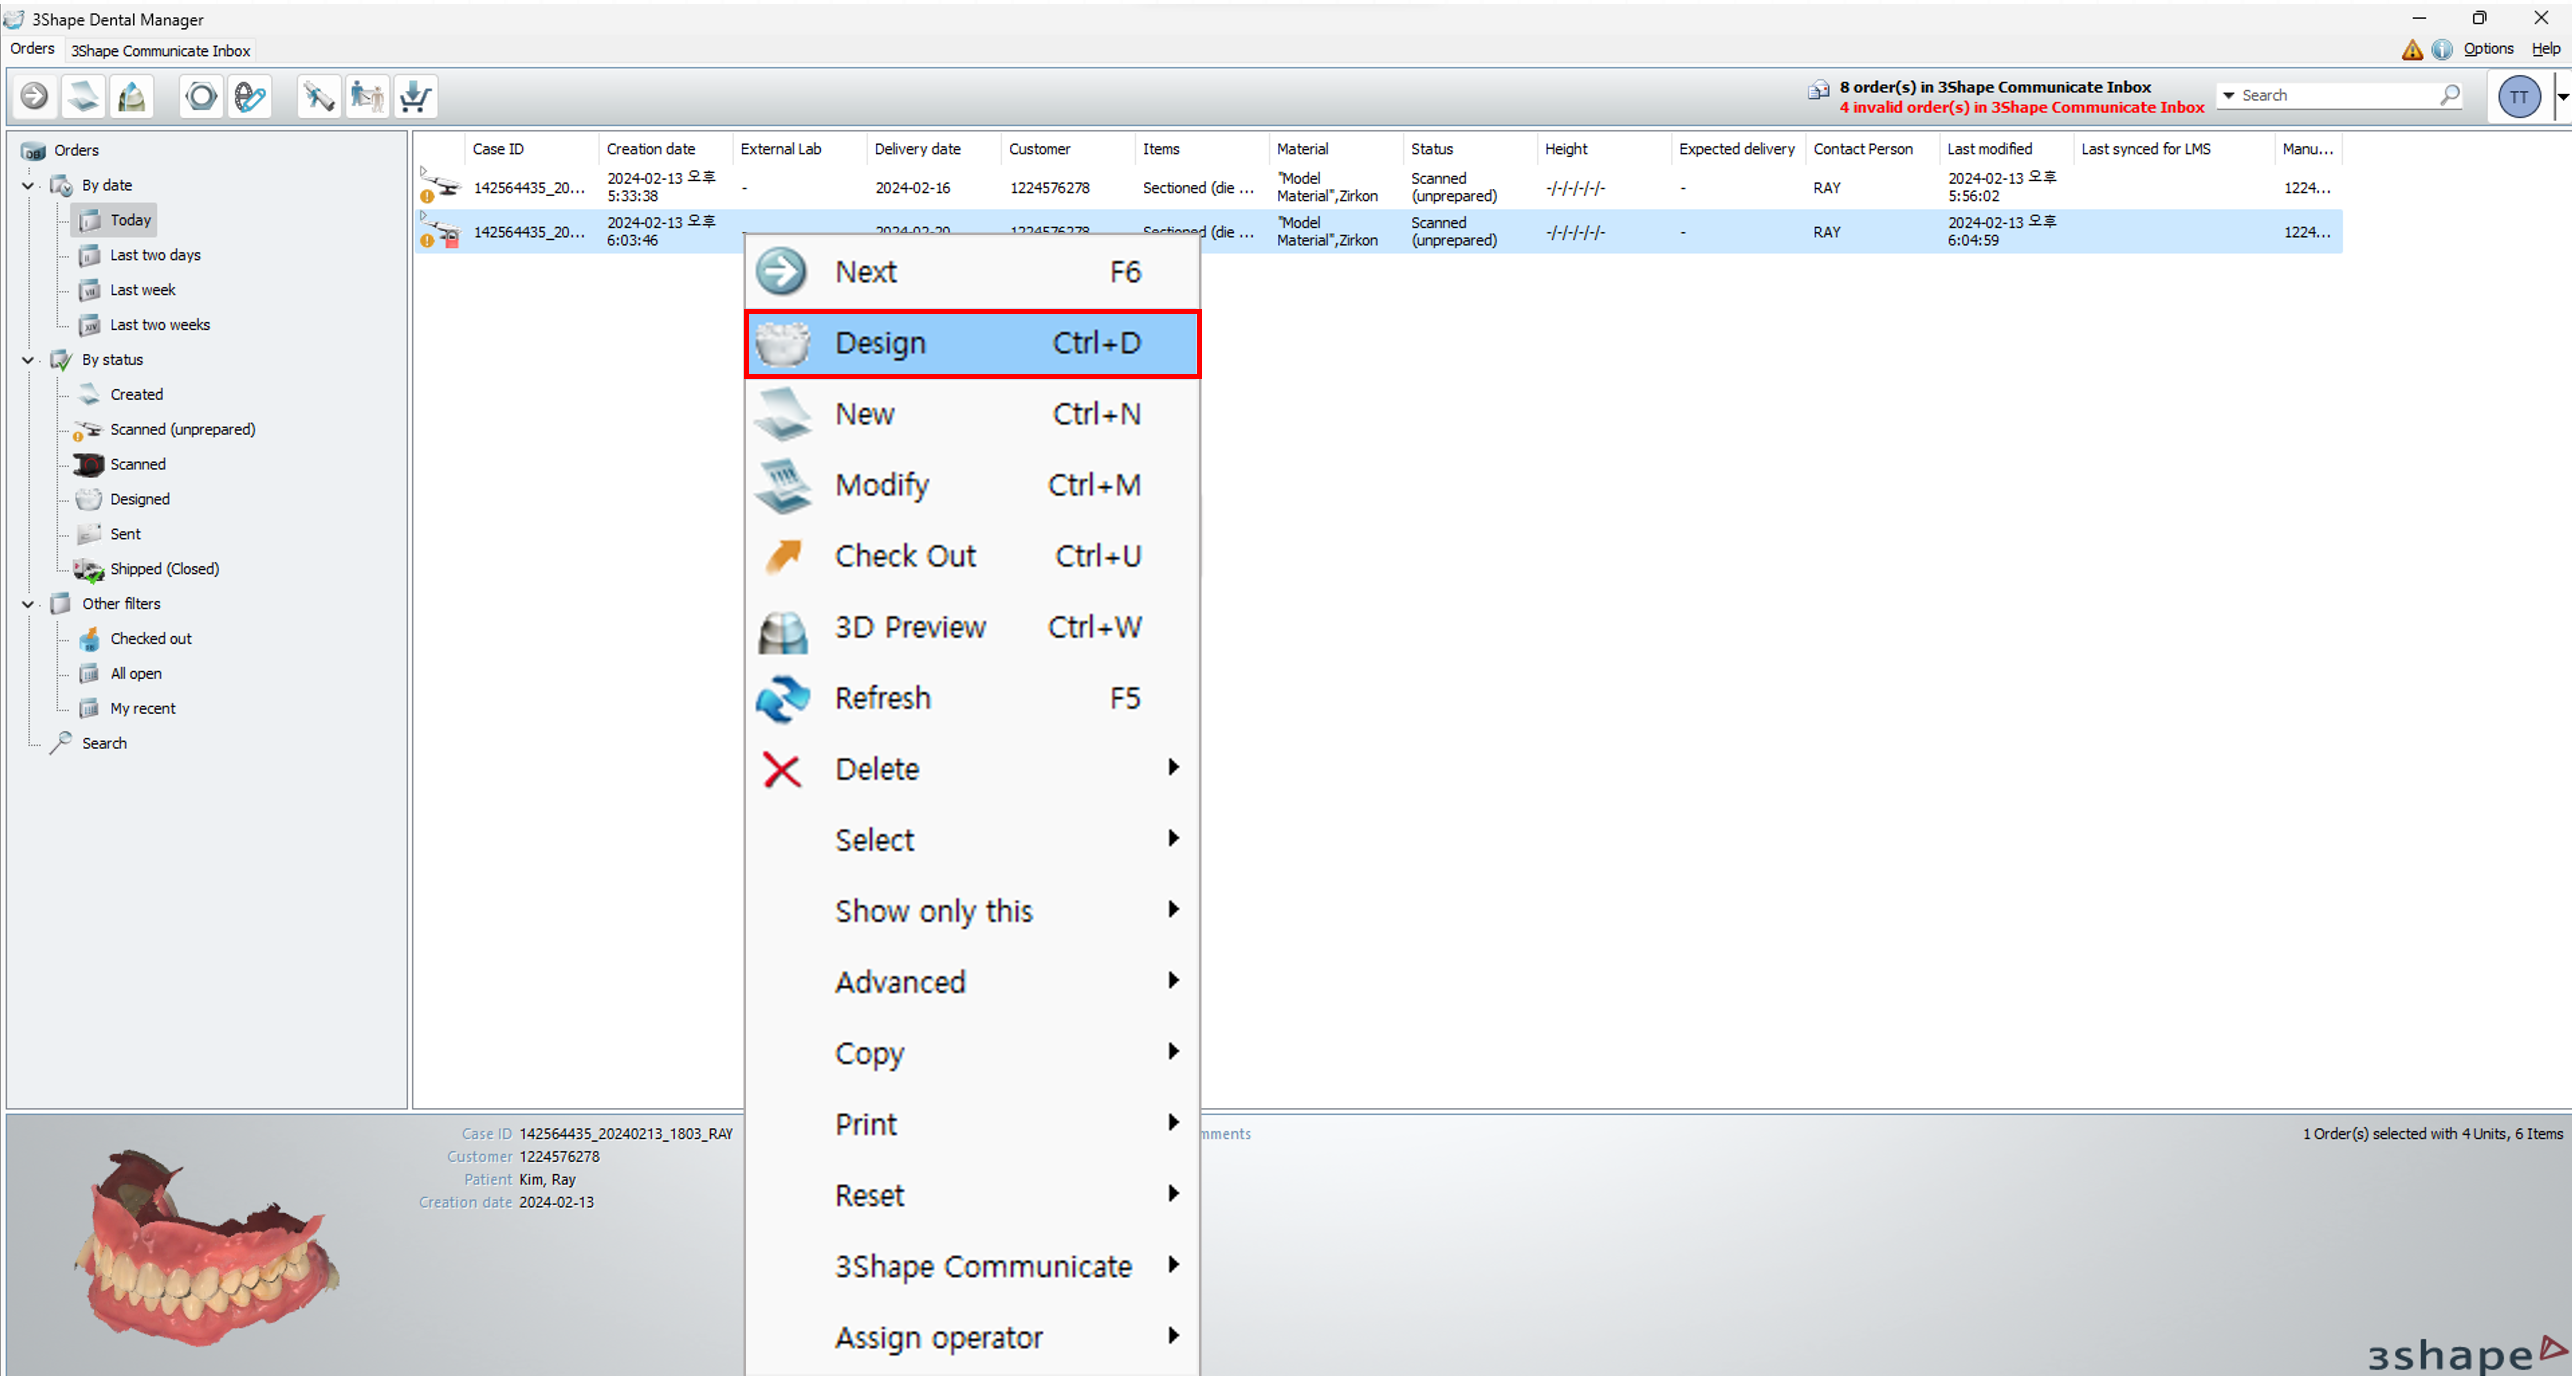
- You may now proceed with Design in 3Shape Dental Designer.
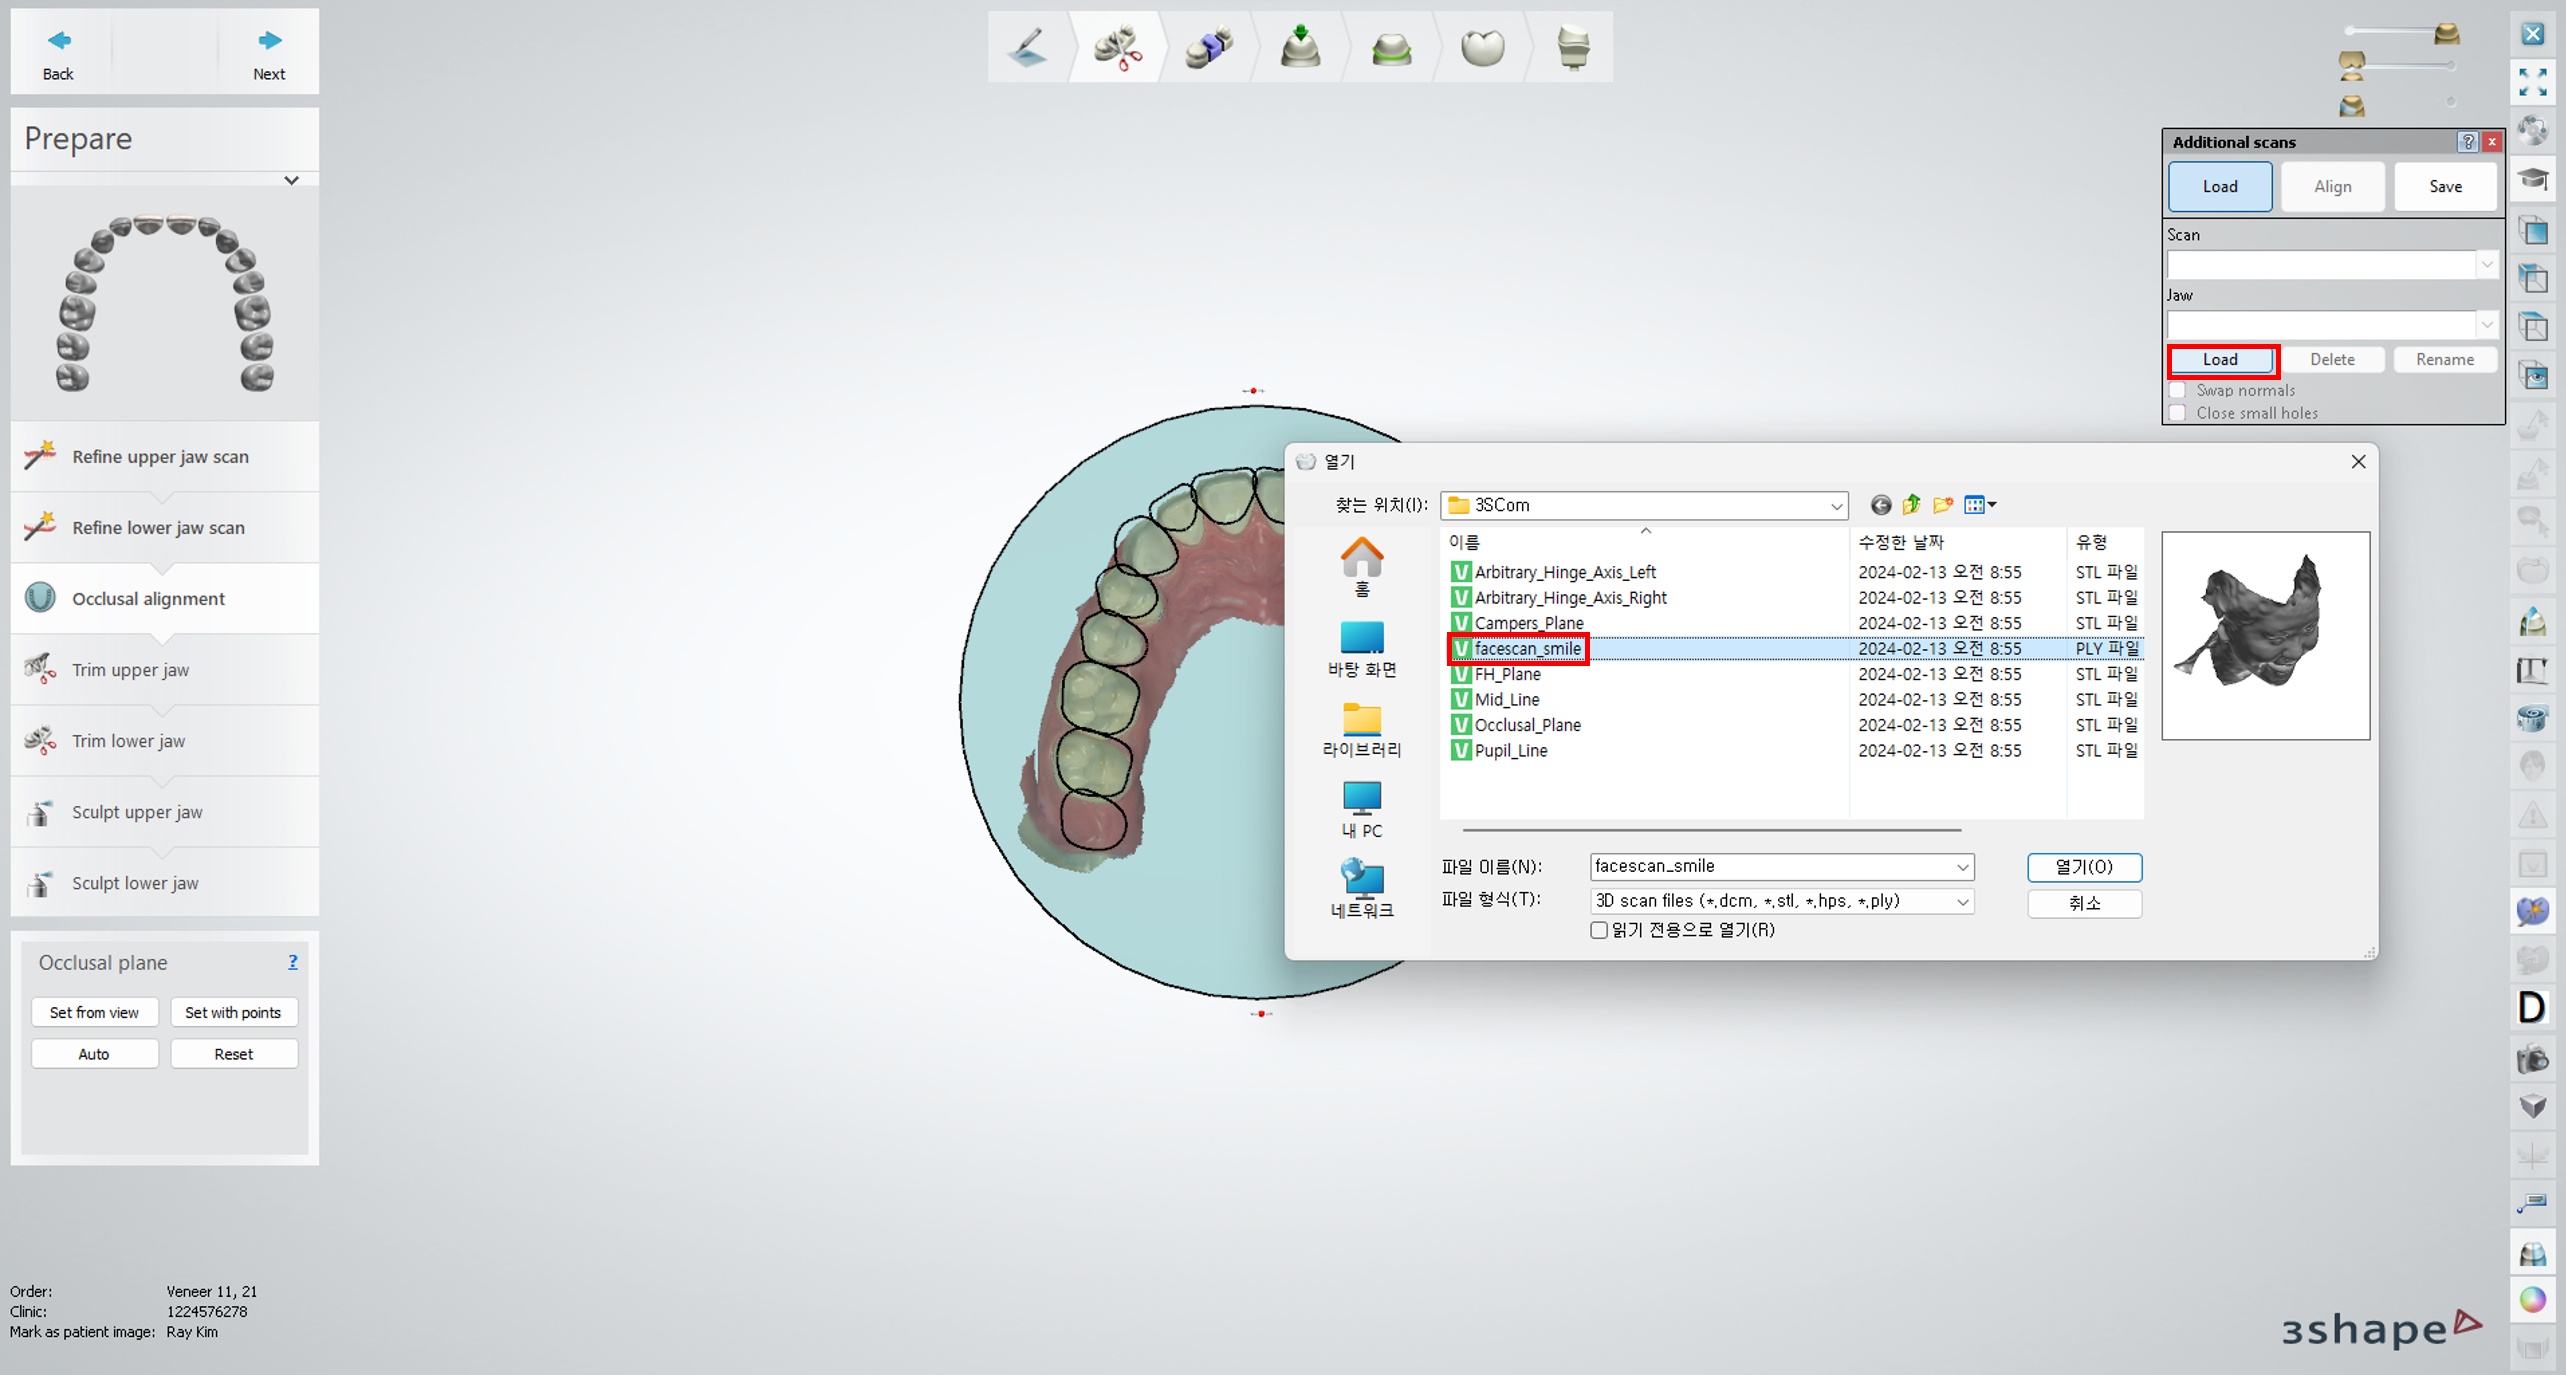
- Click Additional Scans button to load facial scan data. Enter the path that you copied.
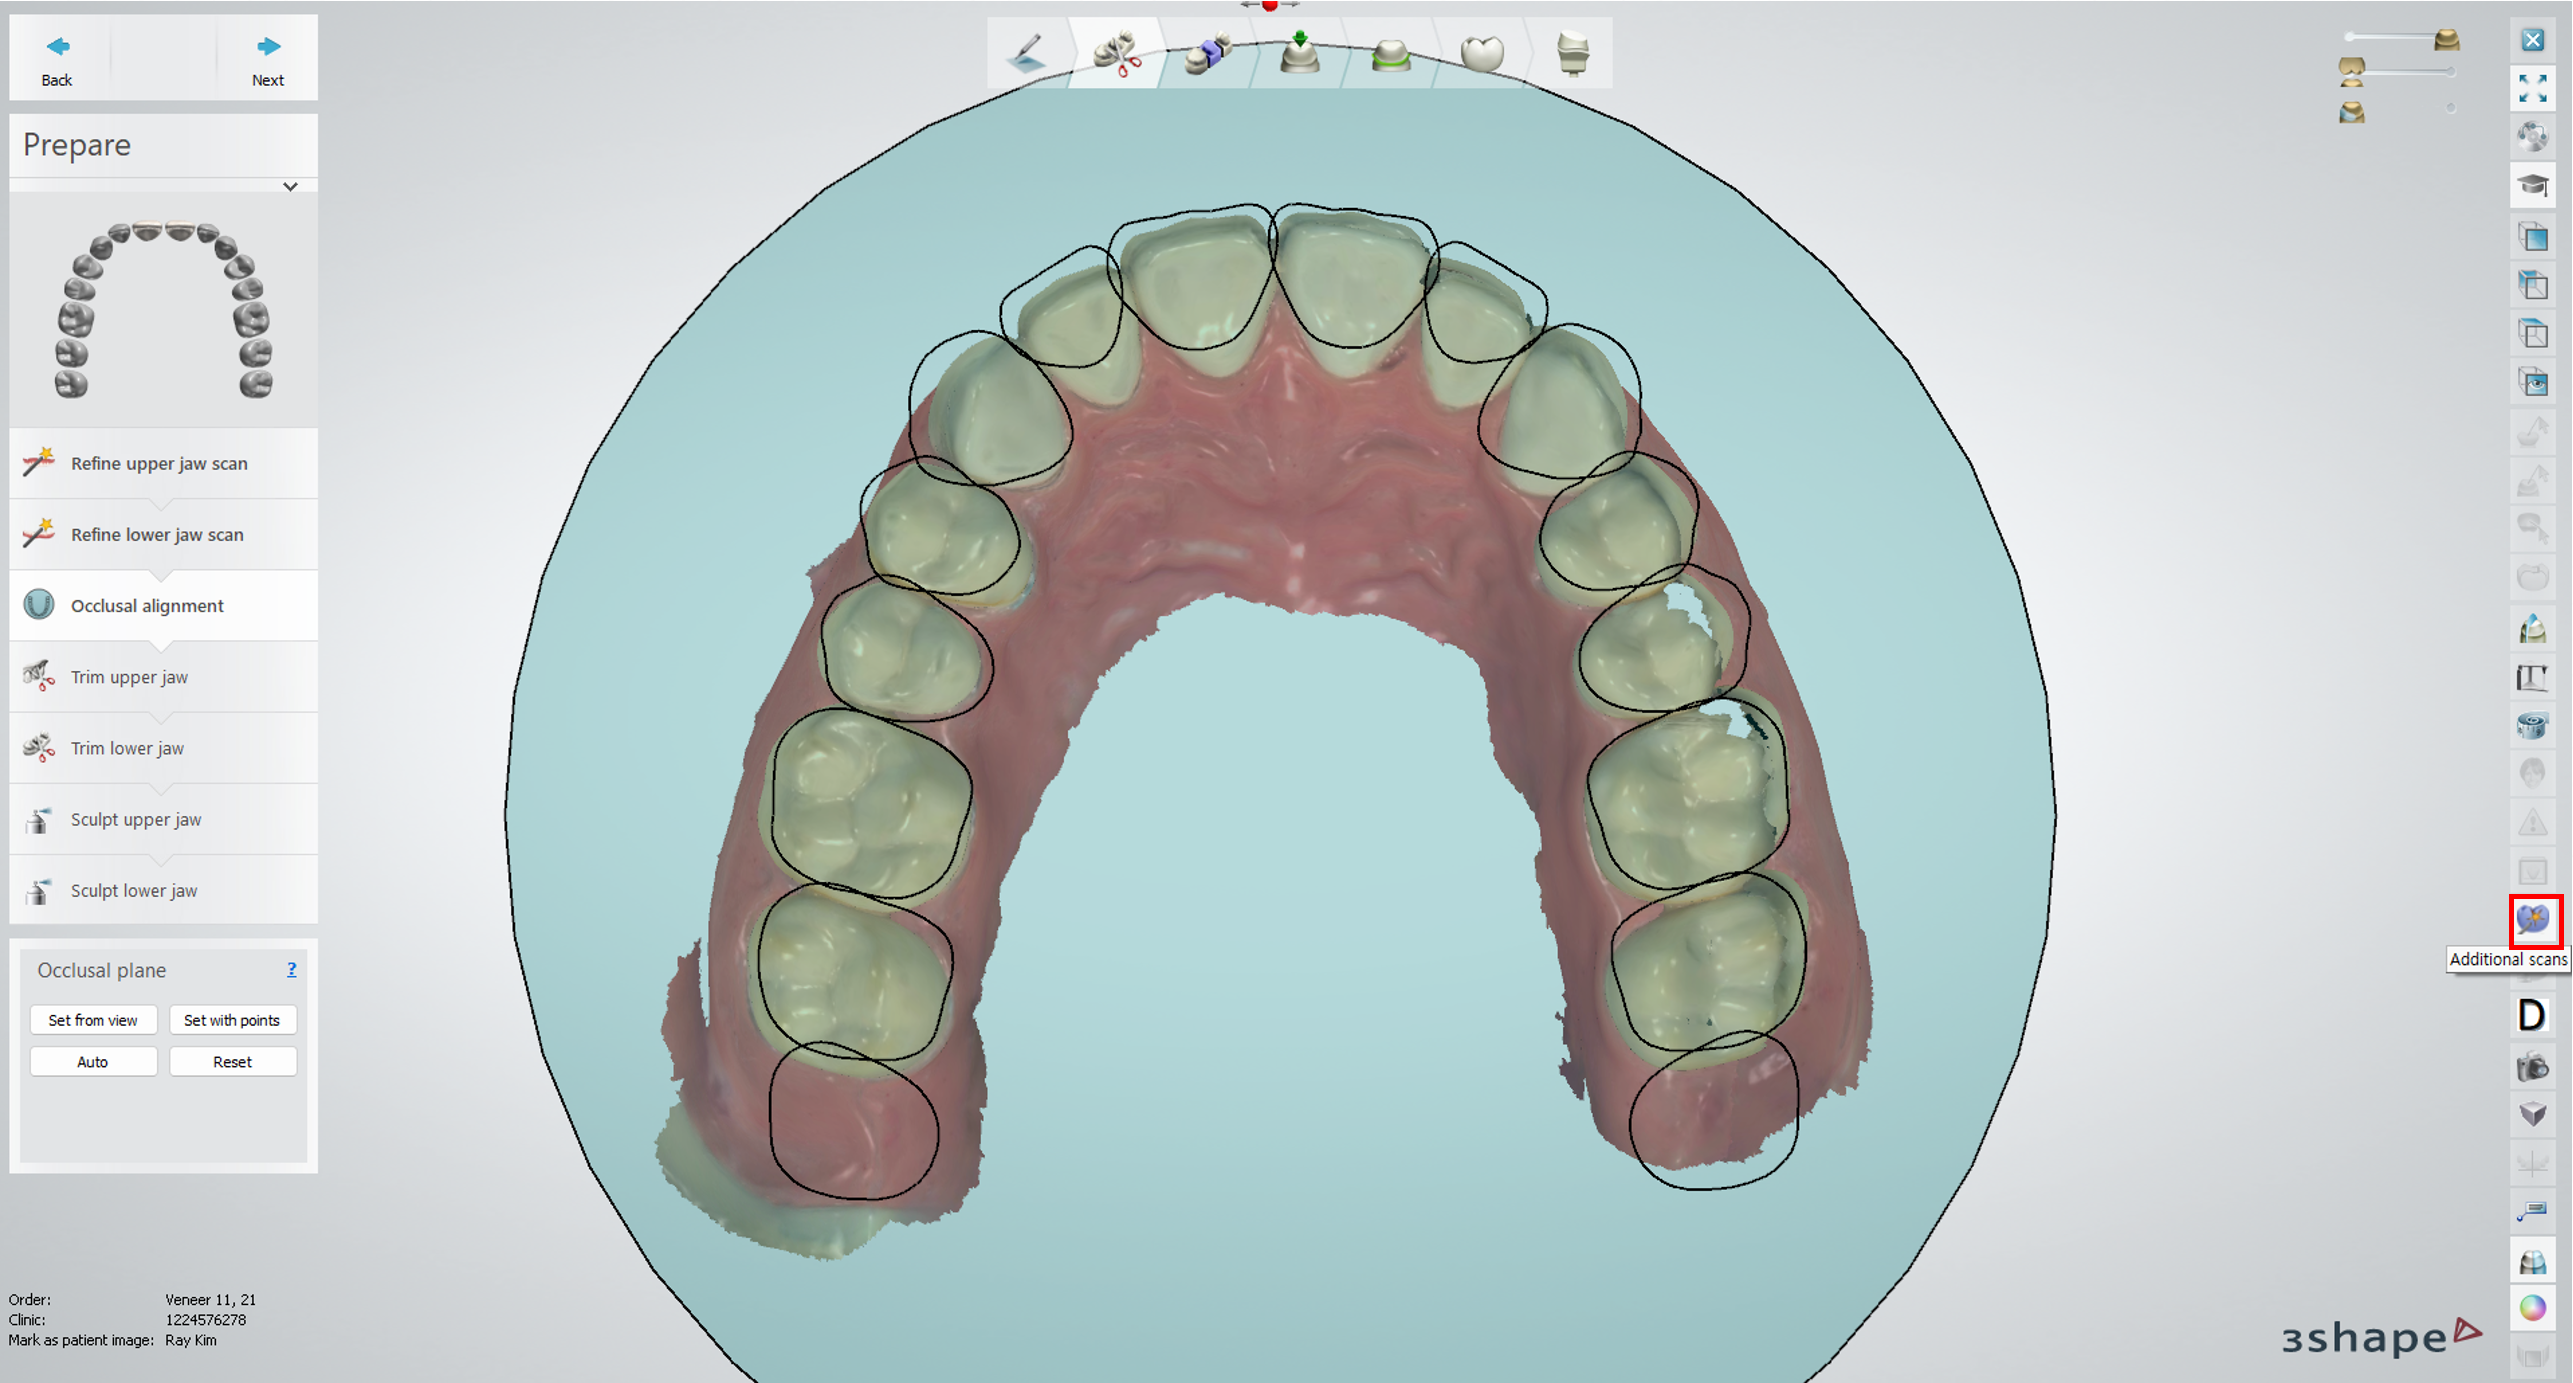
- Click Load to import facial scan data.
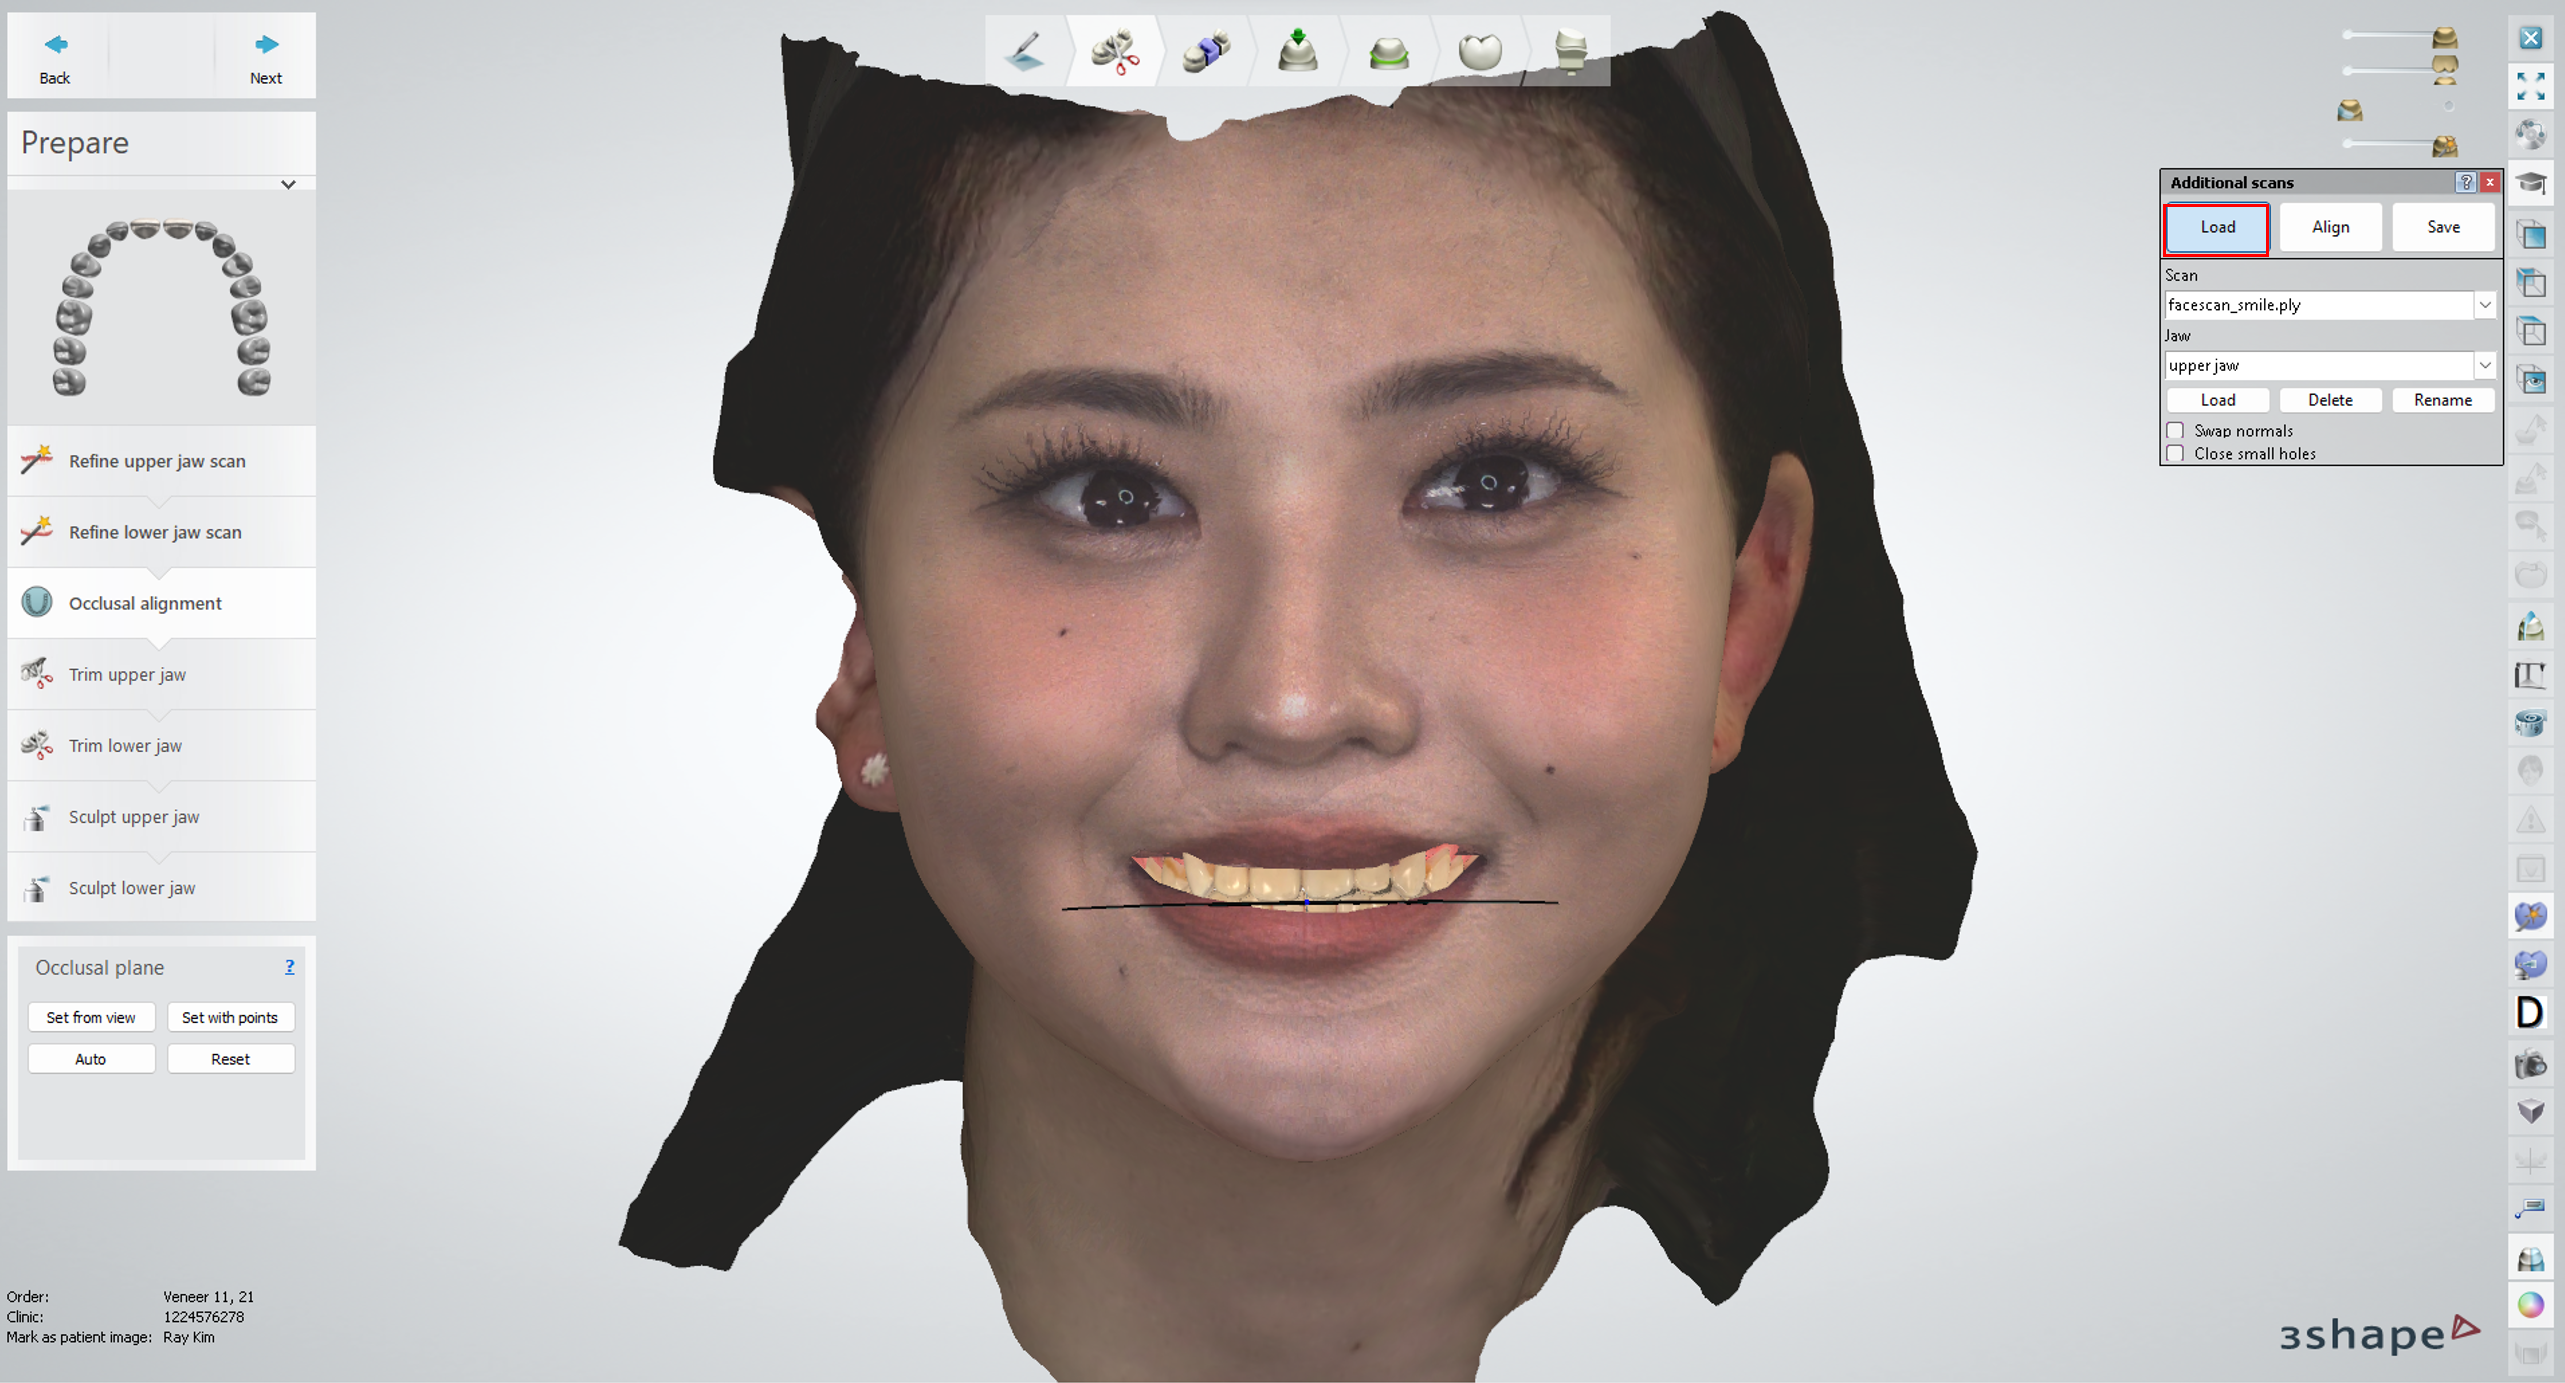
- When importing face scan data and specifying the IOS occlusion plane, the screen may appear as shown. This is not an error. You may reference the design by rotating the view accordingly.
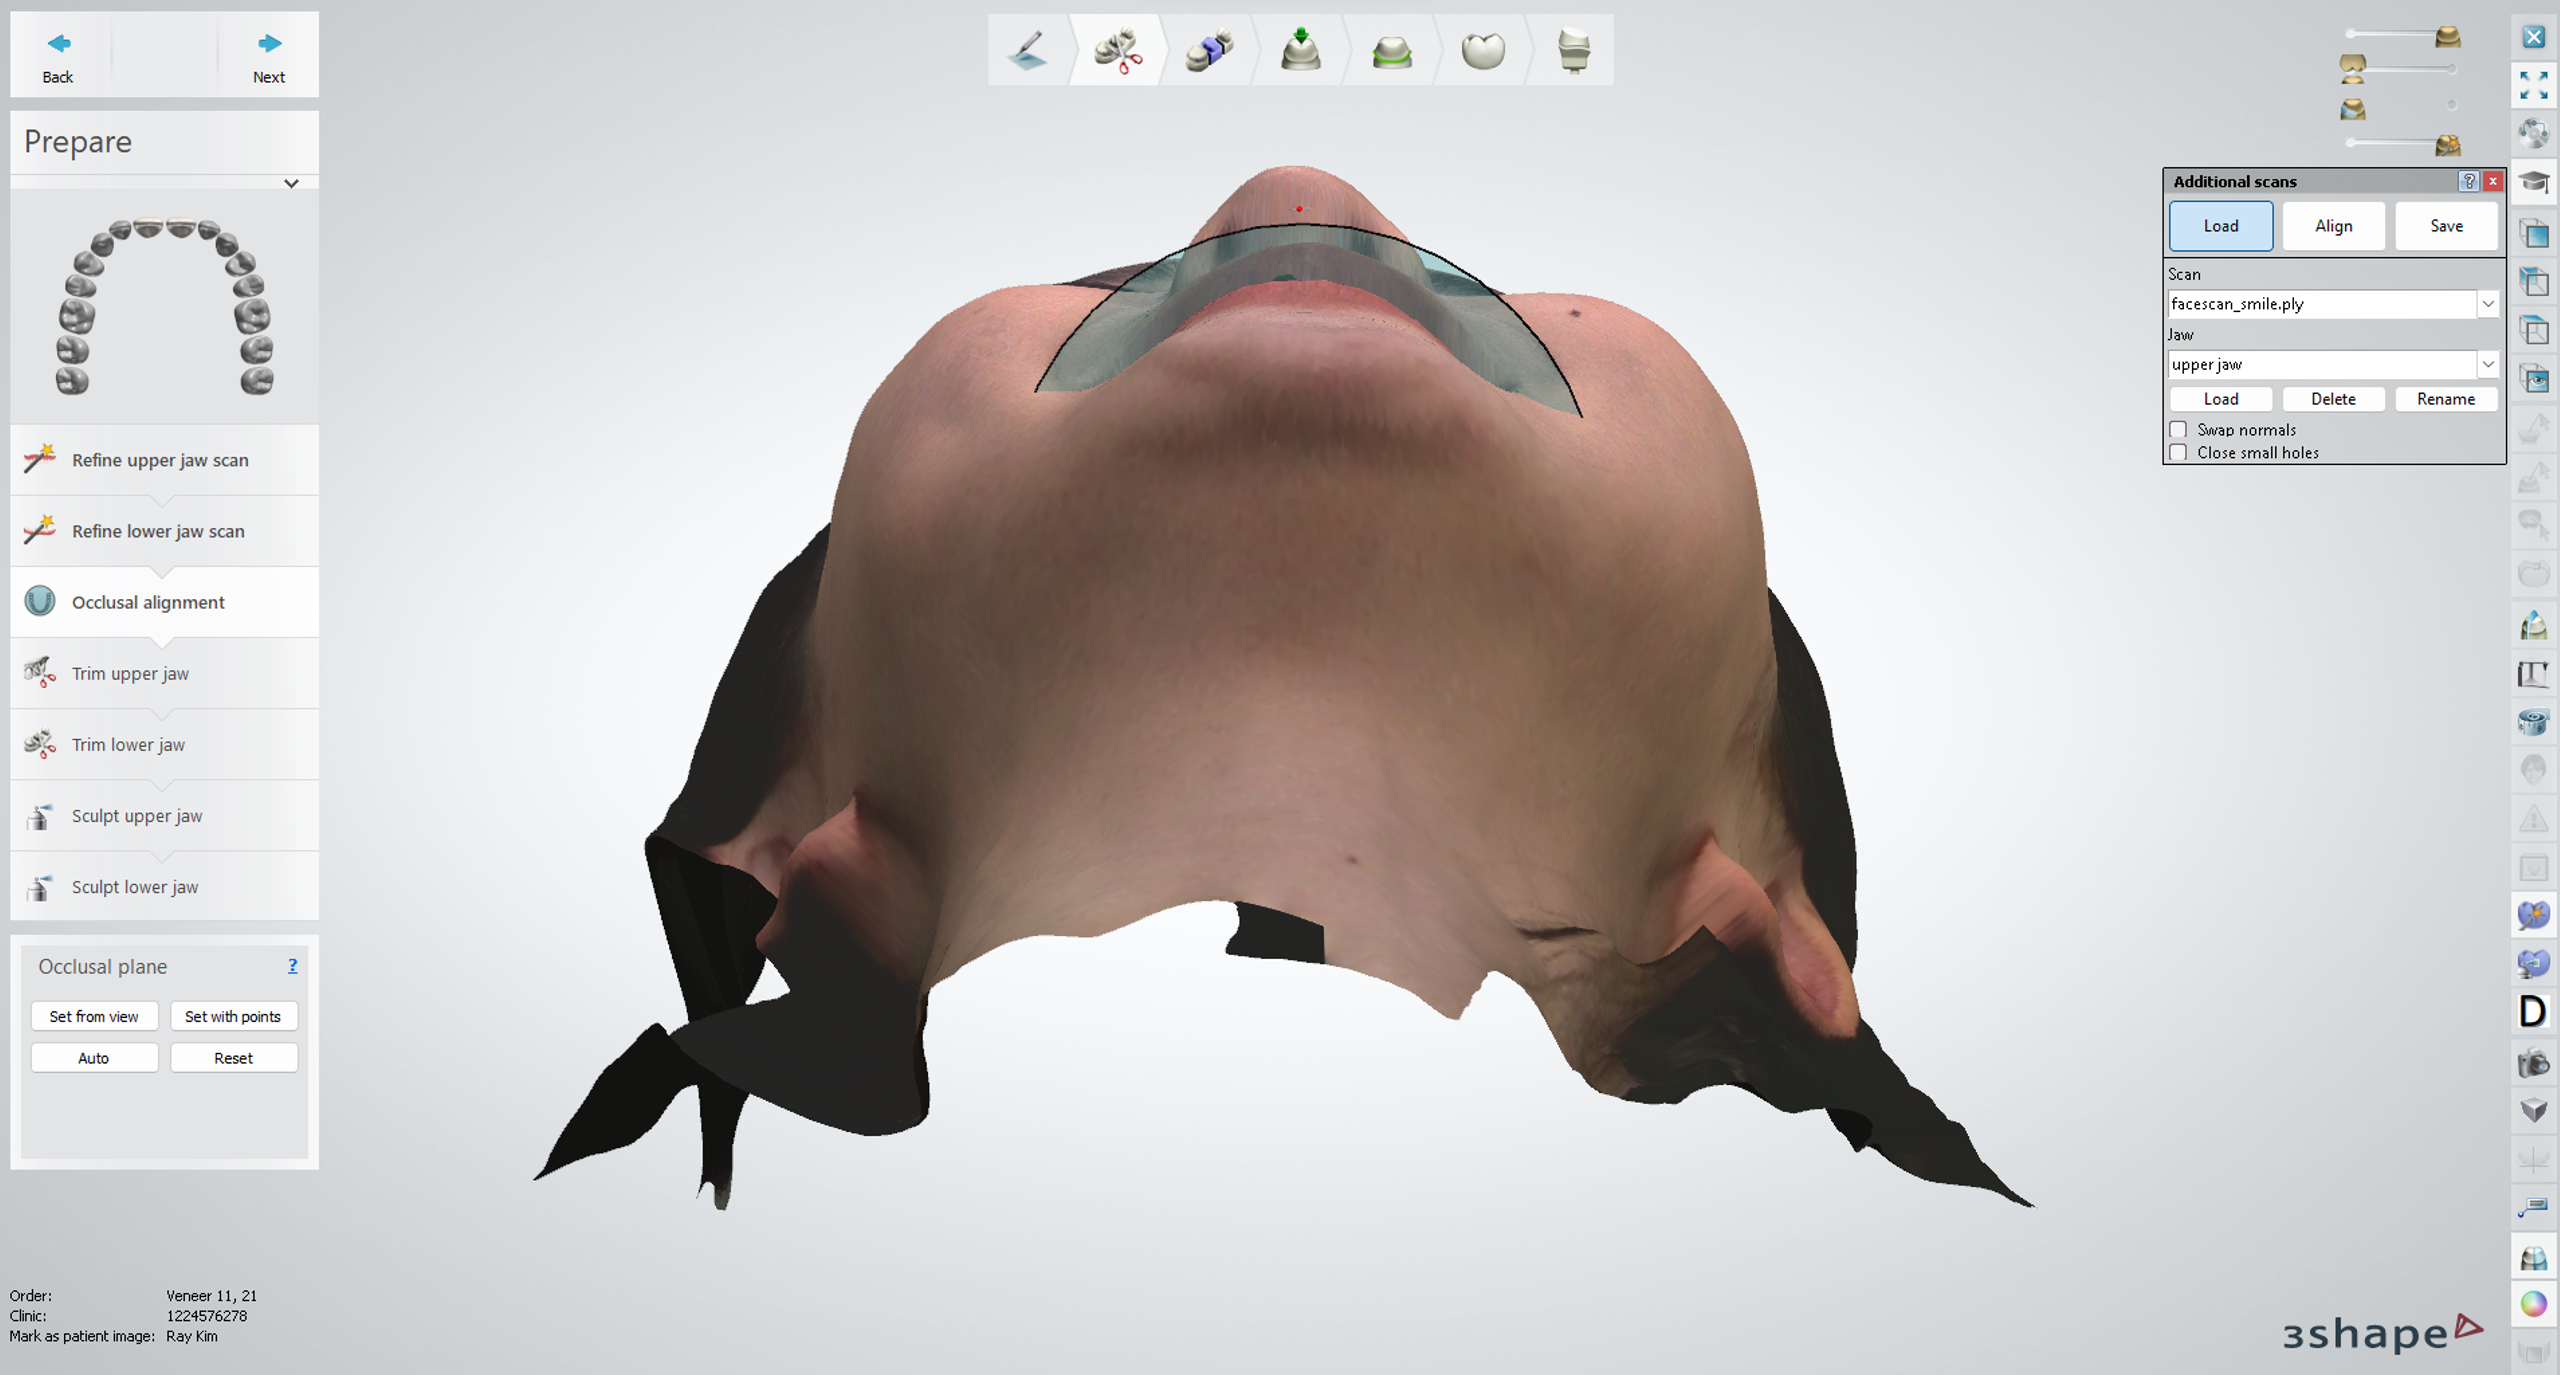
- Proceed with the design by referring to the imported Face scan data.
Contact 3Shape Support if you have further questions.
For full information on correct usage, please consult the official Safety and Setup Guide and the most current Manual