How to install and use Reveal DDX App
07/11/2023Version Requirements for Reveal DDX App:
Reveal DDX App:
- Version 1.0.0 and higher
- Version 2.0.0. and higher
Unite:
- Version 1.7.33.1 with product version 21.1
- Version 1.8.3.0 with product version 24.1 and higher
Supported Countries for Reveal DDX App
- American Samoa
- Anguilla
- Bermuda
- British Indian Ocean Territory
- Canada
- Cayman Islands
- Denmark
- Falkland Islands (Malvinas)
- France
- French Guiana
- French Polynesia
- French Southern Territories
- Gibraltar
- Guadeloupe
- Guam
- Guernsey
- Isle of Man
- Jersey
- Martinique
- Mayotte
- Montserrat
- New Caledonia
- Northern Mariana Islands
- Pitcairn
- Puerto Rico
- Réunion
- Saint Barthélemy
- Saint Helena, Ascension and Tristan da Cunha
- Saint Martin (French part)
- Saint Pierre and Miquelon
- South Georgia and the South Sandwich Islands
- Turks and Caicos Islands
- United Kingdom of Great Britain and Northern Ireland
- United States of America
- United States Minor Outlying Islands
- Virgin Islands (British)
- Virgin Islands (U.S.)
- Wallis and Futuna
Upgrade Unite to get Reveal DDX integration
- You will receive notification with the available upgrade for you.
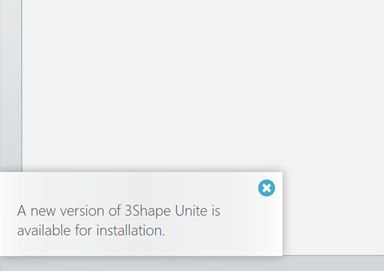
- Click on pop-up message and you will be redirected to Unite Store.
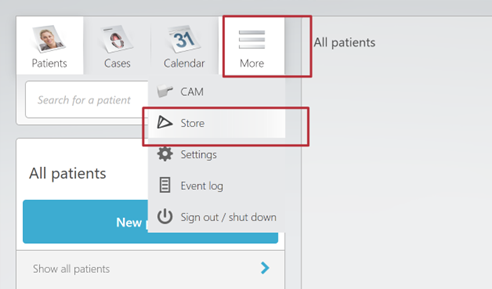
- If you didn’t receive notification, go to “More” > “Store”.
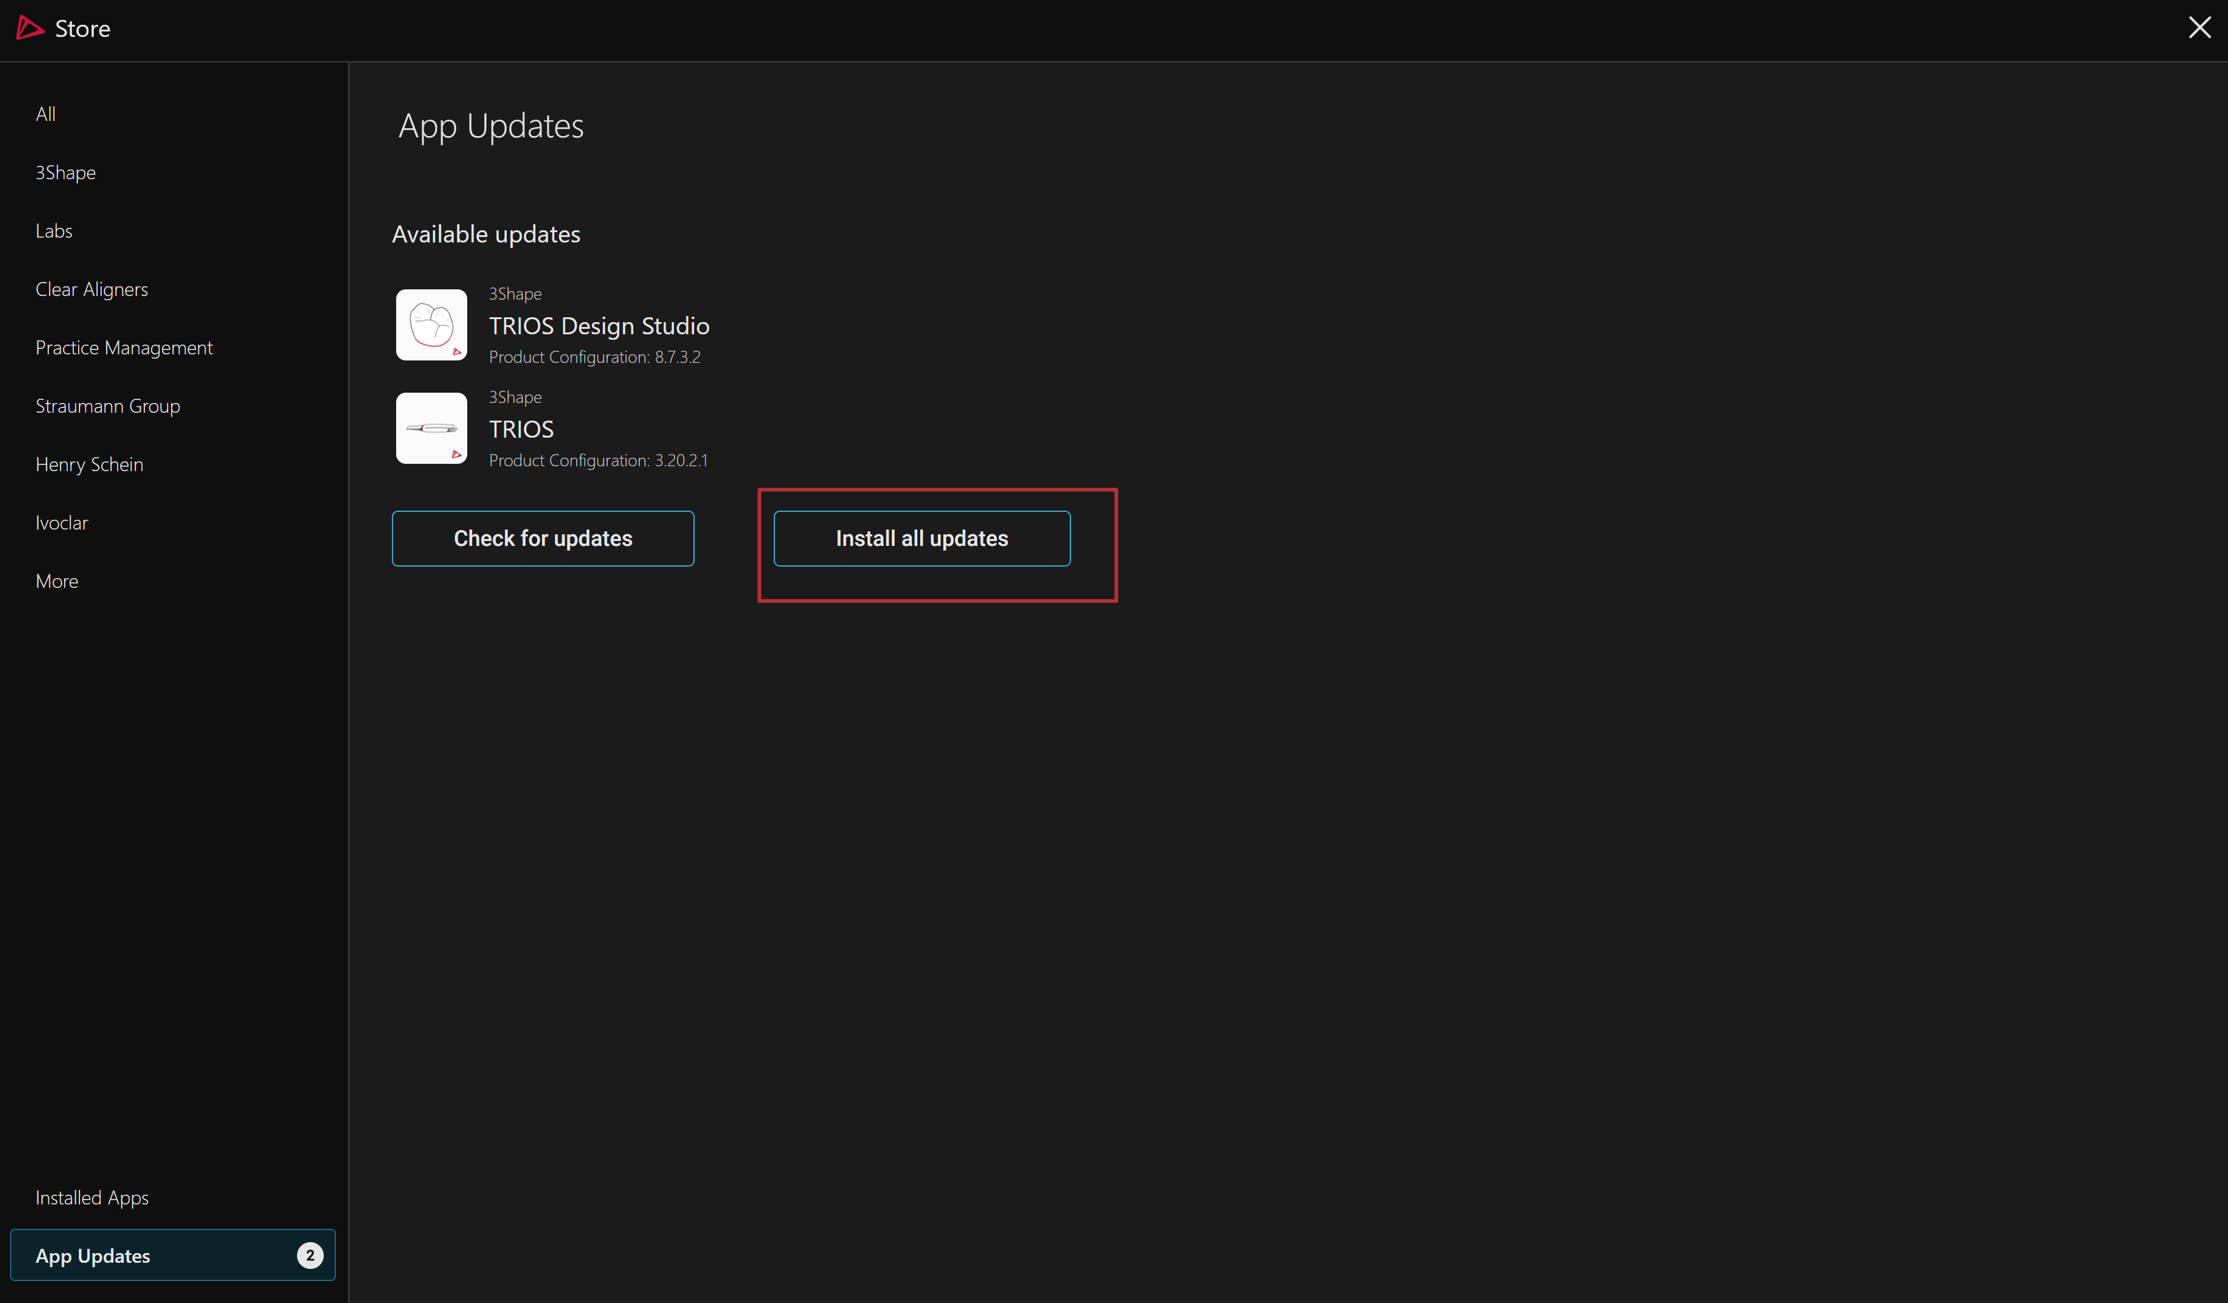
- Open App Updates tab and click “Install all updates”. Wait until the installation is finished.
- Unite will restart automatically.
How to check that Reveal DDX App is installed
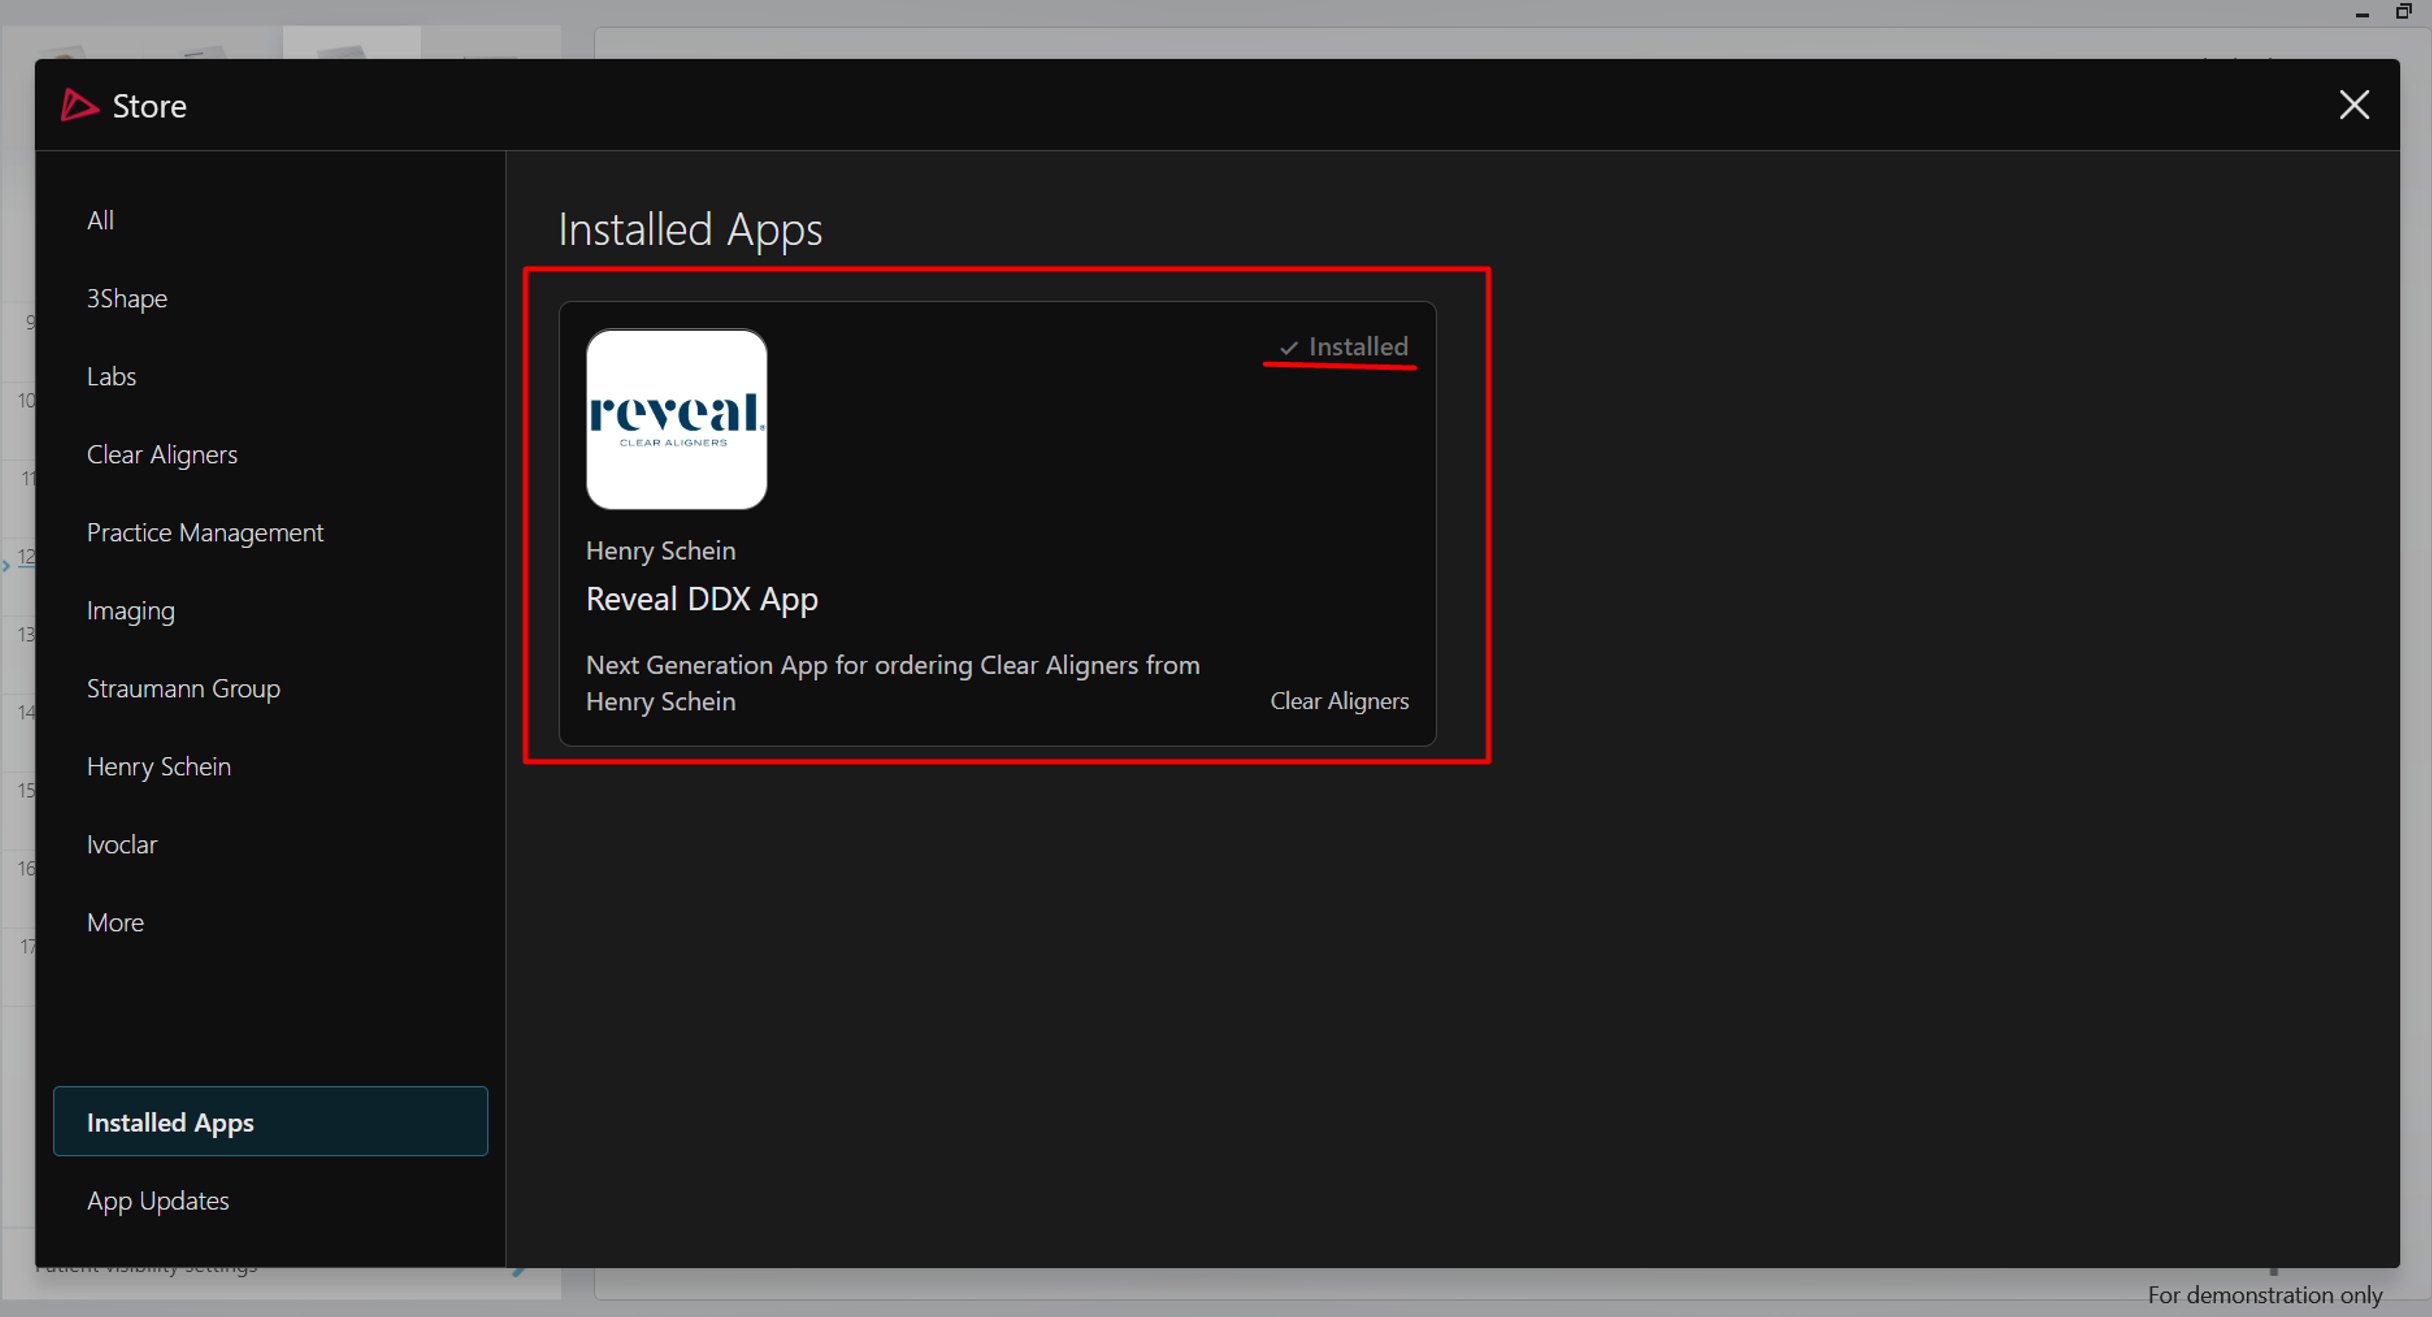
- Go to “More” > “Store” and select “Installed Apps” from bottom menu on left screen.
- The Reveal DDX App should be listed as installed.
Create a case using the Reveal DDX App
- Go to the “Patients” tab in 3Shape Unite.
- Create a new patient or select an existing patient.
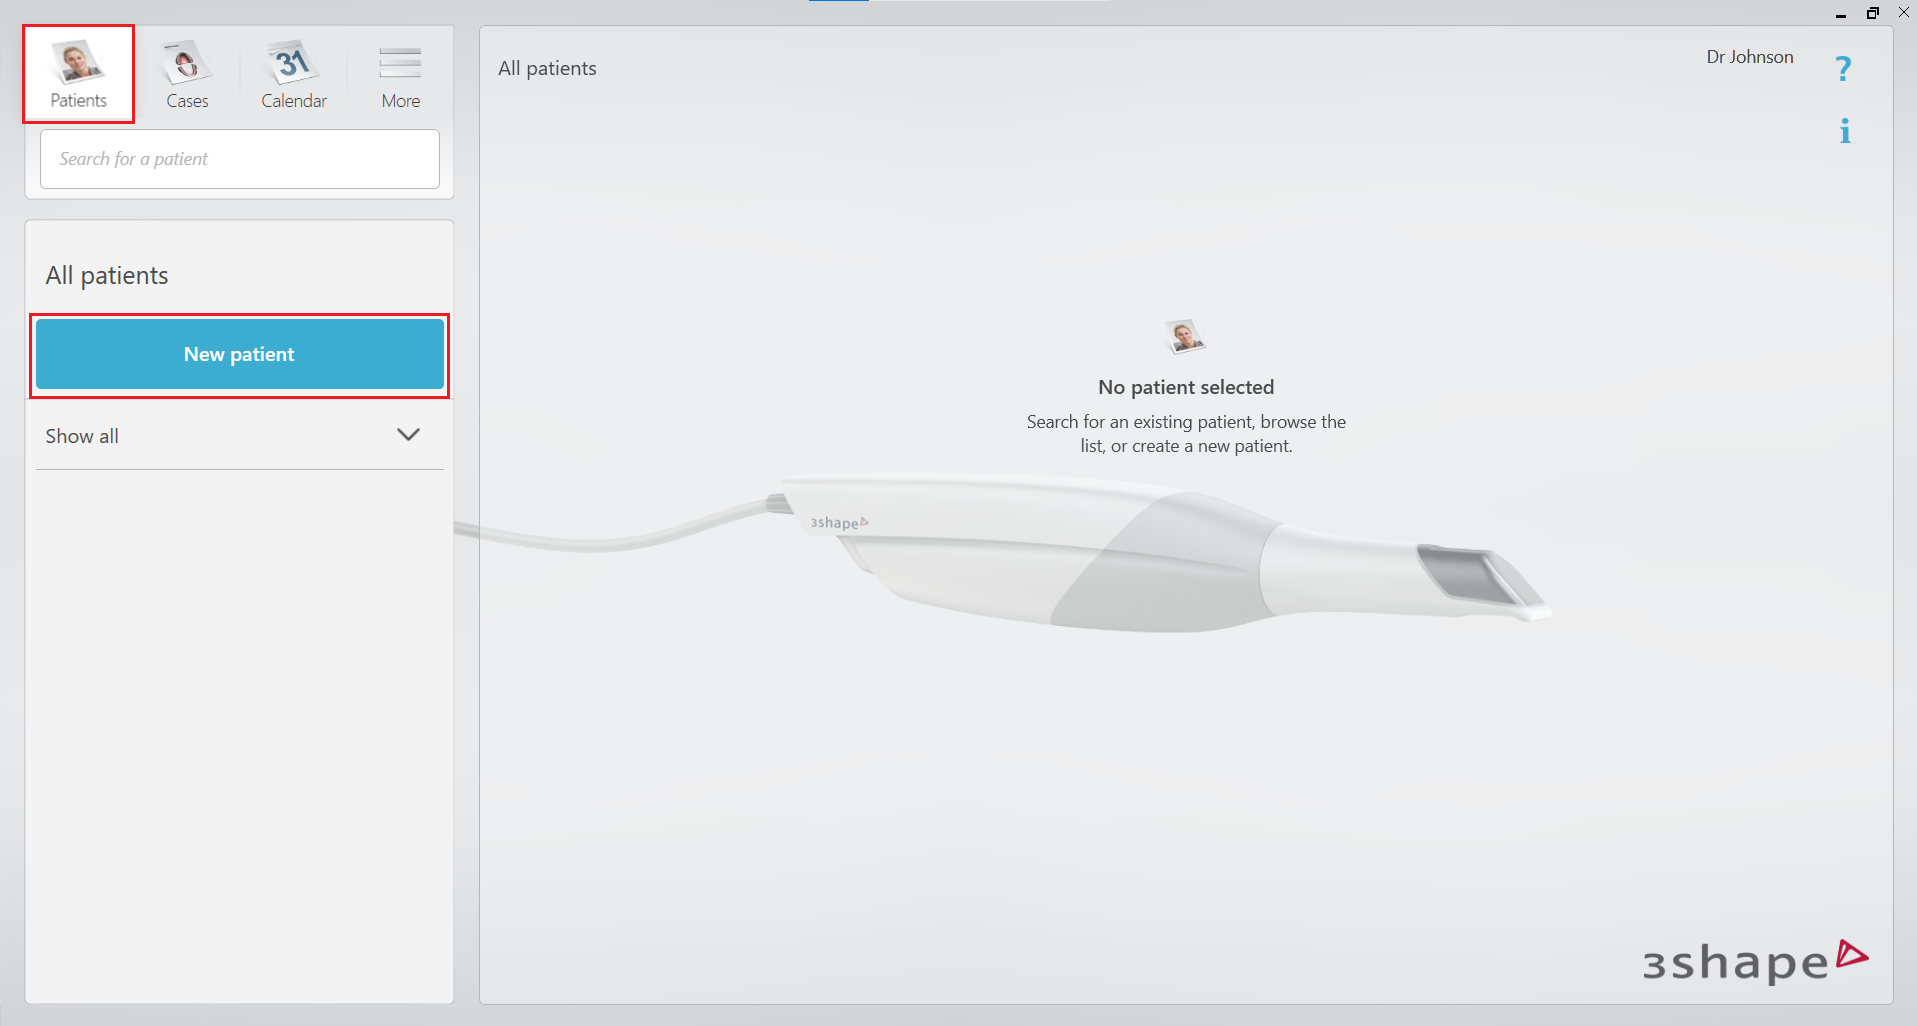
- Once the patient is created, a new window will pop up.
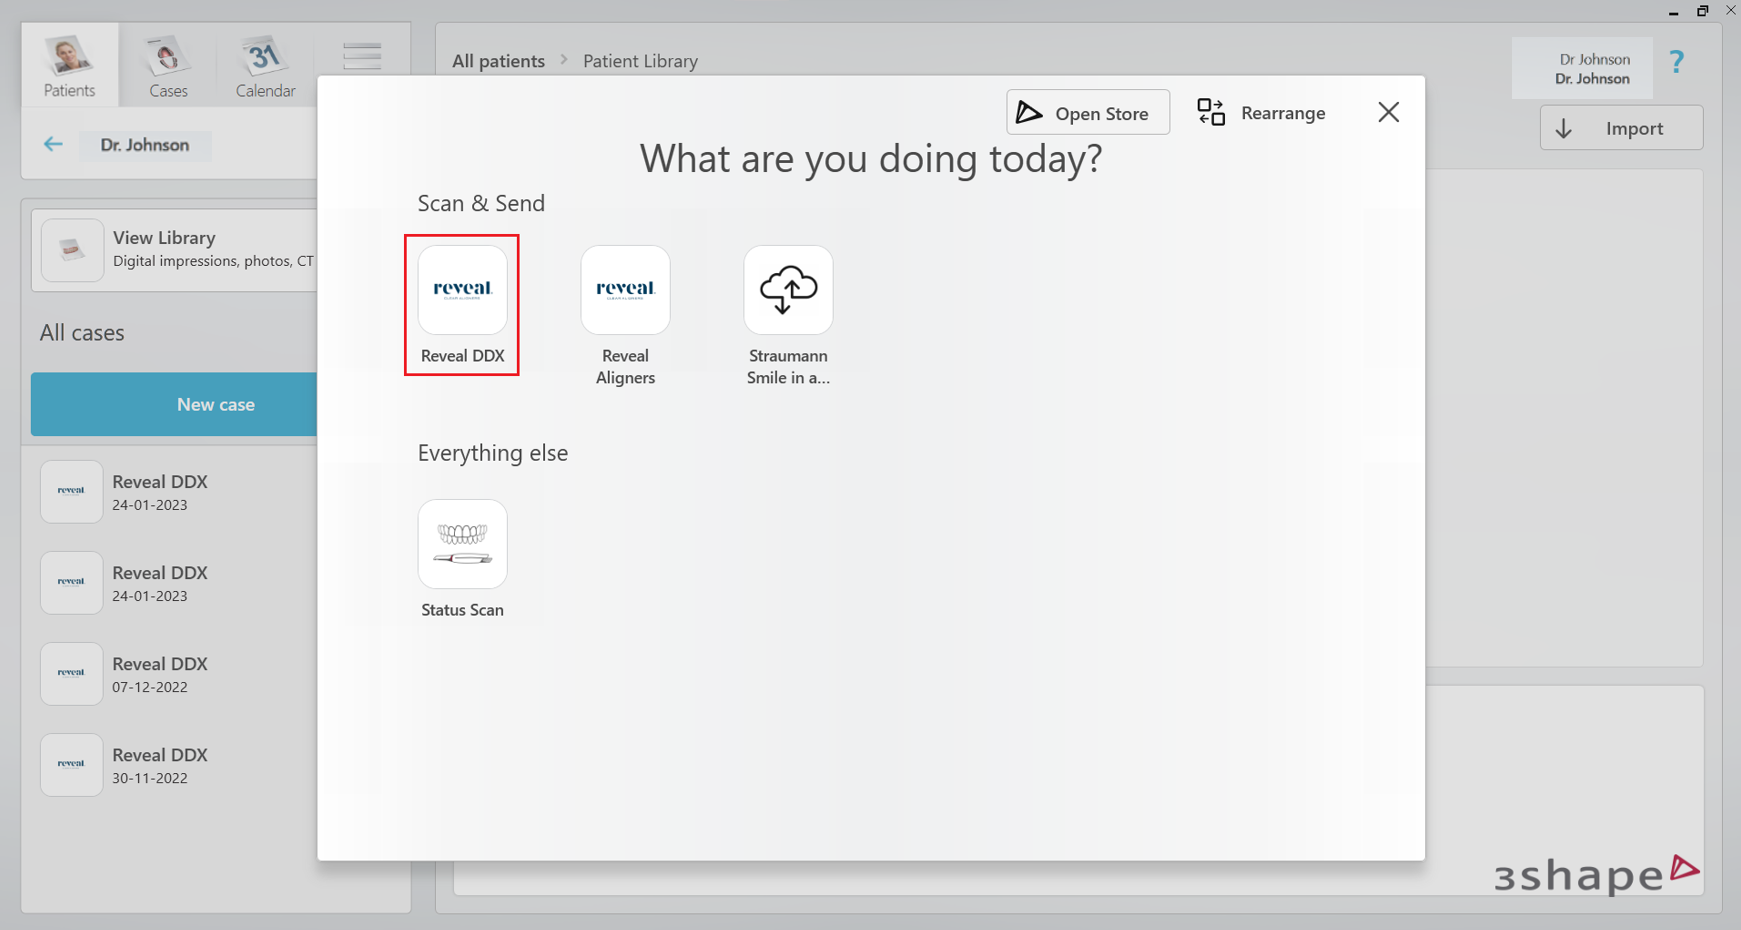
- Under the Scan & Send menu, select Reveal DDX workflow.
- After selecting the Reveal DDX Action in Scan & Send workflow, proceed with the TRIOS scanning.
OR: If no Trios scanner is attached, then you can import scans by leaving the TRIOS scanning. Go back to the Case Management page by clicking on the “Home” button.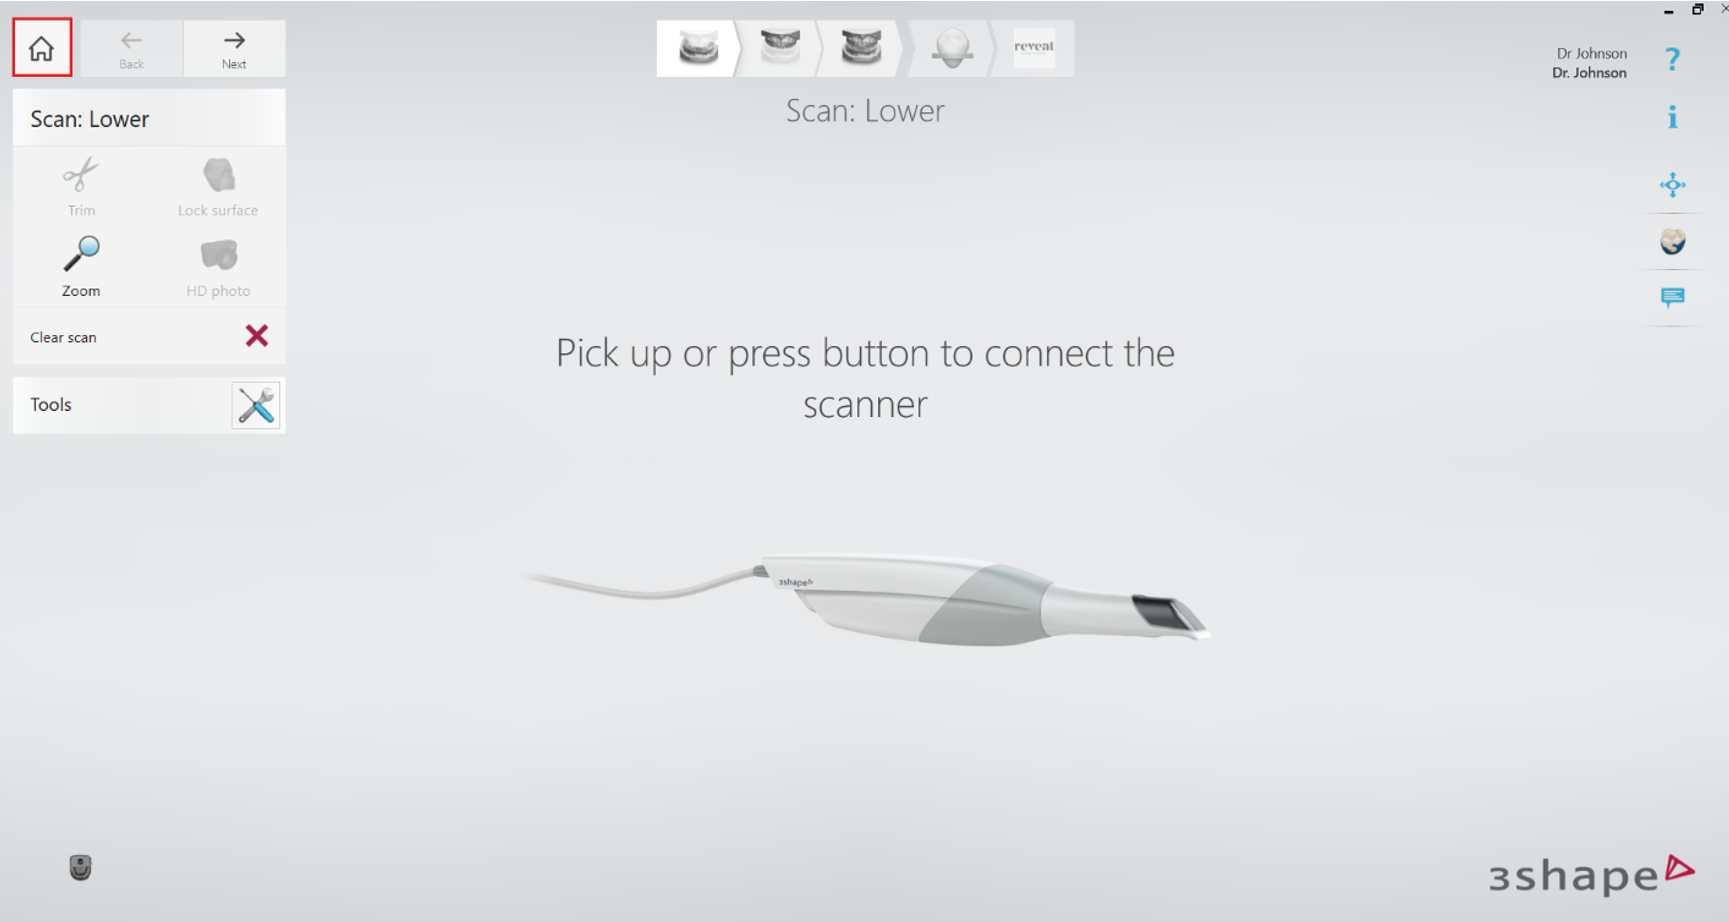
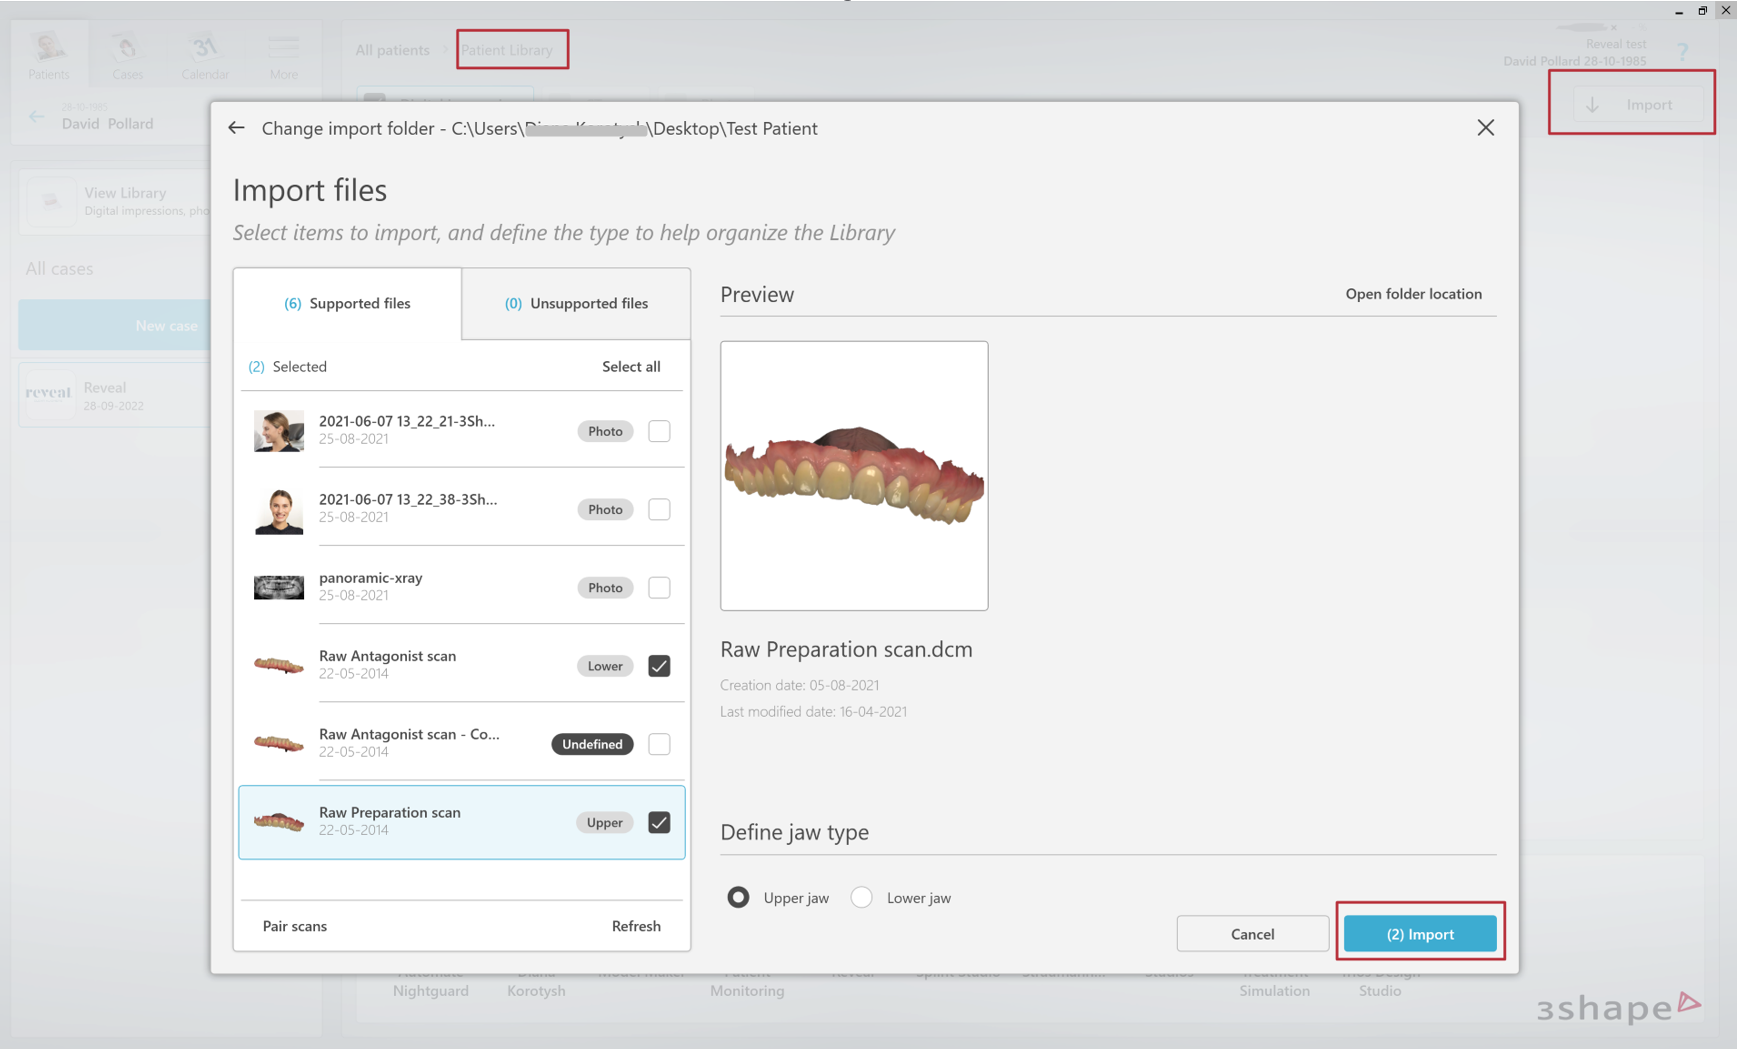
How to import scans in Patient Library
- Go to Patient Library and click “Import” button.
- Select the folder on your PC where the files are located.
- In new window, select Scans > define jaws (Upper/Lower) and click Import button.
OR alternatively, you can start the workflow by selecting imported scans in Patient Library and click on the Reveal DDX icon.
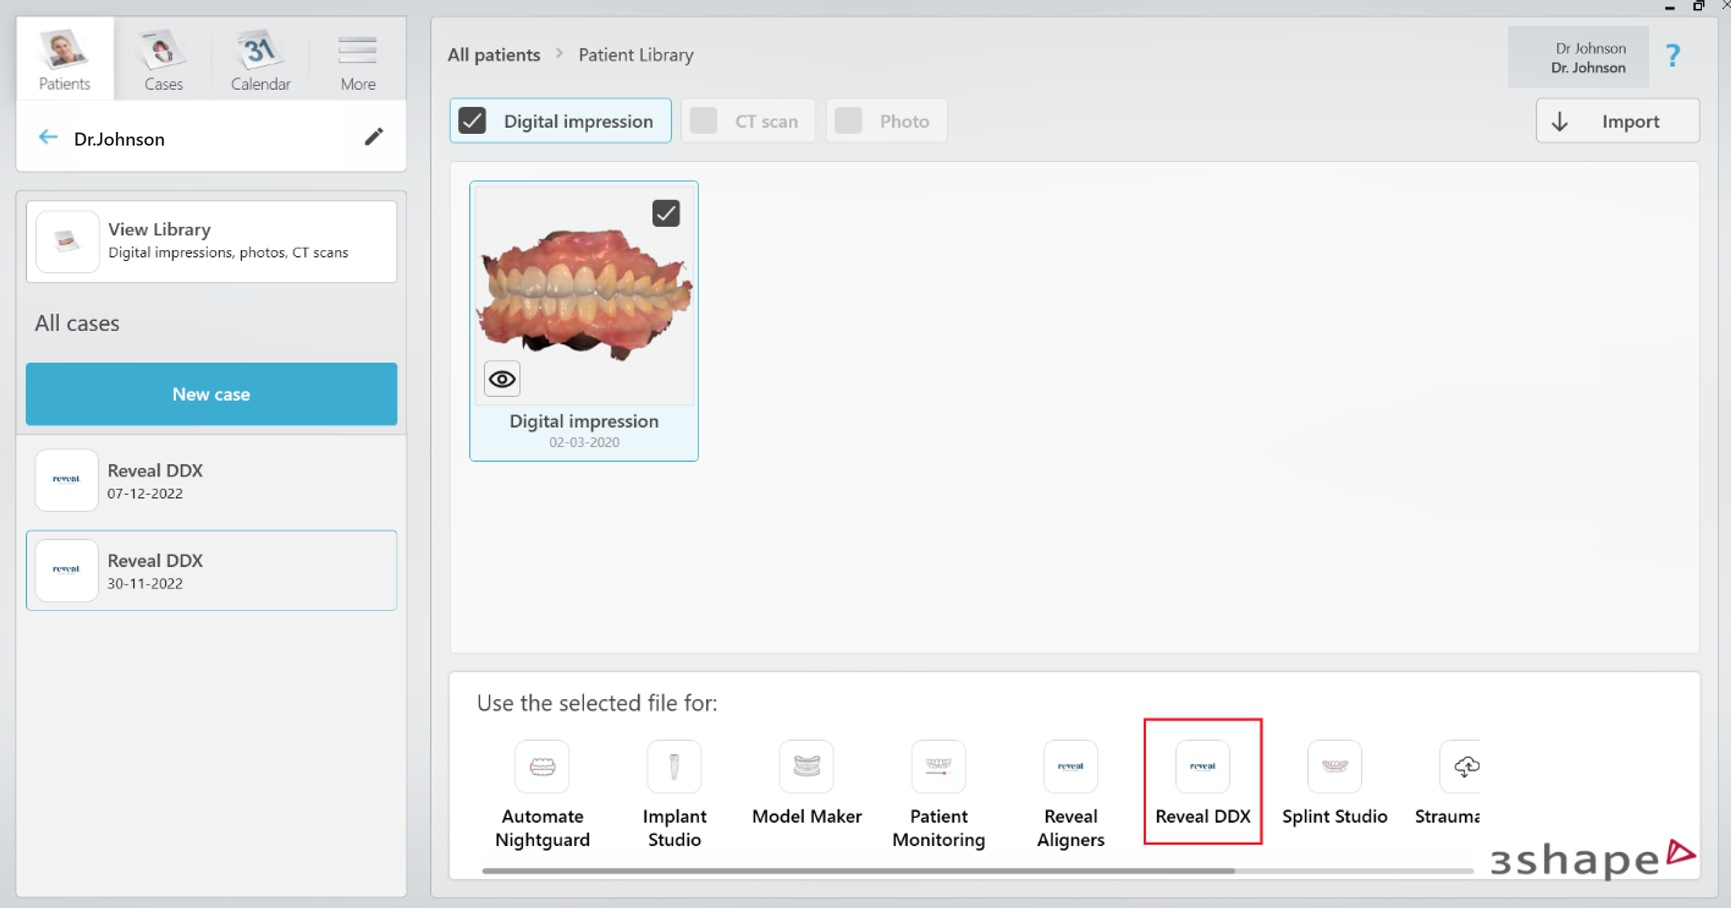
Reveal DDX app should be selected to proceed with the workflow. This should not be confused with Reveal Aligner that is an existing Communicate-based integration.
Starting Reveal DDX workflow
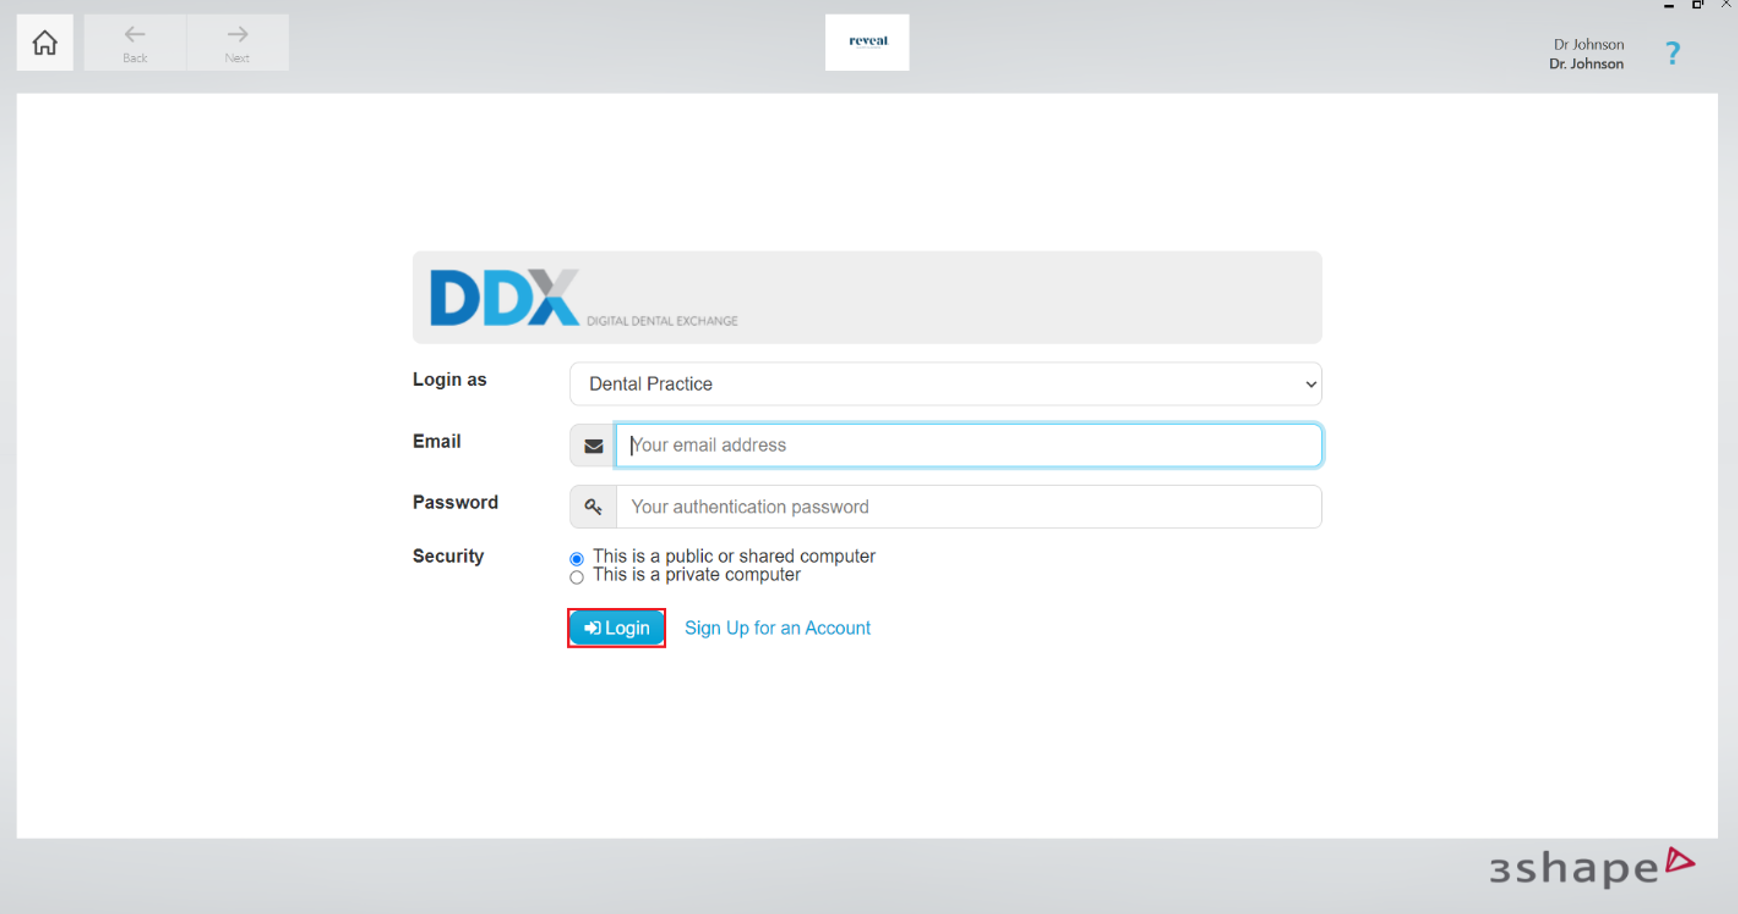
- After choosing the Reveal DDX integration workflow, the integration case will be opened at the login page for Reveal DDX web portal.
- Enter your account credentials and click “Login”.
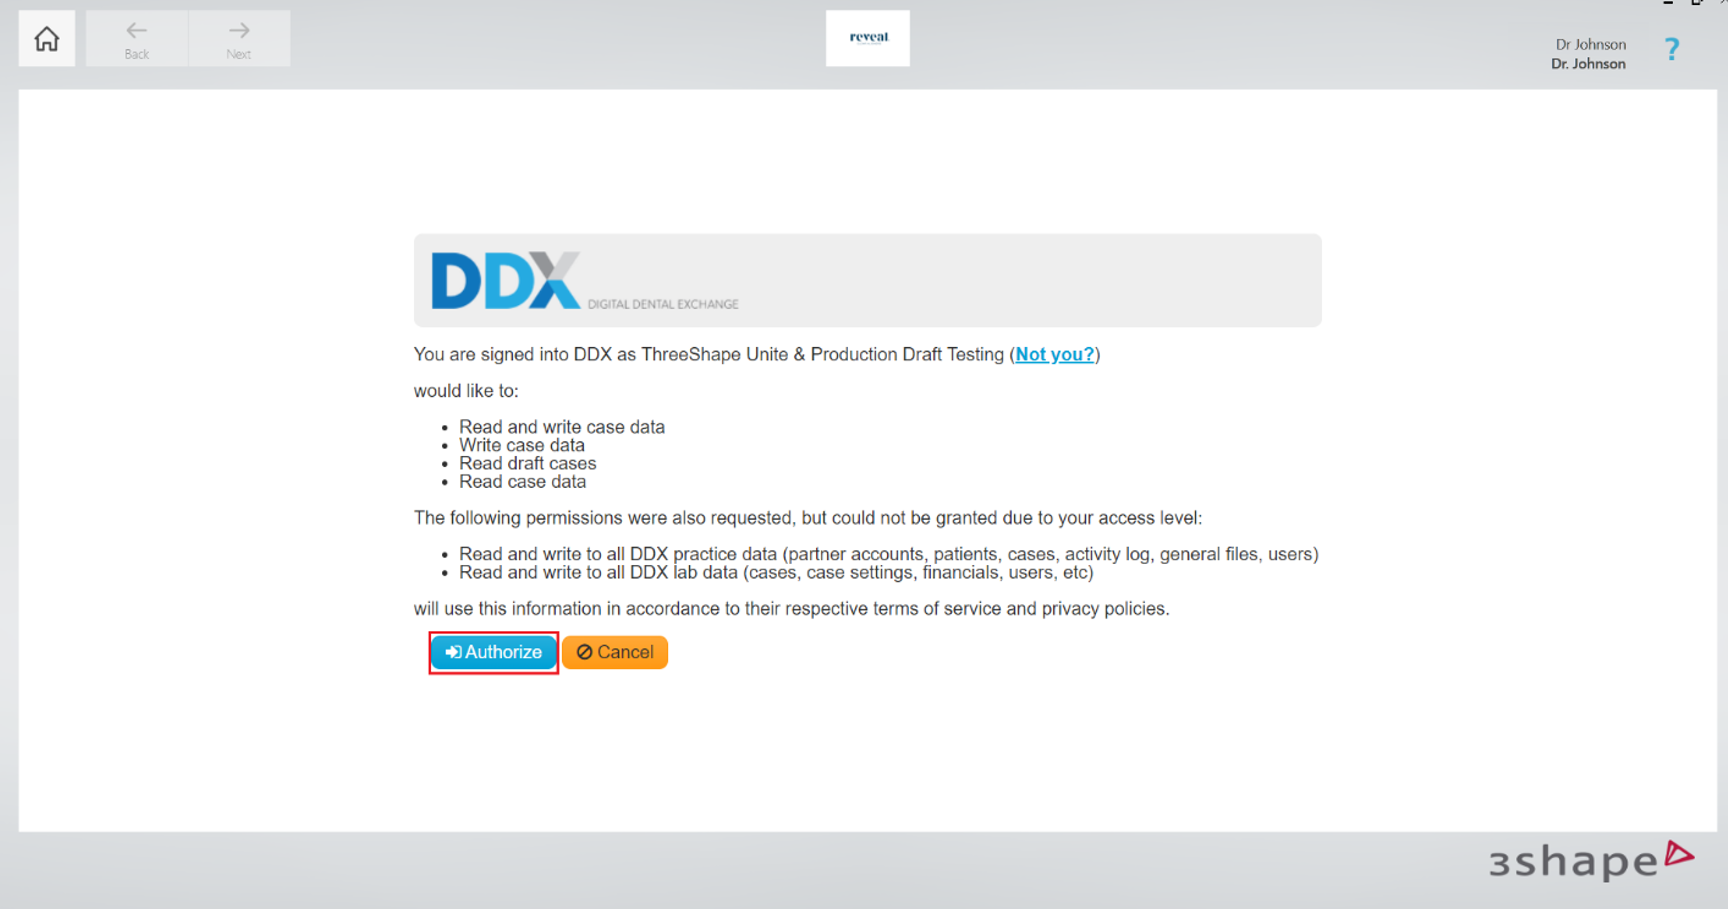
- Click “Authorize” button to continue.
- Wait while your Reveal DDX workflow is preparing.

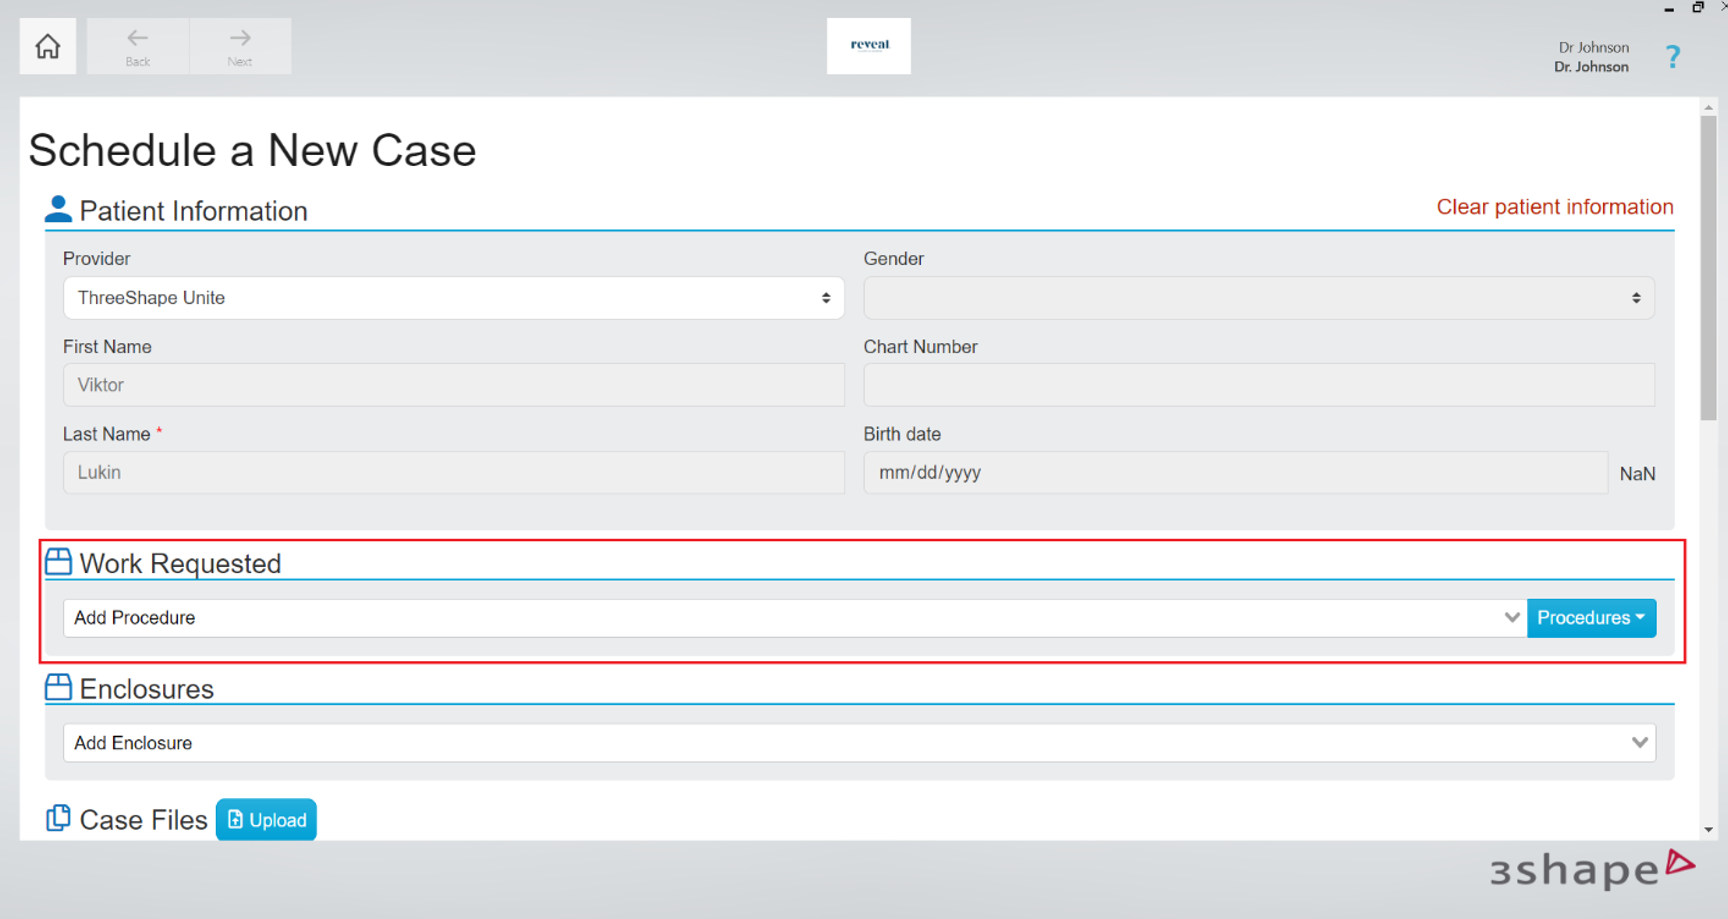
- Fill in case details, choose procedure in the “Work Requested” section.
Scans and Patient information is already transferred.
- Scroll down, enter notes if necessary.
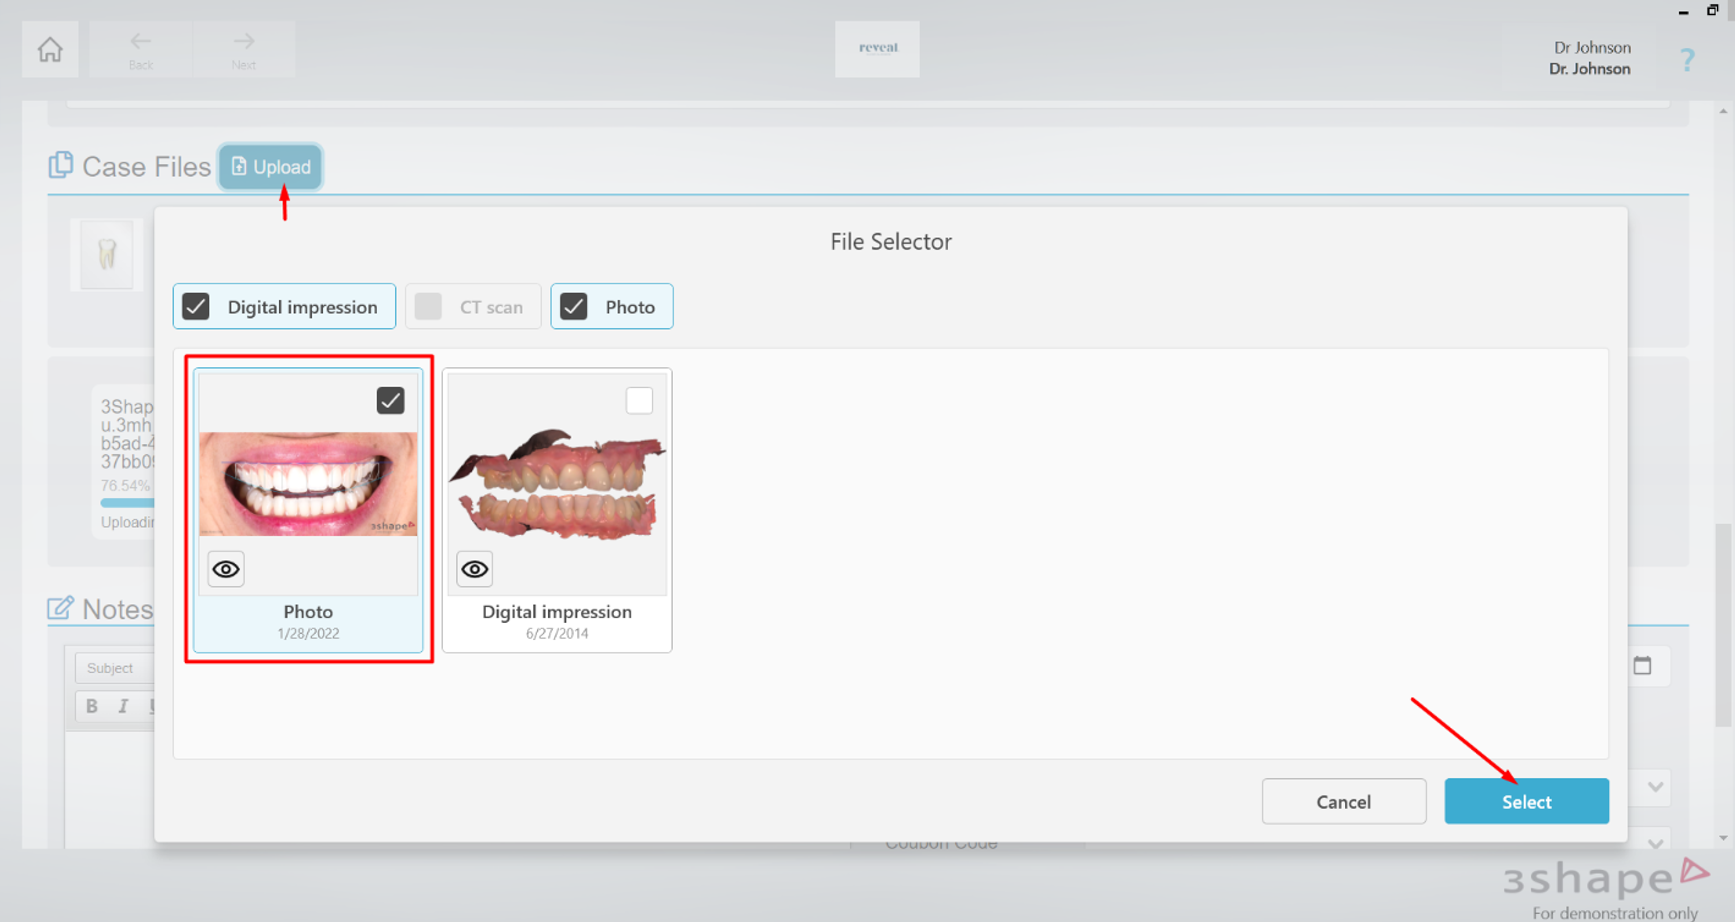
- Additional photos can be added, if necessary, by clicking on “Upload” button

- The following dialogue will appear where the user can select images from Unite Patient Library.
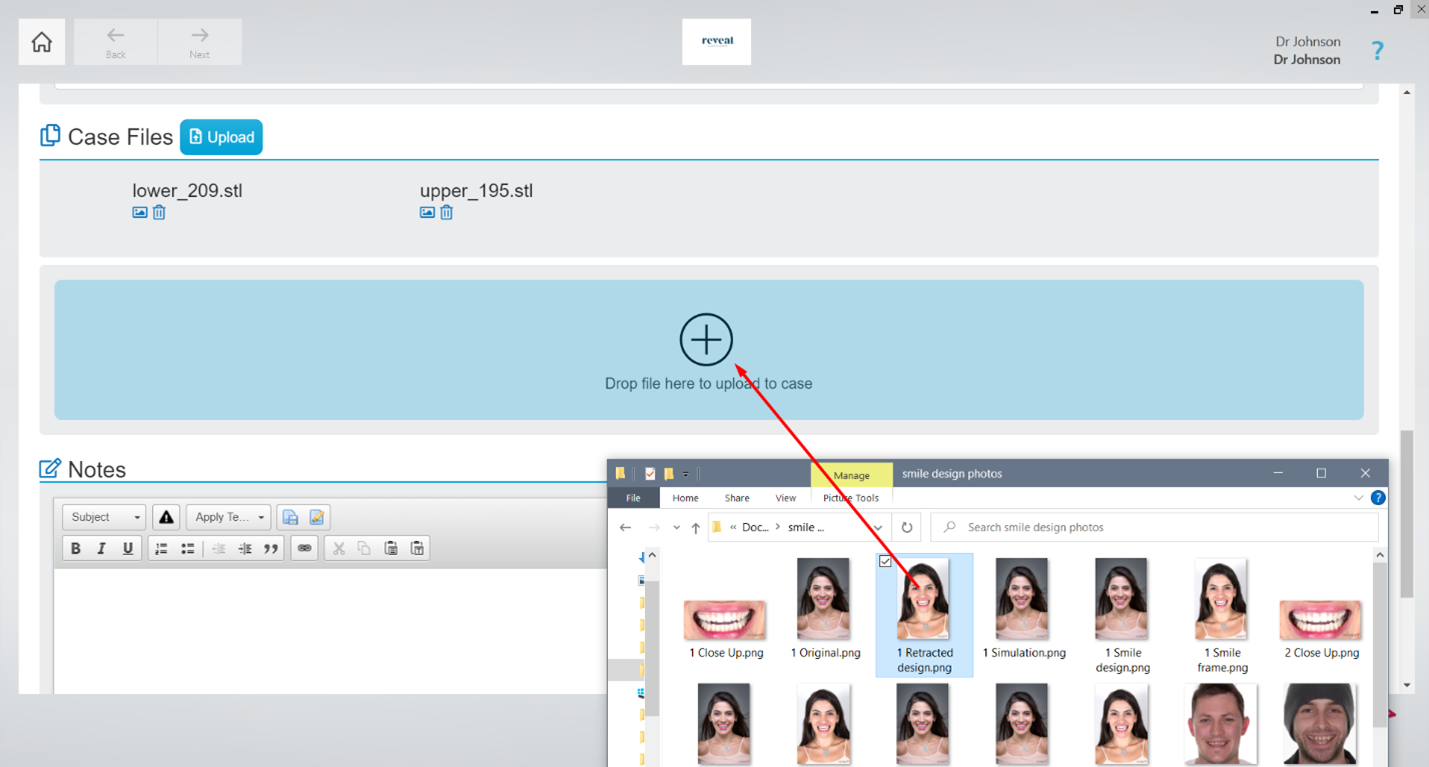
 OR ‘Drag and Drop’ functionality can be used:
 For drag and drop Unite should not be run with elevated privileges (i.e., administrator mode).
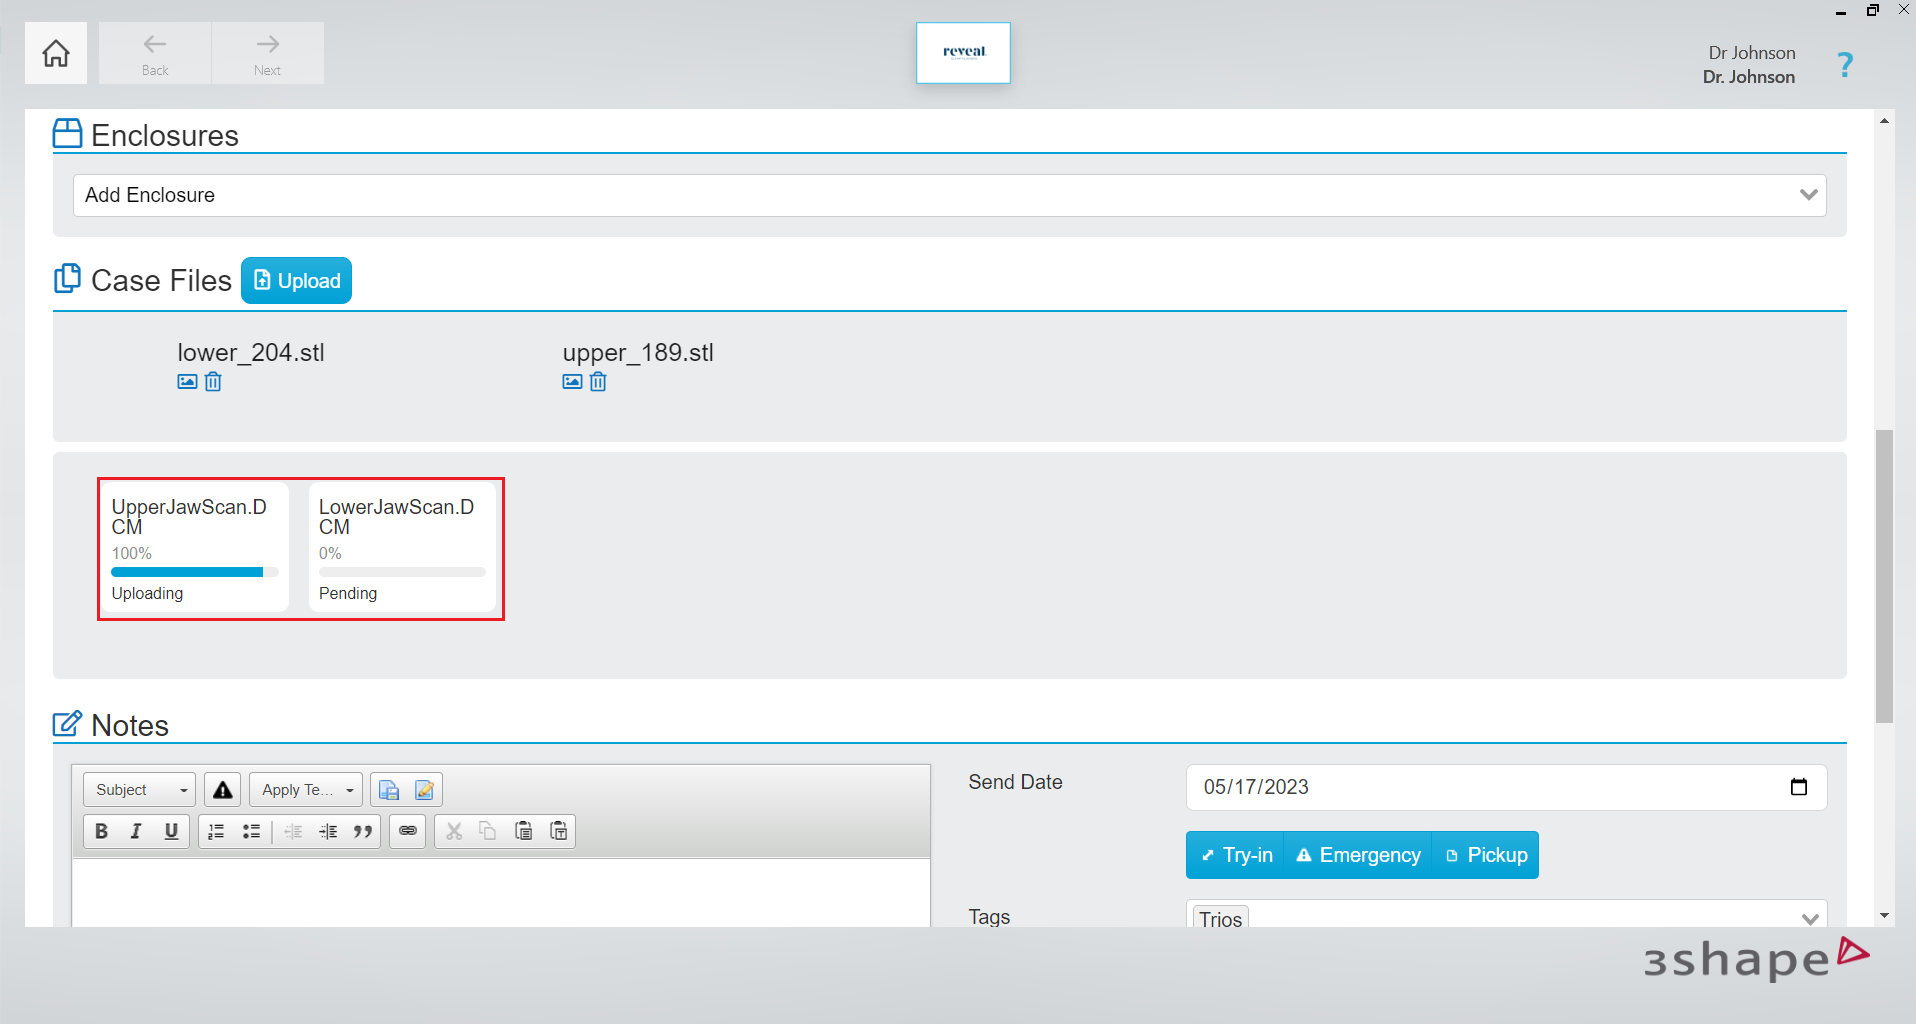
- After images are added, they will appear in Case Files section.
- Before submitting a case, it may be saved as draft.
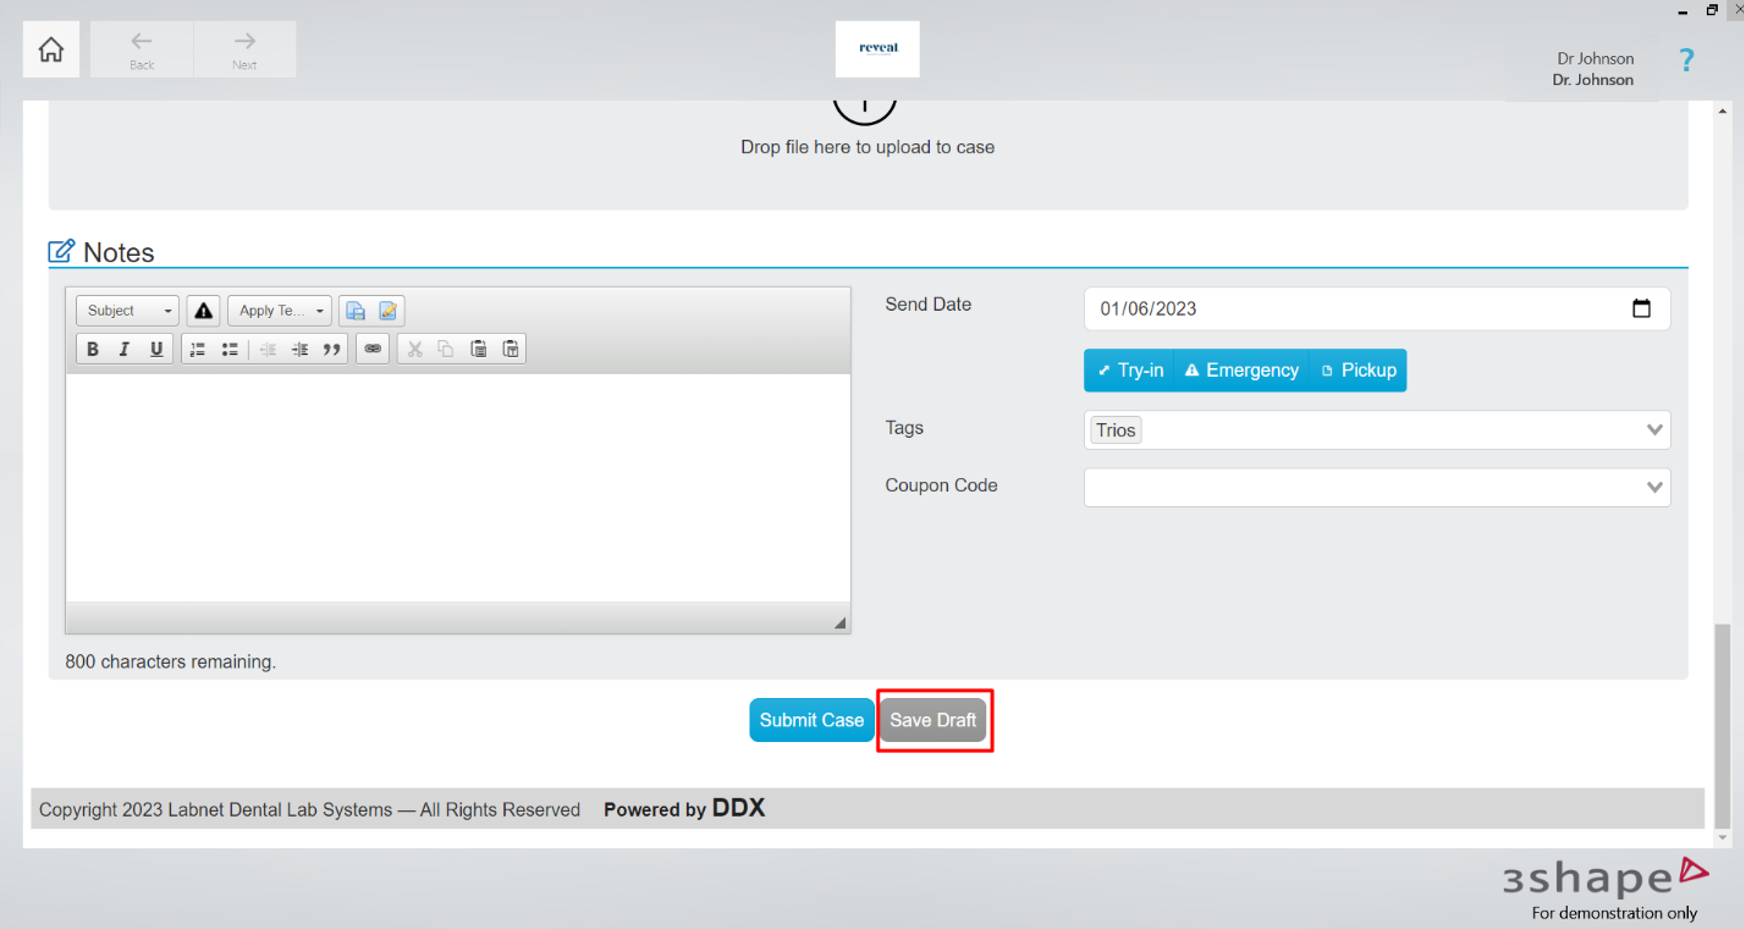
- When the case is Submitted, you will see your case number and case details.
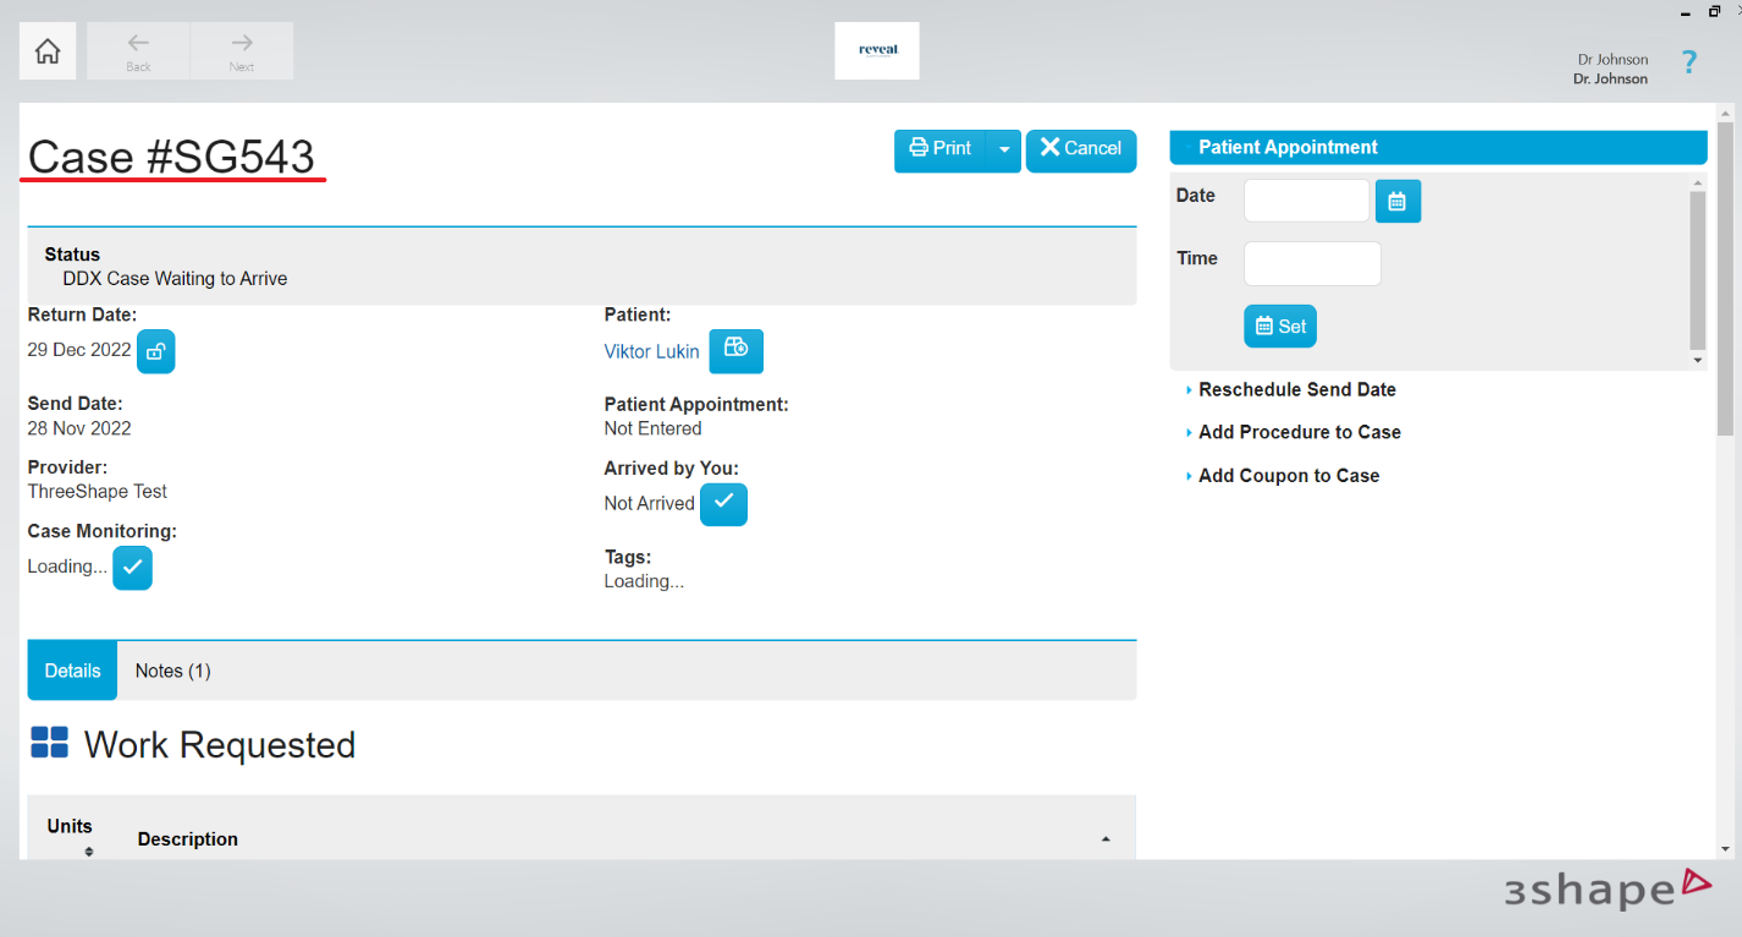
Check your Reveal DDX case status in Unite Case Manager
- Click “Cases” tab in Unite.
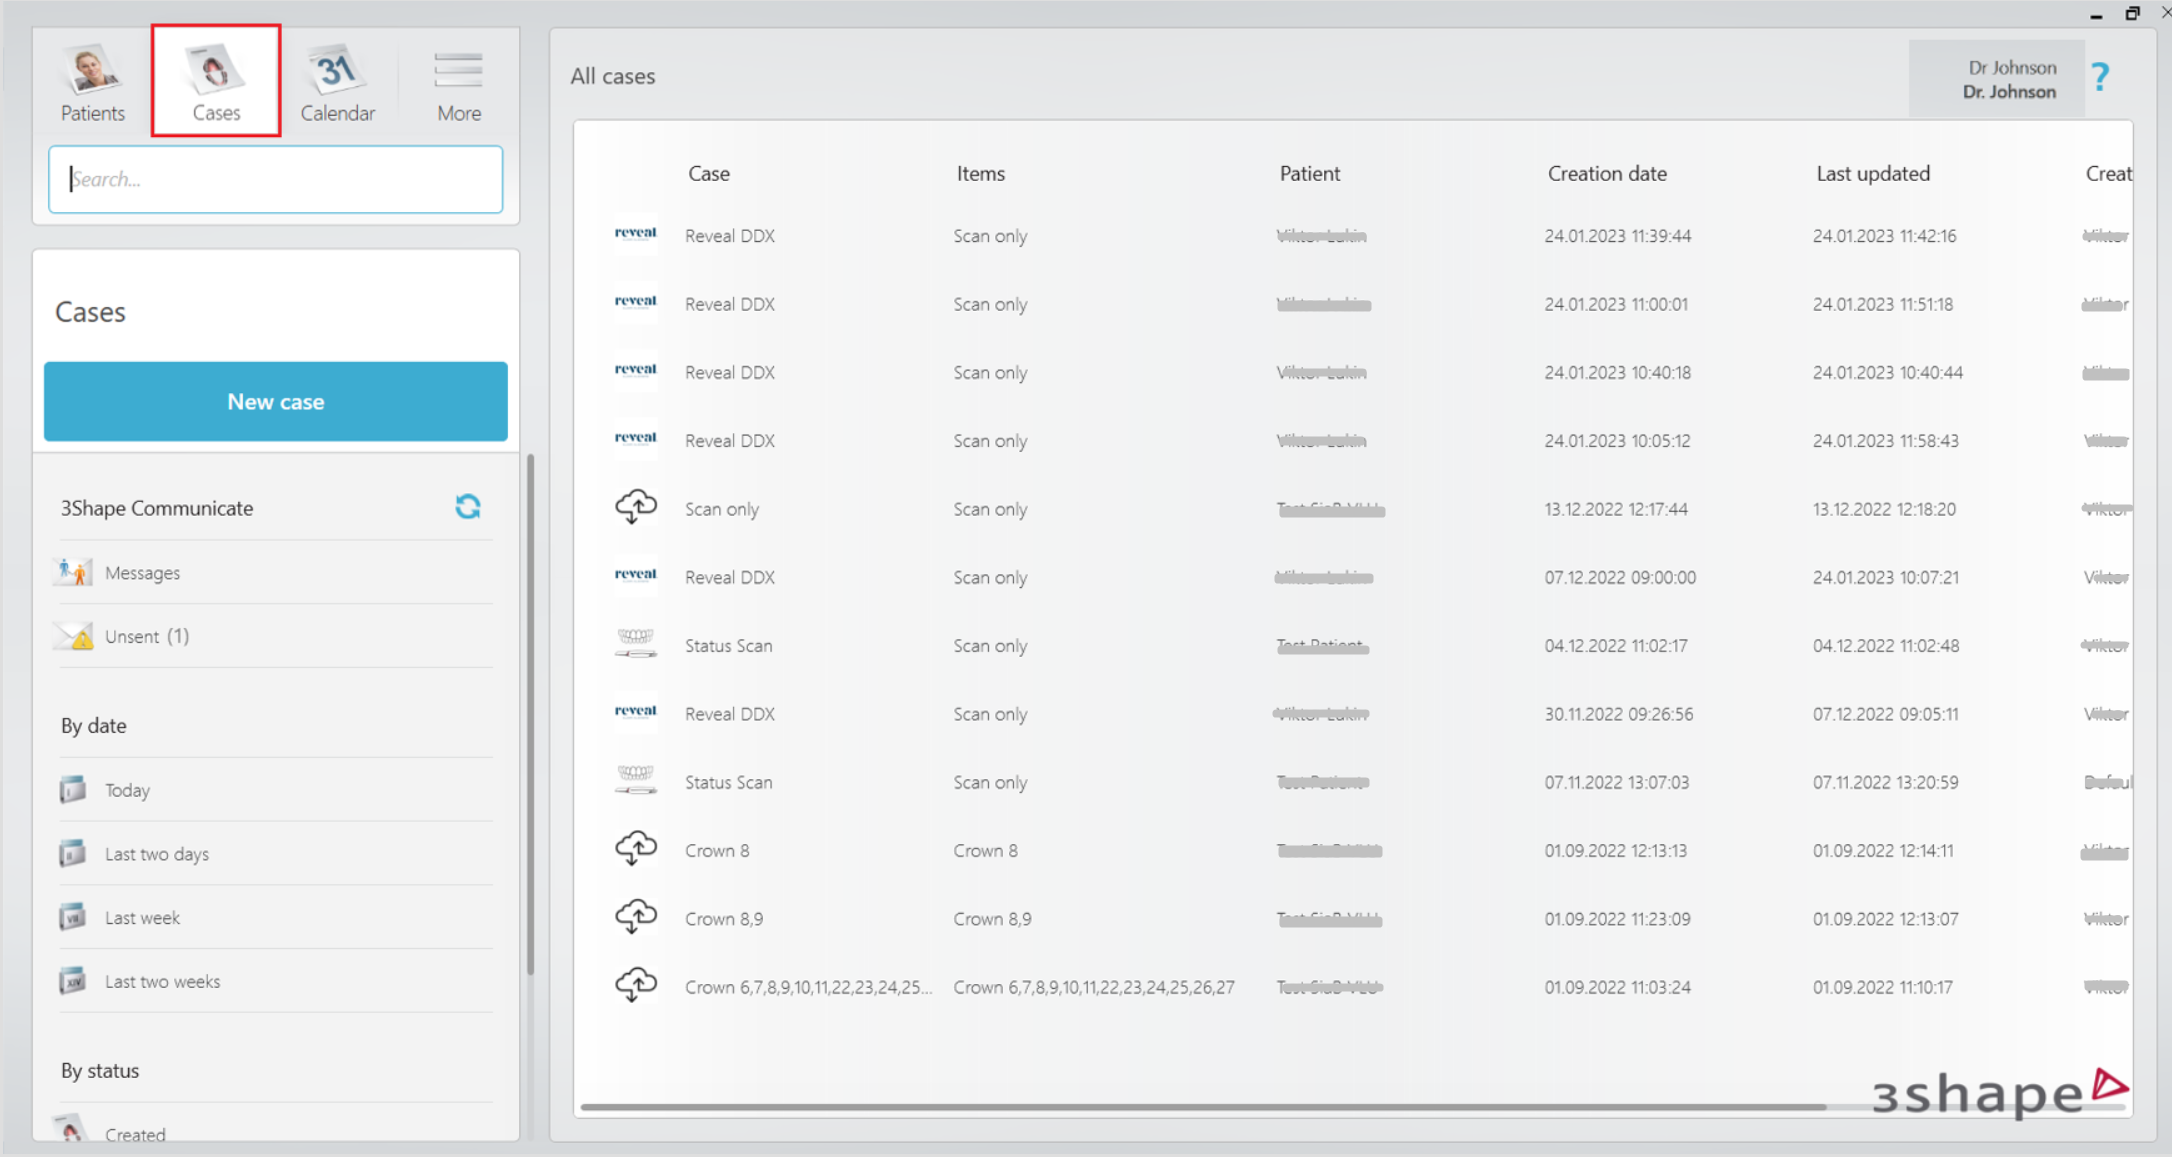
- Select the corresponding case from the list and check the progress bar.
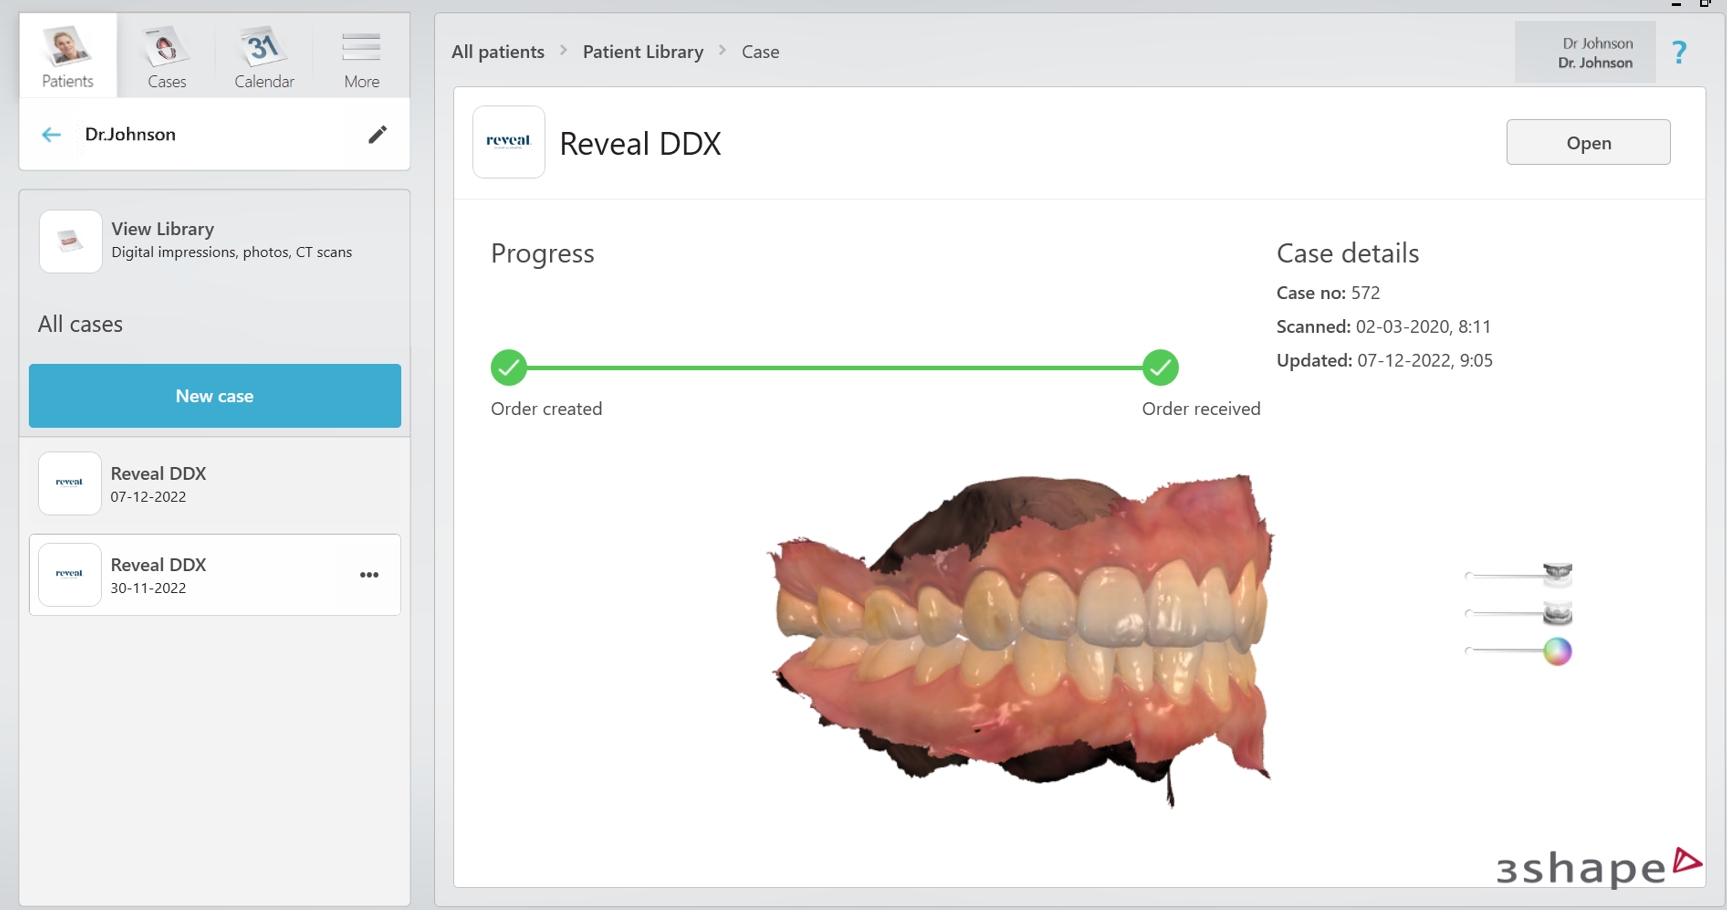
- Or alternatively when re-entering case.
Contact 3Shape Support if you have further questions.
For full information on correct usage please consult the official Safety and Setup Guide and the most current Manual.